What are the top ten ways to simplify your gardening?

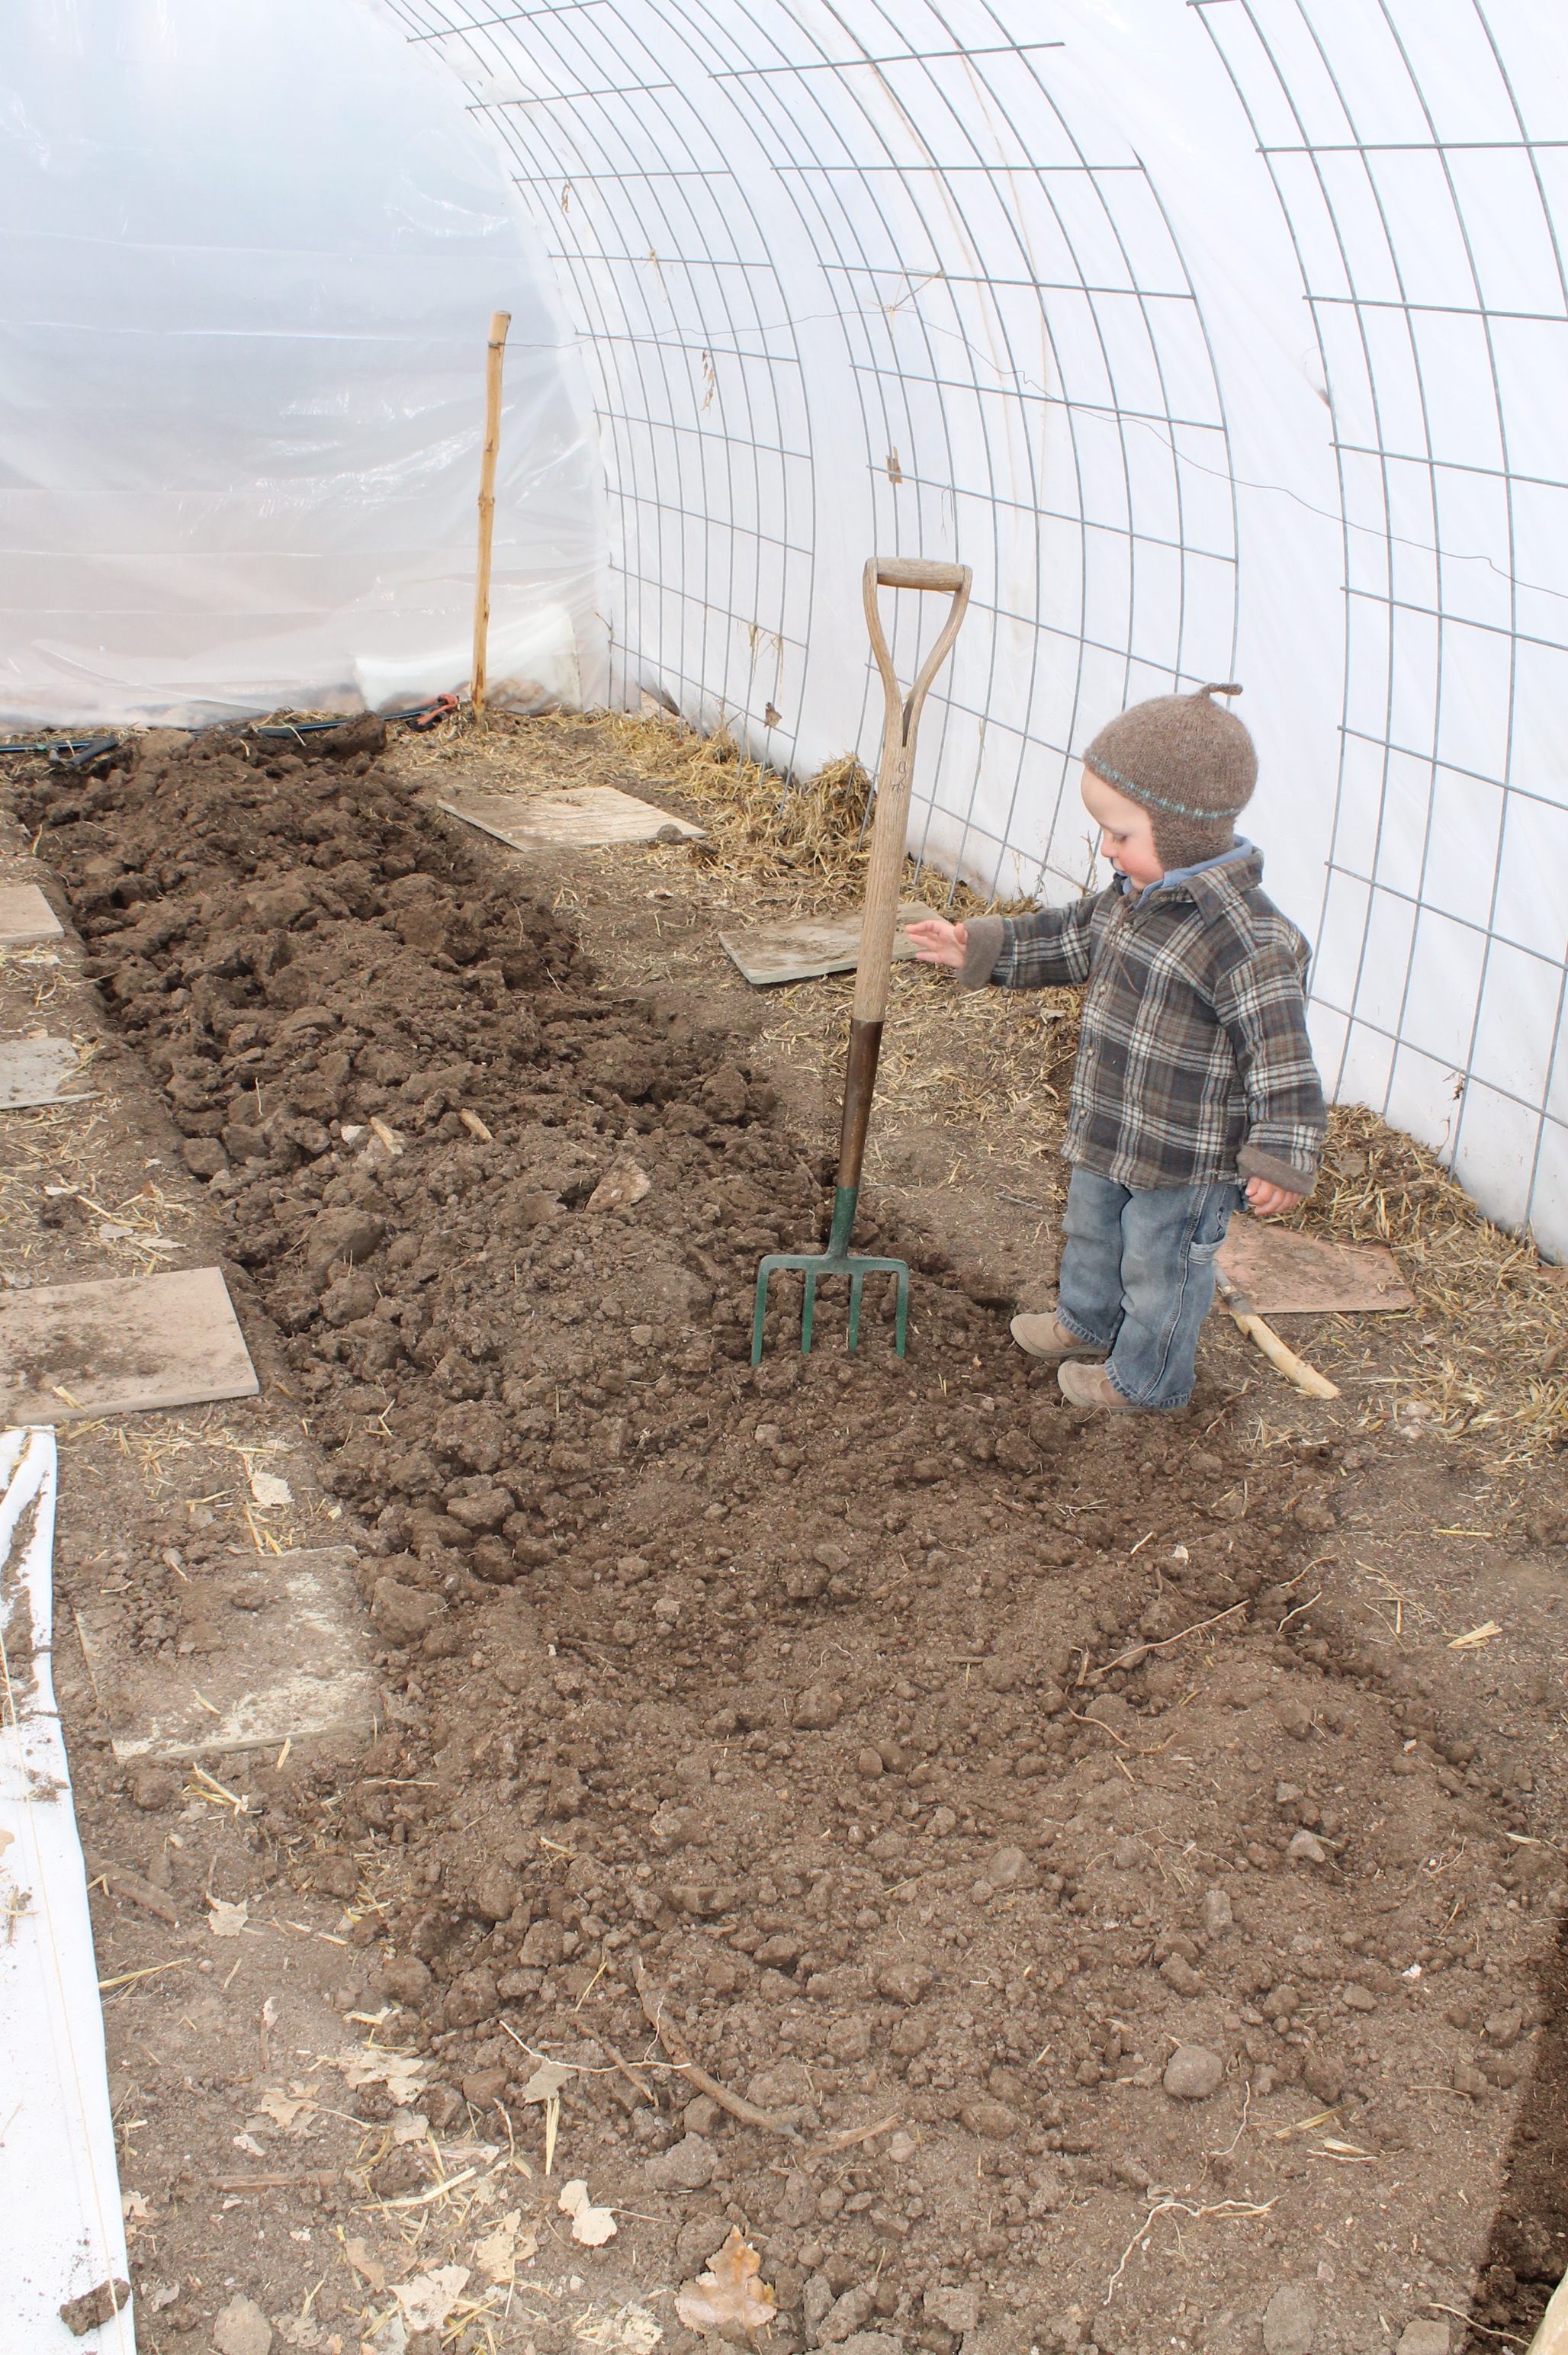
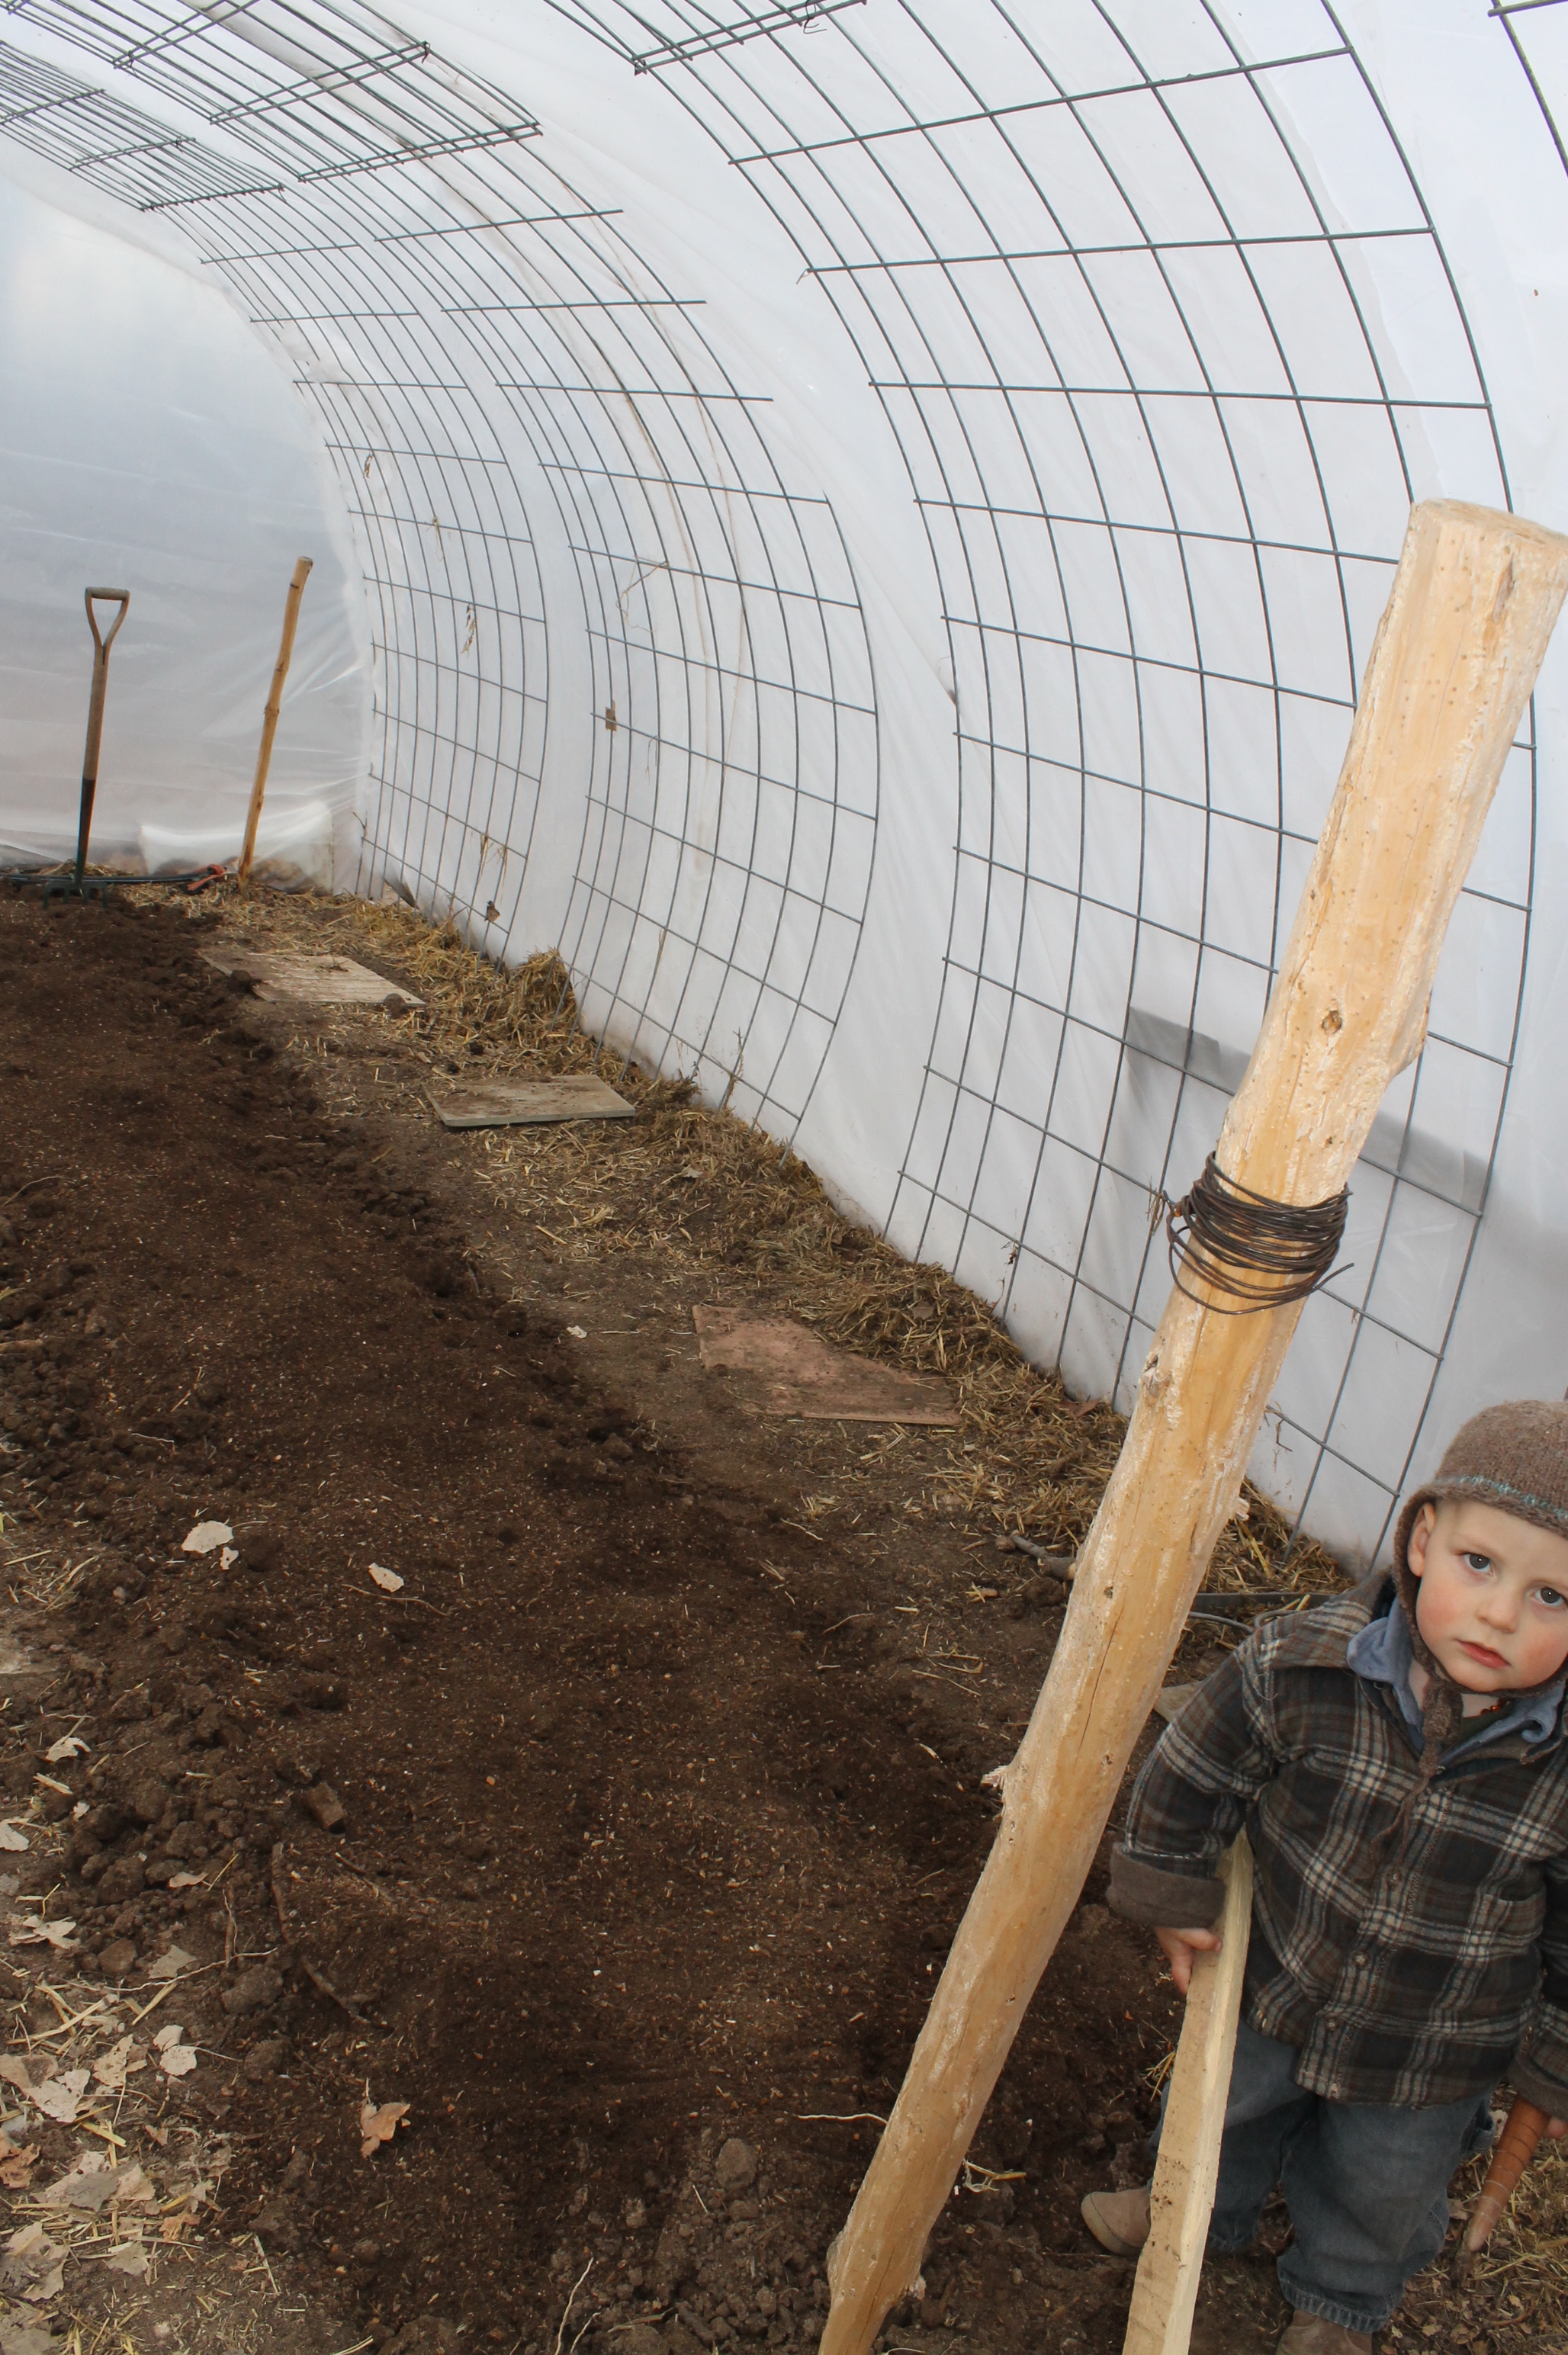
Christina, over at Tumbleweeds and Seeds posed this question to me the very same day I mixed up a fresh load of potting soil, filled my homemade wooden flats and sowed seeds to be pampered in my greenhouse till it is warm enough to transplant them outside under row cover…..All this to say- -my gardening style is hardy simple.  Because I love it and love to do it all myself it is totally worth all the effort, but simple it is not.  So as I worked, I thought of all the ways you (or I if I so choose) could make gardening simpler.

IMG_4493

The first would be simply Don’t garden.  NO seriously I am not kidding, yes I am a garden teacher and yes I would love to teach you how, but seriously like any hobby, life-giving or not, one must consider the time, skills, costs, resources and water, that go into any new endeavor.  Gardening can help take you out of an industrialized food system, it can get you out into nature more, it just might address pressing personal and global shifts, but consider if it is the right fit for you and your time and resources because honestly it may not be worth doing if you can’t do it well.

IMG_7289

I worked as the school gardener a couple of years back and I had a co-worker who told me a great story.

She rode her bike to work, shopped locally, she did all she could to reduce her carbon footprint and contribute to her community.  One summer she decided to add growing her own food to her good green efforts.  She built a raised bed, bought fancy soil, invested in little plants from the greenhouse and watered like crazy.  She worked so hard that summer and got very little return that ended up losing money & time, but she did gain the realization of how much effort it really took to grow your own food here in the high desert.  She concluded her tale with,

“After all that, now I happily shop at farmers market and I will never scoff at a $3 bunch of Carrots again.  Those farmers know what they are doing, have the appropriate resources to grow beautiful food, and man, the earn every penny!!”

Did you know that one of the biggest problems with the Santa Fe Farmer market is that the farmers CAN’T SELL all their beautiful food!! So much effort, water, land, money, highly precious resources here in the high desert all gone to waste….So if you can, just buy your food from the local pros and save your water bill and spare time for something else.  Gift your local farmers with the value and respect you give any professional.

IMG_0423

Now if you are continuing to read, it is probably because you love to garden, can’t afford market or have some other very good reason you are set on growing, or like me, you simply MUST, so my dear gardeners, here are a few more tips for you.

IMG_4937

1-Starts

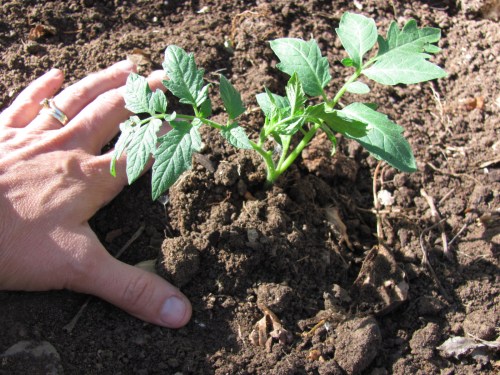
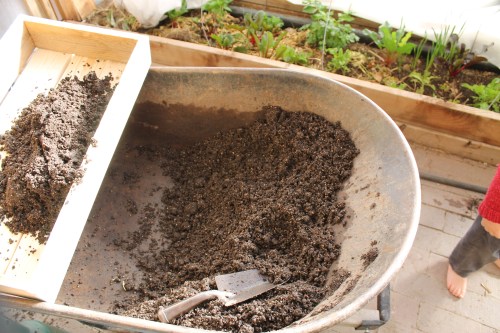
If simple is what you are truly looking for, the first advice I would give would be don’t make your own flats, soil or even grow your own starts.  Though a wonderful and pleasurable task, it is not simple and not always easy to do all the pre-growing yourself.  I would recommend buying starts from your local Nursery, Aqua Fria always has a good selection, and of course plenty of folks at Farmers Market.

 IMG_9518

2-Choose your crops wisely

Grow only what you eat constantly, what costs a lot and doesn’t travel well.

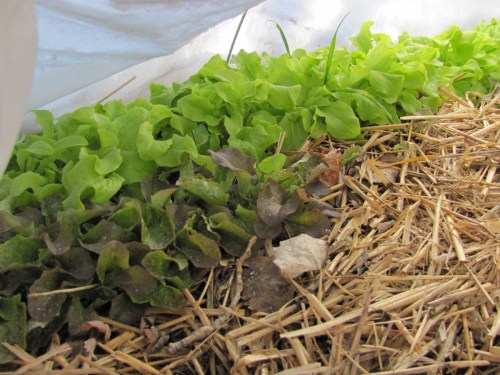
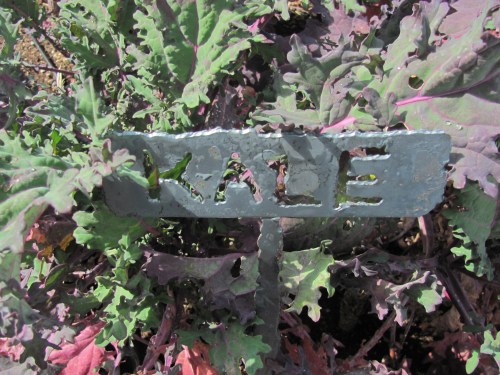
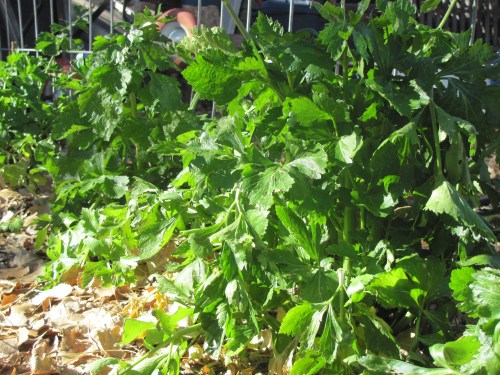
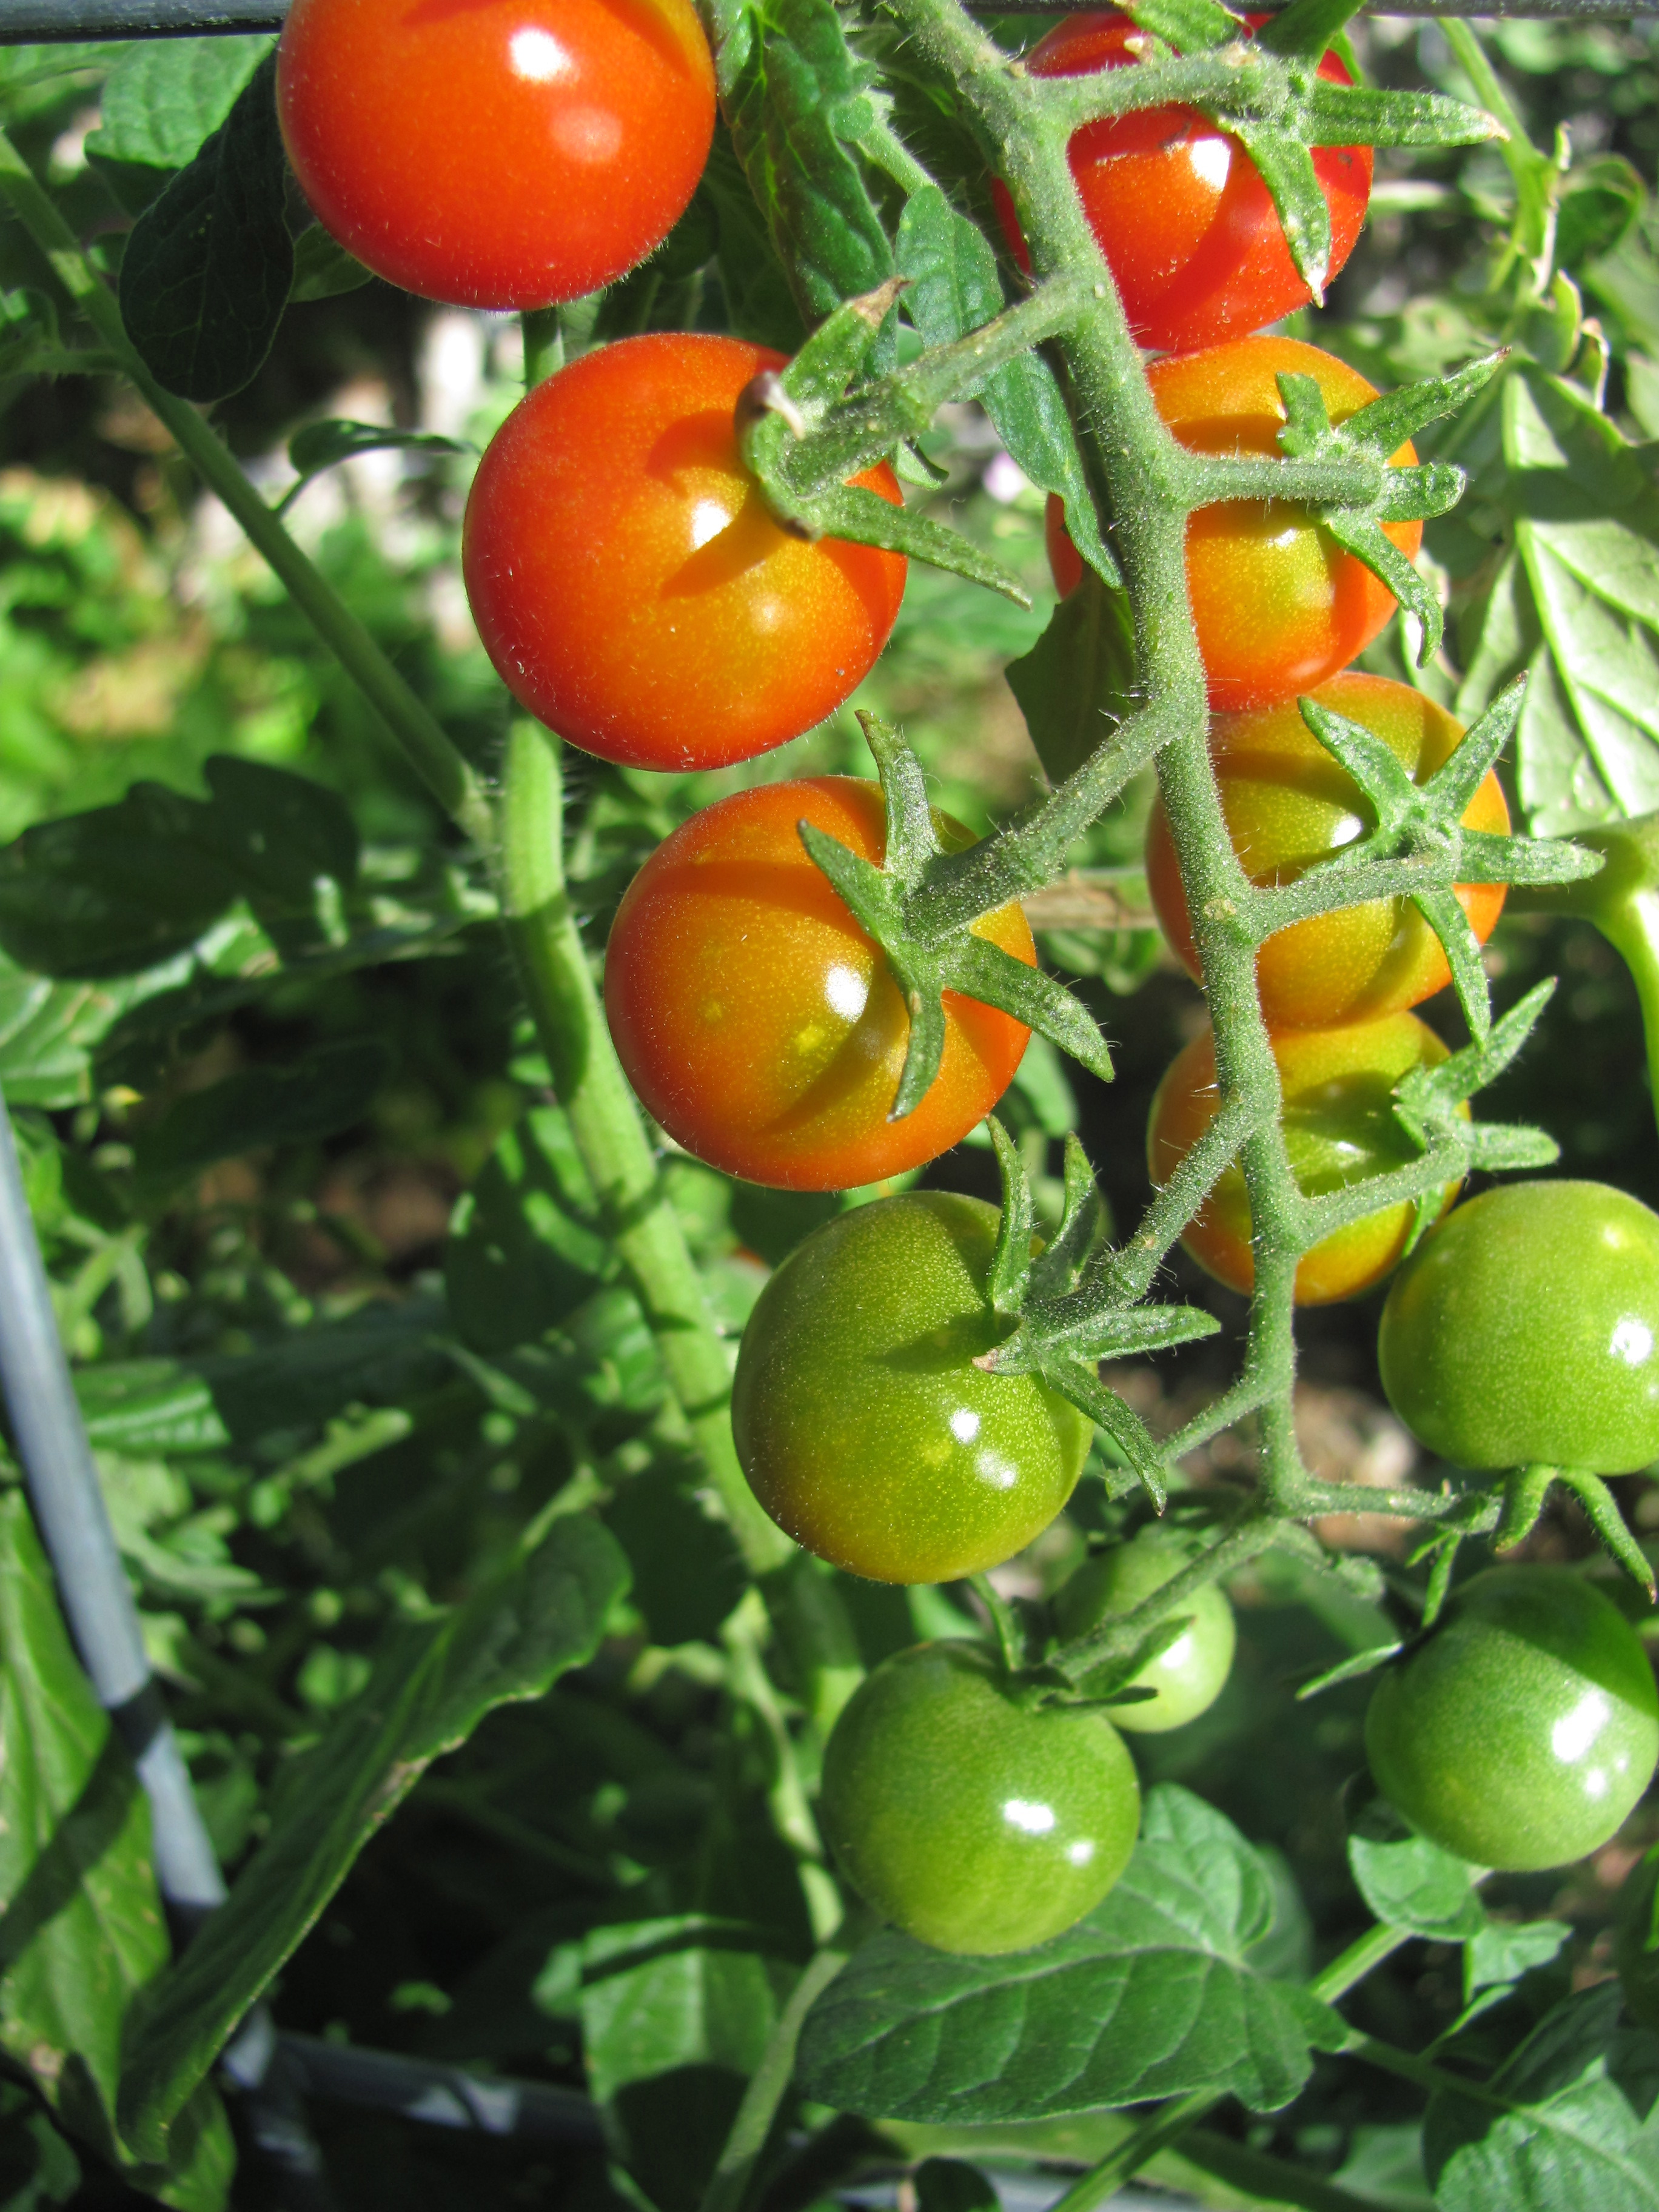
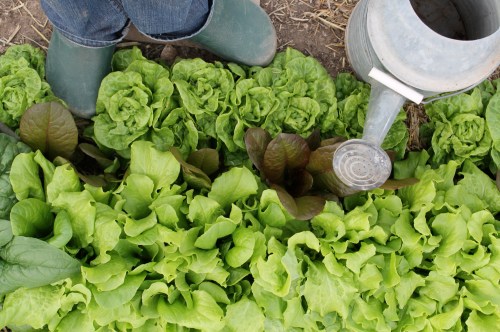
Like greens, salad, or herbs.  I say make good friends with Swiss Chard, it can be eaten raw of cooked, grows almost year round, bugs don’t like it, it is truly a loyal pal.  I also recommend people start with potted herbs that come come inside in the winter.  This way you always have them on hand and start to really save money and those darn plastic containers most herbs in the supermarket come in.  Dark leafy greens like Kale & Chard are always giving and take require very little attention and really you can’t eat enough of them!

Grow crops that will supply for your needs all year.

Garlic is super easy, low maintenance and you can grow a whole years worth in your backyard.

Skip field crops

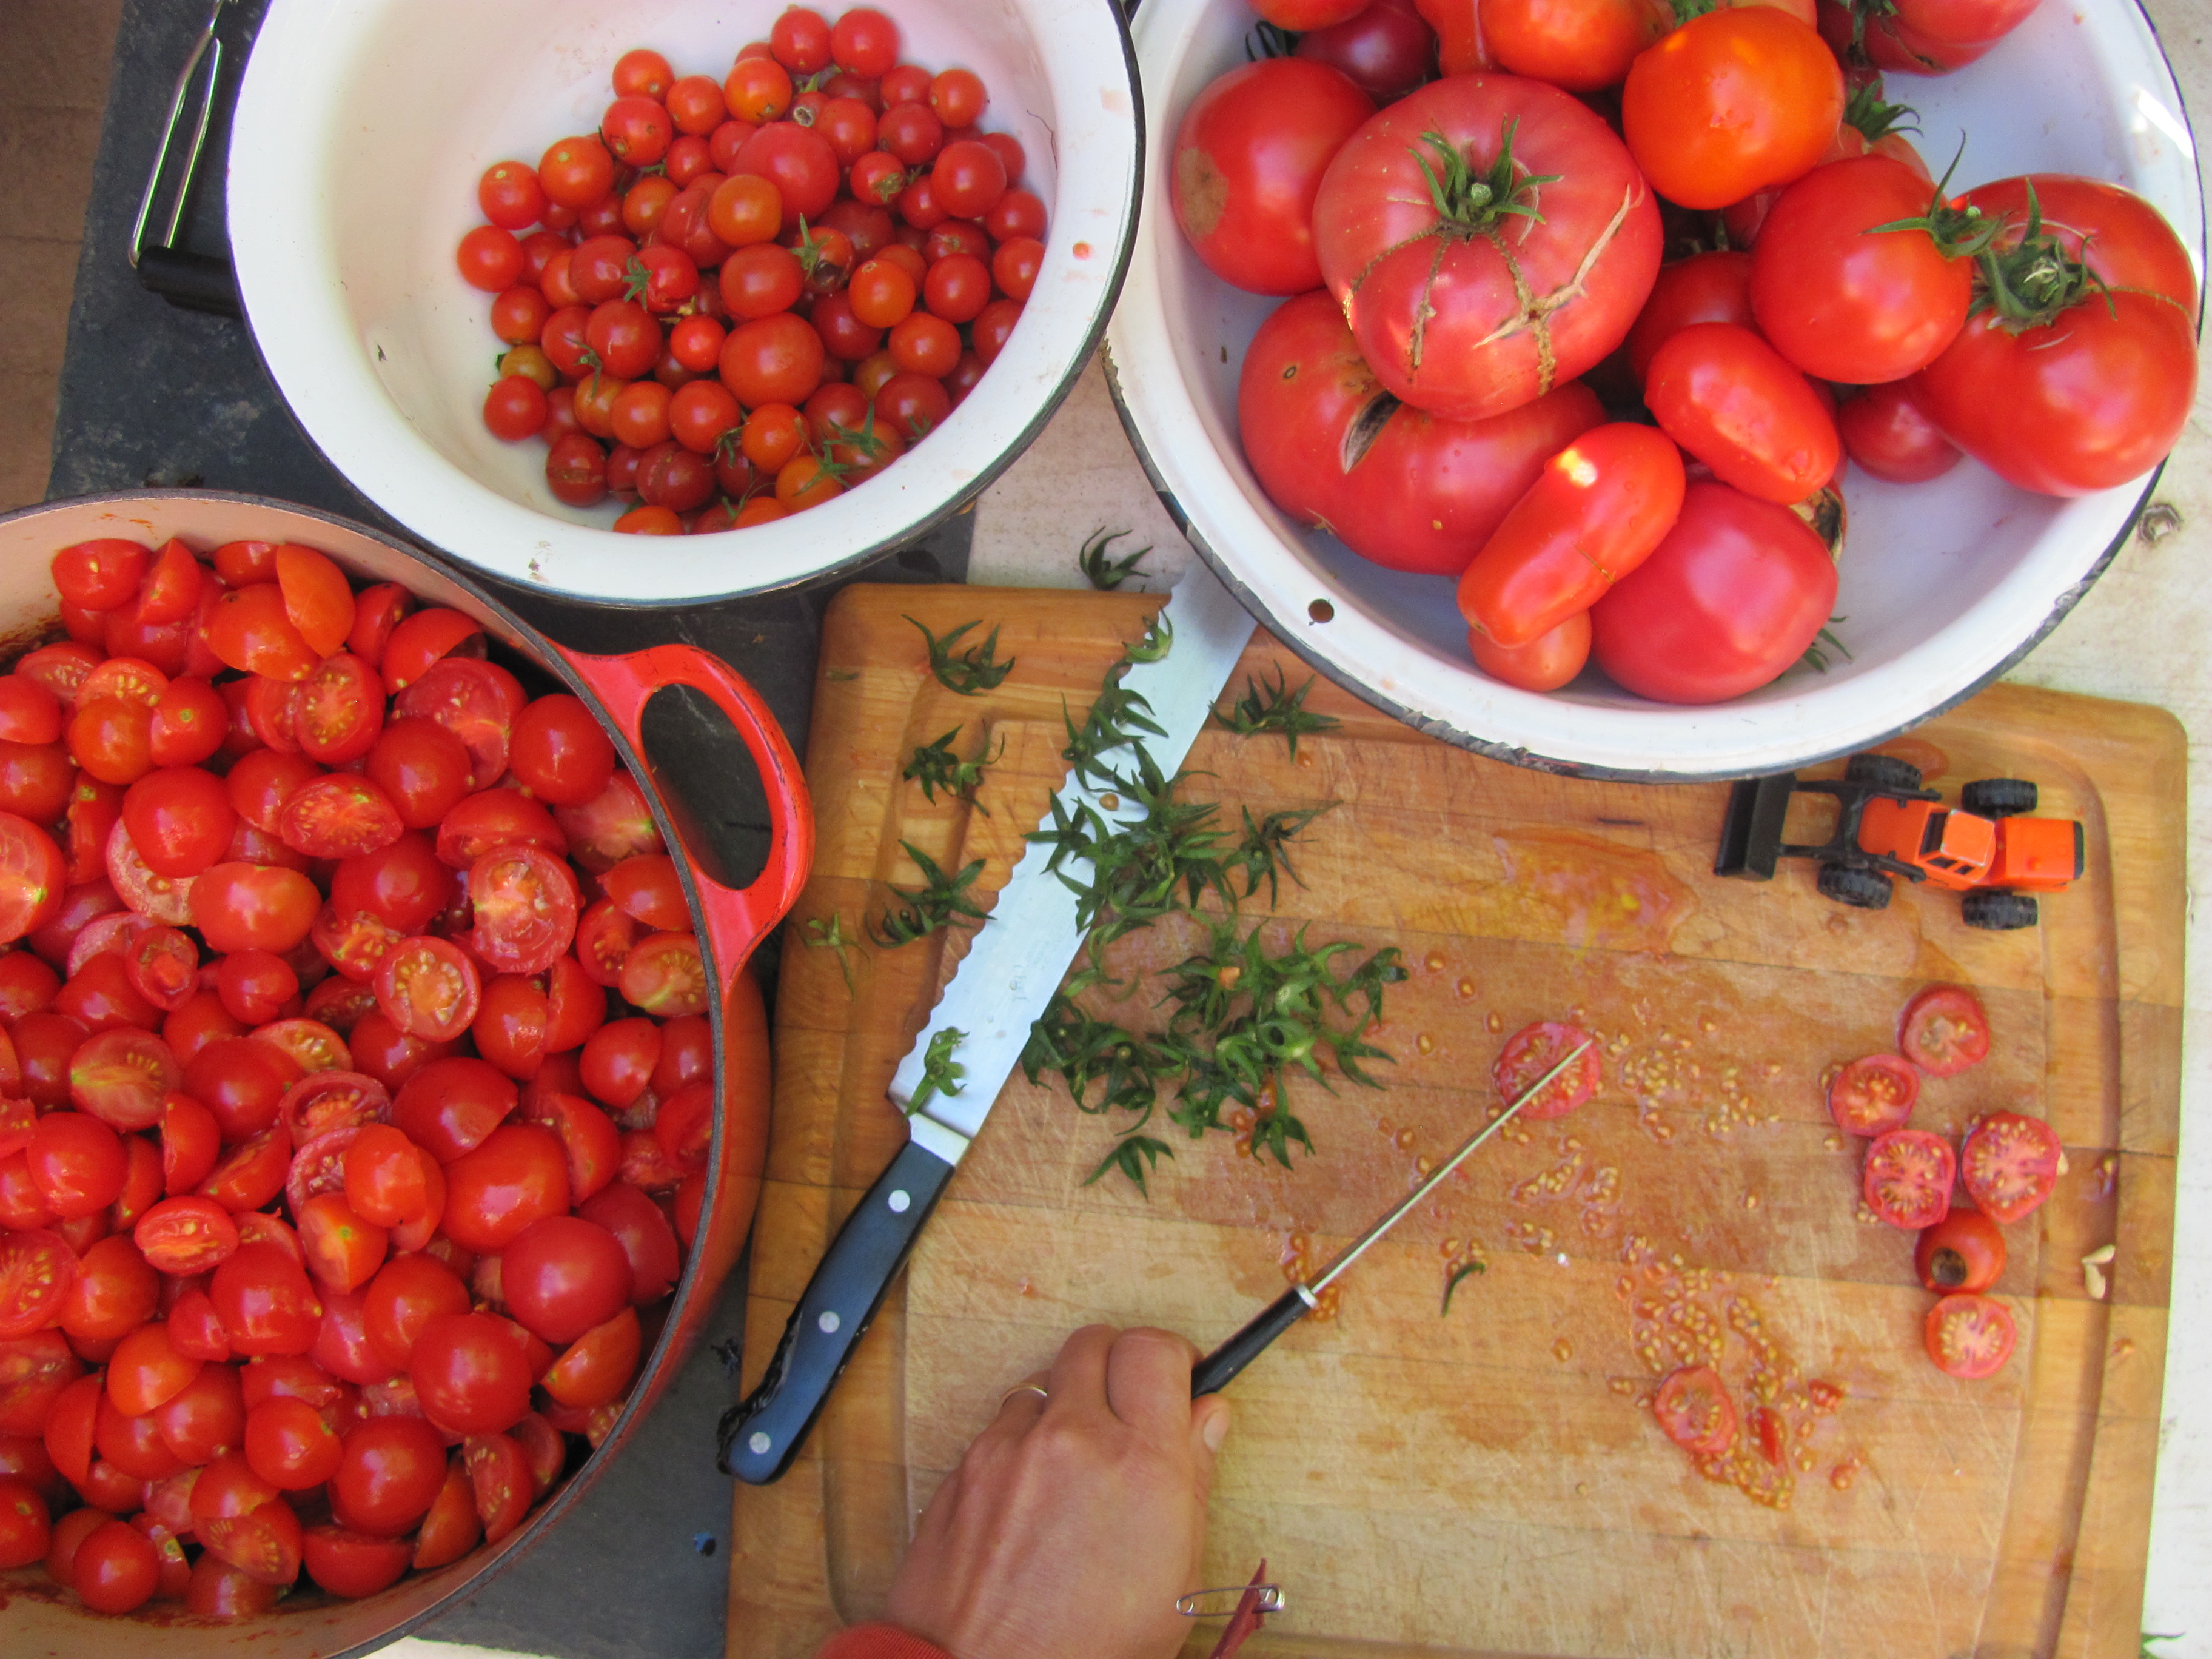
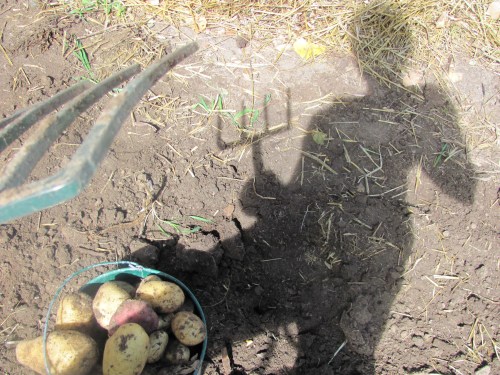
If you have a small yard and are trying to grow some of your own food, skip crops like Onions, Winter Squash, Corn, and Potatoes unless of course you have really great success with them.  You can buy all those in bulk locally and cheaply from farmers at market and store them all winter long.  There is no way I could produce all that I consume, so I save my garden space for things I consume daily.

IMG_3774

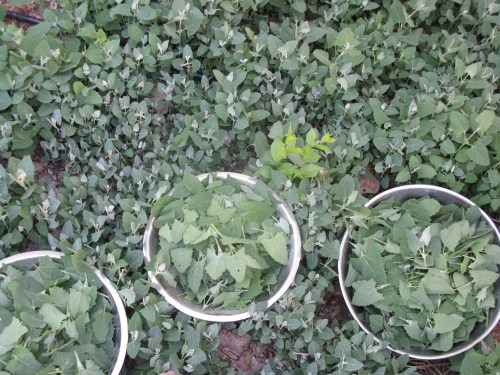
3-Consolidate Resources- Small is Beautiful

Plant intensively one area, don’t spread your gardening all over the yard.  Choose a small are and really love it up, water it well, spoil it with compost and mulch and wind protection.  Even use containers on your porch that have great soil and are convenient to water, but make sure this precious area is well cared for.  Your work is a resource too, so make sure you are using your time and energy as wisely as well as your water and nutrients.  A small intensive area that is well cared for will sing, rather than over doing it and spreading you and your garden too thin.

IMG_8101

4-Mulch like crazy & STOP Weeding!!

Mulch suppresses weeds so you don’t have to worry about them.  It keeps in moisture so you water much less and builds up organic material in your soil.  If you do have weeds, let them be if they aren’t encroaching in precious vegetables.  Just change how you see them , call them cover crops, call them water catchment, call them green in the desert.  If they are getting in your veggies way, pull them up and lay them down right where they are and call them mulch.  They will just dry up and look like straw anyway!!

IMG_3282

5-Plan well

I have found good gardening really is good planning.  Sow succession crops so as you harvest you are continually adding more seeds.  This makes so you are always harvesting something, so no time, water or space is wasted.  If you need help, here is my handy planting calendar to help guide your way.

IMG_7275

6-Low till to No till

Build up the soil with constant additions of organic material.  You are building up an ecology that does not need to be disturbed every season.  Once you dig deep the first couple of seasons, a light fluffing of the top soil should do the trick for sowing seeds and transplanting.

IMG_2847

7- Chicken tractors

Have you ever had chickens loss in your yard?  Then you have seen them scratch, pick and rake your garden to a nice fine tilth.  Build a little cage that fits over you beds and put the chickens in there before you sow.  They will do the work for you in day!  No chickens?  I guarantee you have a friend who will lend you a few for a day.  They of course eat bug and weeds too, you don’t need to be the only one working out there!

IMG_1858

8-Swap and share

Your friends have chickens and you have Chard- just trade, we don’t all need to do it all the time!  Things are only worth the value we put on them.  Create your own little underground swapper market.

IMG_0982

9-Perrenialize

You can plant your whole yard in edible berries, trees, herbs and shrubs and have a lot less work to do weekly.  You may have bumper crops one year creating a lot of work at one time, but I am sure you will have tons of friends all of a sudden who want to come over and help pick.  Also Perrenialize annuals too.  Let things go to seed and they will be sure to sprout up in odd places next year.  You can wild harvest out of your own yard if you let things naturalize and learn to eat your weeds! Generally perennials take less water too and you can use grey water on them more easily.  All our dish water goes onto our perennial front yard.

IMG_0063

10- Only garden if you love it!!

Forgive your self if you don’t love gardening and use your precious time and energy on some other righteous earth healing soul nourishing endeavor, I am sure you can think of one that is calling to you right now!

Planning for Spring

IMG_3822

Ahhh, the subtle return of the light, the seed catalogs in the mailbox, it is still cold outside, but the garden dreams have started.  I know you are with me here, as I have gotten numbers emails lately about this year being your year for you to grow some serious food.  I often forget how valuable growing my own food truly is and then I wander into the produce aisle mid winter and see Kale for almost $4 a bundle.   All my winter garden laziness falls away and I  get to down to business with my garden planning, compost collected and double digging.  Honestly I don’t really buy many vegetables, in 2012 I grew over 500lbs of veggies here on 1/5 of an acre and though I haven’t done my math yet, but I am pretty sure 2013 there was even more.  Every year is different, but I am hoping for an abundant year ahead, with the Wood Horse on my side and all. ( We just went to a Chinese New Year party, for those of you who missed that reference)

IMG_3281

Today to celebrate Imbolc, the half way mark between Winter Solstice and Spring Equinox, I am making potting soil for my green house flats which I plan to sow tomorrow with lots of cool season greens.  For those of you who bought a planting calendar, are you gardening along with me this year? ( If you didn’t get one, I still have a few.)

IMG_3827

This spring, starting March 28th,  I am excited to be offering a class at the Community College on Gardening in the Desert.  These cold winter eves are spent in pouring through my book collection, organizing my thoughts and recruiting signups for this class.  If you are familiar with SFCC Continuing Ed courses here is the course info is: course #Hg337 01/crN 31535 if not just call 505-428-1270 and they will get you all set up if you care to join me.  We will be going from seed to harvest, focusing on home scale vegetable production in the high desert and since I run the garden at the College, we will have lots of opportunity to get our hands dirty.

IMG_2828

Meanwhile, today in the backyard we harvested almost 1 lb of Spinach and are about ready to get the hose out and just spray down the entire lot if we don’t get some moisture soon!  Enjoying the sun, praying for rain, the eternal dance of the desert grower!

IMG_3917

Mid winter meal

Oh baby it is cold outside, but the garden is still growing, slowly slowly, & generously provided us with salad for Thanksgiving, Christmas and New Years!  Thought I would share some tips I learned this year on my season extension.

First off plan and plant your fall/winter crops in late summer and cover with floating row cover when frost start to get rough.

IMG_2476

Seeds Savers American Spinach does beautifully in my winter beds!

IMG_2200

When it snows, sweep it off while it is still fluffy, if not it will freeze, harden and smash your hoops down and freeze your little greens underneath.

IMG_2204

When the weather is really nasty, cold and snowy add a layer of plastic, like the rolls of painters drop cloth you get at the hardware store, over your row cover to collect sun heat and help the snow shed.  The heavier duty the better– this is 4mm.

IMG_3245


Open up beds in the middle of warm sunny days, other wise you might be shocked to see that some of your greens are actually frozen…but if you wait, they can bounce back and be eaten!!

In this weather, I barely water in ground crops, especially cause snow melts slow in this spot, and when I say barely I mean I haven’t watered in over a month!!

Hope your harvests are still feeding you well.  Happy New Growing Year!

THE GARDENERS YEAR 2014 Calendar is here!!

They finally came in the mail, I was so hoping they would come before the Waldorf Faire and they did, though I must admit, the jewelry took the spotlight that day, but I did sell a few to my lovely gardeny friends.

They are big, beautiful and very user-friendly, and frankly make me proud!!

Here is the write-up I put up on Etsy where they are for sale now and with this secret- not so secret code- Shipfree- you can get free shipping anywhere in the the US until Jan 1 2014!!

IMG_3281

THE GARDENERS YEAR – Planning your Plantings for 2014

This Calendar is 12 months of garden goodness, designed to make planning what to do in your garden simple and easy.

As a garden educator I often get the same question from my clients and students–
“WHAT TO PLANT WHEN?”
IMG_3286
I made this Calendar based off years of experience gardening in the High Desert of New Mexico, which is Zone 6 for gardeners in other areas.

I garden organically and learned what I know from a few local farms in New Mexico & abroad, but most of what I teach comes from my apprenticeship in Agroecology at the University of Santa Cruz, CA in 2002.  Many of my techniques and tricks are inspired by French intensive gardening, permaculture and bio dynamics.  This calendar especially reflects the Maria Thun & Stella Natura Biodynamic Planting Calendar in regards to following the recommendations of planting roots crops, fruits crops, leaf crops and flowers crops when the moon is traveling in correlated signs.  This is only a guide, but I like the idea of not only flowing with the seen, but unseen forces of our earth and planets as well.
IMG_3285
My calendar takes you through each month guiding you on what to plant, when and where.

I start many seeds inside as well as use cold frames and mini hoop houses for season extension and do all my gardening in the ground, all of which I provide guidance for within.
IMG_3287
Along with what to plant when, each month includes a brief tutorial on what to be doing in the garden that month, how to make your own planting flats, how to make your own soil mix, growing tips for Carrots, Garlic, Squash and much more.

IMG_3289

THE GARDENERS YEAR CALENDAR also includes the New Moon and Full Moon dates for 2014 as well as solstices, equinoxes and important seasonal holidays.

All the full color photography is my own from my own gardens here in Northern New Mexico.

IMG_3282

The Calendar Measures 11.5 x 14inches and is spiral bound, making perfect not only for reading, but recording what is happening in your own garden.

This is has been a huge help to new gardeners and seasoned gardeners alike and simply helps you get the most out of your timing, which in gardening is key to productivity.

Get Yours Here.

Use the coupon code- Shipfree for free shipping now till Dec 25th!!

Hope you enjoy it!!

IMG_3290

Winter in the Garden

As winter slowly slips in we are starting to transition into the internal senescence of the season.  The leaves are falling, blanketing the world & garden for a rest.  As a human being I too will rest, though I continue to eat all winter long and love to provide, as least a little fresh food for my family.  I believe in letting go, but I also like to hang on, just a little.  The key is just consolidating so you can conserve your resources and maximum energy in all forms. Here are some of my secrets for high desert winter food production.

IMG_8101

Plan:

Timing is what makes a winter garden.  Planting your winter vegetables in August will ensure good hardy plants that you can protect and keep harvesting off into the winter.  Planning ahead is really what winter gardening is all about. If you got a late start, transplanting can be done into the fall, but don’t expect much growth till spring, your plants will most likely live, but may not thrive until spring…however they will have such a head start you will be eating from them when it is technically still winter, most likely March.  Last year I made my own calendar with sowing dates for year round high desert harvest and sold them locally.  I am working on the 2014 one right now which you can preorder, just send me a note that you would like one in the comment box.

IMG_8371

Plant:

You can still plant perennials in the fall and early winter. October is a beautiful month to plant, garlic, bulbs like tulip and daffodils, Perennials & Fruit Trees.  It is also pleasant, as most nurseries have big sales on perennials this time of year so they too can consolidate and converse labor in the coming months.  Perennials will need to be watered in the winter, but no more than a good watering every 3 weeks( unless they are covered in snow and then you get the day off!).  In the spring they will have a beautifully established roots system and be stronger against harsh spring conditions.  As for seeds, I honestly do not plant any seeds from Fall Equinox to Winter solstice, remember, mother nature needs to rest too.  If you do have ways to cover your beds or have cold frames, established plants, or even starts can be covered of put in cold frames in the fall.  After November 15th though, I would probably hold off till February for this too, as it is really hard for a little guy to go through transplanting shock in the cold season.

IMG_6523

Gather:

Building soil and adding organic material is our main goal as gardeners, especially here in New Mexico.  Learning wild foods is of course crucial, but if we want to eat cucumbers originally from India and Lettuce from the Fertile Crescent we must provide the tilth and nutrients needed for these delicacies.  To do this we must gather, save and cycle as much organic material as we possibly can into our systems.

IMG_2081

Leaves– for mulching beds, making compost and general building organic material on your site.  Bags are lining the streets right now, you have a trunk in your car, right?  Mine get delivered to my front yard; after years of living under the same big tree my neighbor and I have figure out the perfect harmony.  He rakes the leaves that fall in his yard, bags them up and throws them over the fence into my yard.  I dump them out onto my beds and give him back the bags to reuse!!

Jaengy smashes the toasted egg shell for me in the clay mortar and pestle, one of his weekly tasks

Jaengy smashes the toasted egg-shells for me in the clay mortar and pestle, one of his weekly tasks

Egg Shells– Every time you crack an egg put it on a cookie sheet in the oven, the pilot will dry them out and when the sheet is full they can be crushed to a powder and saved in a mason jar for calcium amending later.  I have found them very effective in preventing blossom end root in my tomatoes. Last year I saved a gallon full and it turned out to be perfect for 100 tomato plants, one handful per plant.  Since tomato planting time ( May) I have already gathered almost a gallon…luckily there are some other amazing uses for eggshells.

The sweetest smelling soft country roses outside my front door

The sweetest smelling soft country roses outside my front door

Coffee grounds– Great for acid loving roses.  They can be applied directly to the soil around the rose during the year, or you can cycle them through you compost system.  Worms love them too!

Compost– If you garden and don’t have a compost, start one.  You will be amazed at how much less garbage leaves your house and won’t have to worry about stinky, leaky garbage bags anymore.

Compost:

I usually start a new pile of compost every spring, so that by fall the old one is fully decomposed and can be harvested.  Making compost where you would like to have a garden the next year is ideal, as the soil is being worked & amended for you.  To harvest compost I usually take off the top ‘cap’ of leaves or straw, (used to keep moisture in a pile and keep in any smell) dig out the ready compost and pass it through a shifter over a wheel burrow.  This can be out of a chicken shed, worm pile or just plain old compost pile.  If the compost has sat all summer, it is probably ready to use, though sifting gets out any bigger pieces that have not decomposed which can be added to the new pile.  Shifting also gets out the worms so they can be added to a new pile.  Then sprinkle the beds with about an inch of compost and turn the compost in a bit.   By harvesting compost now you also can store it in a container so you have it on hand for potting mix in the late winter.  Trust me, you will only wait till January to harvest compost once, it is no fun at all!

IMG_8859

Turn soil:

This can be done with a pitch fork or a broad fork, which doubles your efforts and can be bought locally here.  If the compost has fresh manure in it, it will break down and leach over the winter and should be plenty safe for spring planting.  Fall is a great time to dig, fork or loosen beds, as the soil is warm and often moist from the fall rains.  If you wait till spring, the ground may be frozen when you are ready to plant your early crops.  perennial crops do not need tilling, and prefer not, but annuals do seem to respond best to lightly fluffed soil with good titlth (texture) and well broken down organic material so nitrogen isn’t robbed in the process of decomposing other things.  Here is a whole post on bed prep, oriented towards spring, but you will get the idea.

IMG_7275

Mulch:

Once this is done, heavy mulching really helps retain moisture, keeps the soil a bit warmer, as well as suppresses weeds in spring and build organic material.  Leaves & aged straw, are my favorites and usually free.  Cleaning, Composting, turning and mulching a bed now helps for early spring planting.  Once you do all these steps in the fall when the weather is still lovely, your beds are ready for early spring planting and you need not spend too much time out on the April wind chipping at frozen ground.

Lazy gardening- the self mulching bed.

Lazy gardening- the self mulching bed.

Row Cover :

I often will cover up my fall crops with row cover in late September before the first frosts, but most of the listed crops below are cold hardy and can take a few light freezes, so they can be ignored for a bit while you focus on rescuing the summer crops from the cold.  First you make little hoops from 9 gauge wire that you can buy in a spool from the hardware store.  Cut 3-4ft pieces and bend them to be a half circle.  Stick these in the ground about every 3 ft and then wrap with your row cover.  I get the heavy weight floating row cover from Plants of the Southwest for $3.50 a yard.  It is 12ft wide so you can cut pieces that fit over your beds…remember to leave extra on the edges so that it can be well weighted buy soil or stones- any strong breeze that catches under the covers will create a sail affect which could tear or remove your covers altogether.

IMG_7697

Let the Sunshine in:

Once I do cover my beds, I cover them for good, as protecting them from wind, and cold is important, the air moves freely, so no need to open and close them every day.  The fabric also keeps in moisture and with cooler temps you need to water less.  When I do open them up, I do it in the hot part of the day, as some plants actually freeze and thaw in the cold season.  Winter watering will need to be done, just like summer watering, when you scratch the surface of the soil and stick your finger in and the soil is dry a fingers depth, you should water, unless of course the soil is frozen.  I usually water my in-ground garden beds every 3 weeks in the winter.  Snow is a great thing for your veggies and there is no need to water if there is snow on the ground, just remember it also may not be the best time to harvest your plants either.

IMG_2082

Select Cool Season Crops:

Winter gardening really just mean keeping alive summer and fall crops.  Winter gardening for me starts in August when I start planting all my crops.  It can also mean prepping the soil in fall, heating it up early with cold frames and planting in late winter early spring.

In New Mexico, before or during the monsoon season is ideal for planting fall crops because the soil opens up and receives the rains and so do your seeds.  The moisture and cooling that season brings is great for fall crops and the plants thrive in the lessening light.  Choosing cold hardy varieites is key to a hardy winter garden.  In his book Four Season Harvest Eliot Coleman lists all his winter varieties and most seed companies now have lists of cold hardy crops like at High Mowing Seeds

IMG_1937

How low can they go?

When you do open them up, do it mid day, as the plant enjoy the sun and may even be some what frozen.  If you harvest them like this they will turn to mush, but if you wait till the thaw they will be fine! It is kind of amazing to watch during the day.  I have negelected to cover my Chard yet and it looks totally dead in the morning but by the afternoon it is perky again and ready to harvest.  Different vegetables have different cold cold tolerances which are useful to know.

The hardiest of the winter vegetables are Kale, Collards and Spinach which can take Temps as low as low 20’s and in the high teens.

Broccoli, Brussel Sprouts, Cabbage, Kohlrabi, Mustard Greens, Parsley, Radish, Parsnip, Turnip can all take temps 28-25 degrees.

All of these can survive under thick row cover all winter, though they may not show many signs of growth, they will start to spring new leaves in February.

IMG_2083

Other semi-hardy vegetables are Beets, Carrots, Cauliflower, Celery, Chinese Cabbage, Endive, Lettuce, Radicchip, Rutabega, Salsify, Bok Choy, Tatsoi and Swiss Chard, tolerant of Temps from 32-29degrees.  These can usually be harvested till Christmas under heavy row cover, but will need to be replanted in the spring under row cover as well.

Cold Frames:  Cold frames can be built in all kind of ways and there are some great designs out there you can easily be guided by.  I would start by reading Eliot Coleman’s books.  There are glass, plastic, straw bales, adobe and even some pretty sweet custom made ones by our local ‘Grow Your Own’ veggie man, Ken Kuhn.  I love cold frames and could talk forever about them.  But the first thing to think about tis your winter reality.  How much do you really need, how much are you really willing to do and how far are you willing to go.  I recommend finding a nice south facing nook close to your front doorstep where you can reach out in your bathrobe a slippers, raise a lid and snip a few fresh leaves on a cold winter day.  Now doesn’t that seem nice.  I wrote a whole post on making those greens last.

 So hopefully all this should get you started.  Stay tuned for the ‘Late Winter in the Garden’ post in a couple of months when you & nature are really ready to get growing again.

IMG_3980

Ode to October

This glorious golden light, I receive you with open arms

Image

As you ripen every last fruit, you ripen me too from the inside outImage

and I am so grateful you are here.

Image.

These are the days we have been waiting all year for, the seeds planted so carefully now in full bloom.Image

There is no loss to be spoken of in this all this abundance, all struggle forgotten in these glorious days.Image

The canning pot still boiling over into cool evenings and crisp air.

Image

And though rest may evade me, I ride this wave of generosity, may it last inside me till the end of the year.

Tomato Time

Yes spring has finally has finally come to New Mexico, or rather summer it seems.  It is now plenty warm to put those tomatoes in the ground and with the moon in Leo (a fire/fruit sign) this weekend, all systems go!!

IMG_6724

If you have ever read this blog you may be aware of my growing obsession with tomato production.  I put up a few tips here last year on transplanting tomatoes.   And then this year I went to a Homegrown New Mexico tomato class and learned a few more tricks.  To add to all this, this year I have been saving all of my eggshells, drying them, crushing them and now I have to magical powder that I plan to put in every hole before I plant.  You see tomatoes often get blossom end rot, and many of my late tomatoes got it last year…IMG_6841

(though I believe it was a watering issue.  You see my irrigation was turned off and I didn’t know it, so by the time I figured it out the plants had been shocked and needed to recover, which they did do, but blossom end rot was s side effect)….But in my reading I found out that blossom end rot is also linked with the plant’s ability to take up calcium…enter egg shells. Lots of readily available calcium for the taking.  So I will sprinkle the magic calcium powder in each hole before planting and we shall see if I can notice a difference.IMG_4980

IN any case, happy planting weekend, I know we all have lots to do!!

Seeds Starting Recap

Last Saturday I gave a public class on Seed Starting at Earth Care community garden.  It went well and was well attended but made me realize a few things…..One was that a little re-cap may be useful,  as people tend to have the same questions and quandaries about starting seeds indoors.

IMG_9550

Seed Selection– Save your own, Trade, Share, Swap…If you are to buy seed go for heirlooms, locally appropriate and organic.  If you would like to start your own seed saving collection, open pollinated varieties are what you need.  Avoid hybrids (for seed saving) and GMOs at all cost! Sources I recommend:

Seed Savers Exchange

Native Seed Search

Fedco

High Mowing

Peaceful Valley

to name a few

Containers and Soil– There are of course so many choices, so I encourage you to use what you have and find what you like.  My favorite are wooden flats so here is a link to making your own out of old pallets or new wood.  I also prefer to make my own soil, so here is  link to that, but of course find your method of ease a pleasure.  Just remember for seedlings fluffy and light soil is best- high in peat moss or Coconut fiber.  Once the seedlings the bigger they will need more nutrient rich mix or a rich garden bed and I will write more on that later.

Temperature–  Seedlings need different soil temperatures to germinate.  For example some lettuces can germinate in soil that is 50 degrees and Tomatoes often need 70 degree soil.  Here is a great Vegetable Planting Chart form High Mowing Seeds blog that has great info on soil temp, germination times, spacing and more.   If you are starting your seedlings inside, the soil is probably stable at the temperatures of your house, but if not they are in an unheated greenhouse or cold frame, it is probably much colder.   I simple Soil thermometer, purchase at any nursery, should help you see what your soil temps really are.

IMG_0132

Check it morning and evening to see how it changes.  Also check your seed packet to see if it tells you ideal soil temperatures for germination, so you know if you are waiting long enough before starting over.  Remember if you seedlings haven’t come up yet, they are just waiting for the right chemistry, so don’t give up.  Just keep working the elements of warmth, light and water till you see those sprouts.  If you need to you can buy seedling heating mats here.

Light- This seems to be the most tricky for home growers.  Many windows simply don’t get enough DIRECT sunlight.  Choose a south-facing window that gets direct sun ALL day, that is at least 8-10 hours a day.  The more the better.  If your seeds sprouts but then get really long and leggy and look like the are desperately seeking the sun, you probably need to supplement with electric lights.  So many people know so much more about that so google that.

Water- Seeds really only need the right temperatures and moisture to germinate, that is sprouting before photosynthesis.  Once you sow seeds (in a moist sowing mix) you MUST keep them moist at ALL times.  Yep, Always!!!! that means watering many times a day if you need to, especially in a heated house in a south-facing window in the high desert!!!.  A helpful tool may be a spray bottle.  Set it on a fine mist and mist the soil.  If you have children helping this is a great job for them and really can’t be over done.  Once you see puddling on the surface of your soil, stop watering.  A watering can with a fine sprinkle really is necessary,  as big flows of water can wash the seed right out of the soil.  Because the seed is only in the first inch of soil, this is what need to be moist.  Once a plant grows the water needs to go deeper and the plants can be watered less frequently, but int he the beginning, moist always.

IMG_0102

Water quality has an effect too.  I use my precious rain water for seedlings and really have noticed a difference from the years I have used our hard well water.  Tap water is ok, but it is best to fill your watering can or a big bucket hours, or days before you water so that the chlorine in the water can evaporate and the water can come up to room temperature.  Cold water can shock plants and of course chlorine can harm them.

Seed Needs– Each seed of course has it’s own temperament.  Some like to be planted deep, some with no soil at all.  Some need fire, freeze or even scaring to crack their seed coats.  They say a generally to plant seeds twice as deep as they are wide.  Seed packets are great source of information, but if you don’t have packets, the High Mowing Vegetable Planting Guide works great to find out all the little special needs of each of your precious seeds.

So there you have it– If you seeds are warm, wet, sunned and in a good growing medium they should come up just fine.  Plants are more like us than we might think.  If you are cold, they probably are, too hot, the might be too.

IMG_0330

Now planning your sowing timing and taking care of the babies well so that they thrive and are ready to go outside when the times comes, oh and of course there is seed starting outdoors as well…..but I think I will write more on that later, for now this should get you started if you haven’t jumped in already.  Happy Seed Sowing!

Seed Starting Class

As you may have gleaned from my blog, I like to garden.  I like it so much that is mostly what I write about, and frankly do with most of my time.  I also teach gardening and have in lots of different places from the Children’s Museum, to Elementary Schools, then high schools, and now I even teach it at a college!!  This Saturday I will be teaching a class to the public hosted by Homegrown New Mexico and held at Earth Care Community Garden.IMG_0290

We will cover as much as we possibly can about seed selection, sowing mediums, containers, schedules, technique, and care in 2 hours.  It would be great so see some of you there!  RSVP here.

The Step by Step of Bed Prep

Ready to getting digging, to break a sweat and work out those winter kinks.  Well I know I am, and bed prep is a great way to get spring started.  Once you read this you may think– ‘Well that it a lot of WORK, do I really need to do all that!!’

IMG_7273

The answer is of course no, you can do whatever you and your garden deem fit…There is no-till, there is lasagna gardening, there is digging in cover crop, there are raised beds, and of course rototillers & tractors could to the hard tilling work for you… oh I could go on, but if you do have in-ground beds, and want to get digging….. it goes like this….

IMG_8784

First I raked off all the straw that was placed there to mulch the tomatoes that grew here last year.  I removed the tomatoes and left the straw covering the beds all winter– though this is in the hoop house I like to keep my beds covered– Reduces erosion, keeps the soil warmer so it can be worked earlier and keeps in the moisture.

*Before prepping a bed, checking the moisture level is really important– If it is too hard you will be digging rocks, if too wet you will be slopping in the mud, lifting HEAVY wet soil, working you back twice as hard and of course compacting the soil where ever you walk….So always check the moisture level before you start. It should feel cool to the touch, leaving dampness on your skin, but not water…It should crumble in your hand into chunks rather than into dust….If your moisture level is too high, dry it out of course, if too low water it well and plan on digging a couple of days later, even the worst looking soil can be transformed with a little water.

Image

Once the moisture level is just right and the is bed clear, you can get digging.  I began with my Spade to edge the beds, that is cut a line along the bed edge to make sure my bed is nice and straight by just sticking the spade in as far as it will go all the way down each side of the bed.  This gives you a nice border to work within.  Then I use my beloved digging fork, starting at one end and working backwards down the bed, flipping up the soil ad I go.  That way I dig where I step, not vis versa, so the bed is nice a fluffy when I am done.

Image

Next, I add my compost.  This was harvested from my backyard pile that had been resting since last summer.  I was delighted that I got 3 wheel burrows of compost from what looked like a pretty small pile.  It may not be enough for my whole garden, but it was good to note that with our food scraps, leaves and garden waste we can produce about 3 wheel burrows worth of compost per season.  I took my spade and sprinkled it on the bed, about 3/4 inch thick.  I used 1/2 the wheel burrow for a bed measuring 3X20 ft.Image

Once it was spread I went back with my spade in the same way I passed with my fork and dug and flipped and smacked, incorporating the compost and continuing to break up the chucks.  A big part of what I did that day was in fact break up chunks, but I have to say it felt good!!  I worked up quite a sweat in that hoop house, sure beats the gym!!!IMG_9576Now with smaller chucks I went back over, yes again, with a rake.  This is the zen part. There is still a little smacking of clumps but mostly just smoothing it all out.IMG_9577

The finer you go, the tilth better for your seeds.  And the more even you go the more consistently moistened when watered.  Now this stage seems to be the most appealing for toddlers to step right in the make their mark… So I baby trapped the bed by putting in a few stakes and wrapping with twine about a foot or two high.  This seems to work well for a person of 22 months– though past 2 years they can just hurdle it with ease– I guess I will cross that bridge when we come to it.IMG_9579  There is drip tape already in the hoop house so I just re-laid it.  It won’t be turned on for another month, but having it out gives me nice straight lines to plant along and a sure thing my babies will get the water they need as the season progresses.  Now we Plant!!IMG_9581These are cool season crops started in the greenhouse, ready to have more space!!  I divide them ever so carefully and placed them individually in the ground.IMG_9585

As I transplant I make sure to make holes deep enough for all the roots to rest in without being scrunched, I also make a little moat around each plant to ensure water pools around each and doesn’t run off.  IMG_9587Now we water & wait– though with the warmth in the hoop house it shouldn’t be long now!!

IMG_9513I had to go away for week before posting this– so here is what it looks like a week later!!  We should be eating in no time!!IMG_9517