After ten years blogging on about gardening and motherhood here at Seeds & Stones, I have moved most of my content and added new juice to my new website, Erin Growing Home.
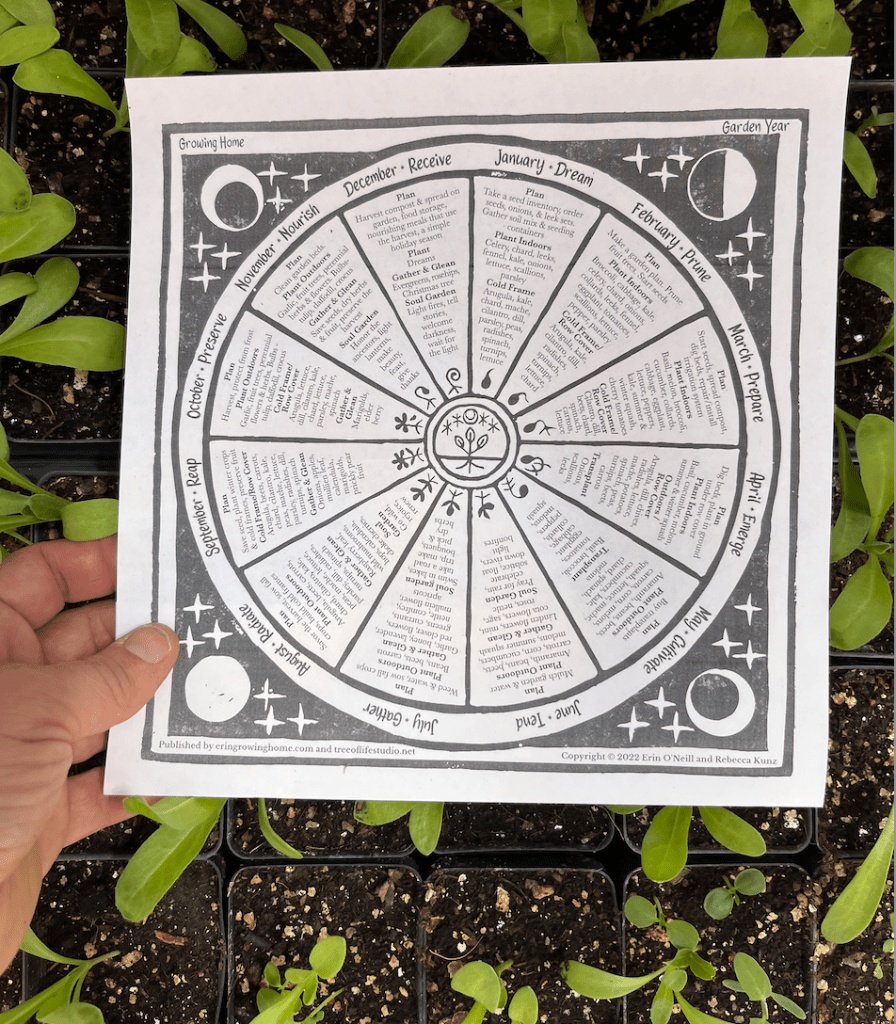
But perhaps most importantly if you sign up for my Erin Growing Home Newsletter you will receive my latest and most dearest project, a carefully crafted Planting Calendar which is the culmination of 20 years of great attention paid to gardening like it’s my job! I worked very closely with an amazing artist and dear friend of Tree of Life Studio to create this beauty and we are both very pleased with our baby.
Growing Home Garden Year Planting Calendar- Get your free printable PDF by signing up for my newsletter at Eringrowinghome.com
The Growing Home Garden Year is a beautiful map to guide you through the growing year, including when to start seeds indoors, outdoors, and in cold frames. It highlights what to plan for in your garden each month, and what to gather & glean from the wild in the harvest season. The work of the inner garden is not forgotten: what to tend in the garden of your soul throughout the seasonal cycles is woven in as well. May it guide you on your way to Growing Home.
So go ahead, jump over to see what Erin Growing Home has sprouted into!
Happy Earth Day- which is every day for me, but it always good to remember where you came from, your mother earth!
Today I got a handful of texts and calls asking me the exact same question…
Me….”Hello, growing home hotline”
Friends….”Help! I planted my seeds over a week ago and nothing seems to be happening, is something wrong?”
My first thought was, ‘a watched pot never boils’… are we in our gardens a little too much that are seeds are getting shy? I doubt it. Maybe something is in the stars…but after the new moon sap with rise again so things should start to sprout right out, but seeds need time, consistent moisture and appropriate temperatures to sprout.
Moisture– Don’t water by habit, water by feel. You don’t need to water every day but you do need to visit your seedlings everyday. Touch the soil, get up close. If the soil is moist to the touch (moist as a rung out sponge) you don’t need to water. Seeds are only in the first inch of soil so this is the area that needs to be moist. If when you touch the soil your fingers aren’t moistened, water. I water daily, but on a cloudy day if the soil isn’t drying out, I leave it. Outside I use row cover over my seeds, like a blanket. I sow the seeds, water and them put row cover over them, then water the row cover. I peek every day or so to check the moisture and water if need be. When I see sprouts, I remove the row cover and place mini hoops over the bed, then I put the row cover over the hoops so the seedlings don’t get squashed, but still are protected against wind, birds, cats, children, etc… I do fold the row cover back to water with a sprinkler until I have my irrigation up and running. ***Note- I always water with a watering can or sprinkler with a very fine spray. Seeds are fragile and can be blasted out of place by a hose or heavy flow from a can.*** Just like this little gardener!
Temperature–
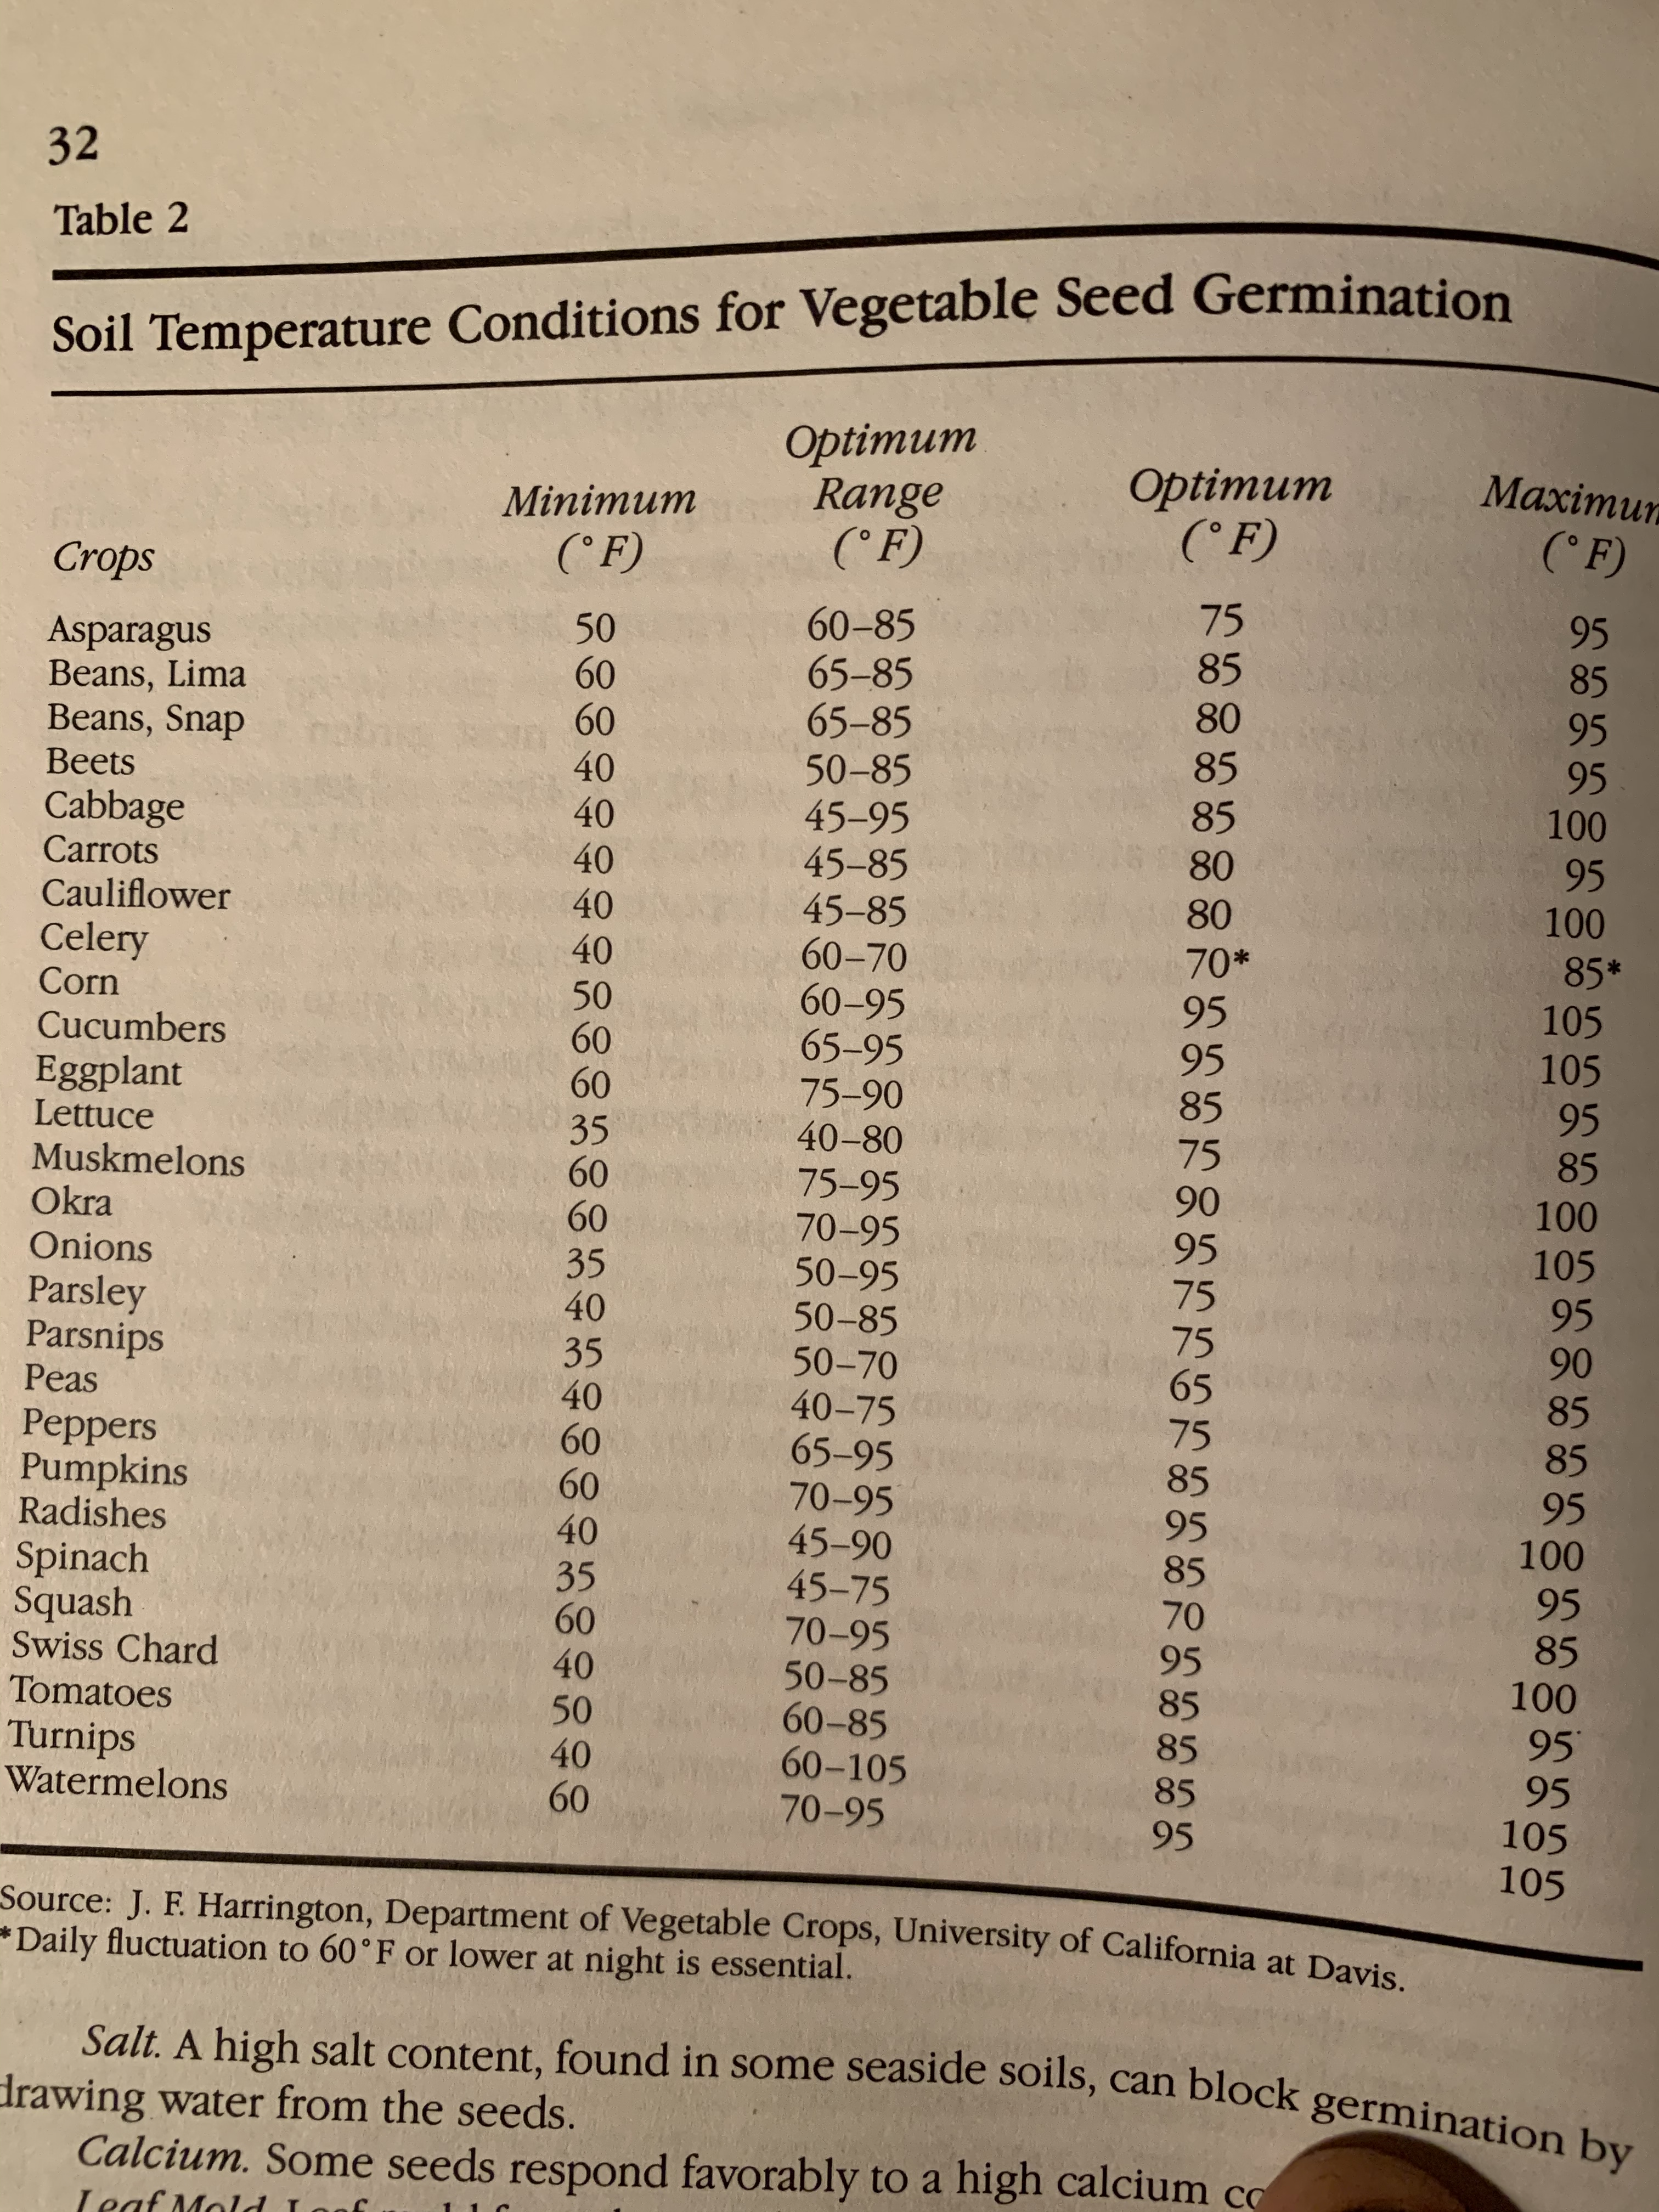
Soil temperature matters more to a seed that air temperature for germination. If you are starting seeds these days indoors, your seeds should be plenty warm to sprout. Most vegetable need 70-80 degree temps to germinate, but keep in mind this is the soil temperature which is different than air temperature. Optimal germination temperatures vary according to the crop, but indoors is plenty warm for all vegetables. Outside, the soil may still be too cold to activate germination, but right now you should only be sowing cool season crops like peas, lettuce, arugula, kale, chard, broccoli, cilantro, etc…. which all like cool temps to germinate… I plant peas in the snow and it works every time! Many people are planting carrot now, which is fine, but it is still chilly out there and they do take a while! You can do a few things heat up the soil faster like row cover, plastic covers, or mulch, and indoors heating mats work really well for peppers, eggplant and tomatoes, especially in January!… but the soil will warm up soon enough, wait for it!
Time– Most vegetable seeds need at least 7-10 days to germinate. If it has been over 2 weeks, your seed may not be viable, but chances are if they are new they are just needing more moisture or warmth to go for it.
Seed Viability-If your seed is brand new it should have at least 90% germination rate because companies actually test for that. If you have had your seeds for a while, or if you are questioning the viability of your seed because it is old or been stored questionably (maybe got too hot or wet?) you can do a seed viability test. Basically take ten seeds, place them spaced an inch apart on a moist paper towel. Slide the towel into a zip lock bag, label it with the date and put it on your fridge… Keep a spray bottle handy because the towel needs to stay moist, but chances are if the zip lock is truly sealed the moisture level will be fine. Depending on the type of seeds you’re testing, they should begin to germinate anywhere from 2-14 days. (Seeds like peas and beans will sprout faster, while seeds like carrots or parsnips will take much longer).
Once the seeds being to sprout, give them a day or two, and then take note as to how many sprouted vs. how many did not sprout. This will give you a germination rate.
Out of 10 Tested Seeds
1 seed sprouts = 10% germination rate
5 seeds sprout = 50% germination rate
10 seeds sprout = 100% germination rate
Obviously, the higher the germination rate, the better. Anything over 50% is decent. Anything lower than 50% still might be usable, but you may need to sow more thickly.
Mulch-Mulching is wonderful and necessary to retain moisture, create soil biology and protect your plants, but if a seed bed is over mulched before the seedlings are 3 inches tall it can suppress plants from coming up through it. I usually apply wet straw mulch around my seedlings, after they are 3 inches tall. If you do mulch with straw over a seed bed, make sure it is light and lose so the seedlings can push up through it. Like I mentioned above- Outside I like to use row cover to retain moisture till I get good germination.
Other Factors–
Soil Medium– Is there enough drainage in your soil mix? Some seeds get too much water and the soil isn’t draining properly. If you just scratch one up you may find they are actually rotting under the soil… it has happened to me!
Depth– Did you plant your seeds too deep? What about too shallow? Most things need soil contact to germinate ( expect many tiny flower seeds which actually need light to germinate). My rule of thumb is plant a seed twice as deep as it is wide… some say three times it’s size, but if you are buying seeds every pack will have very specific instructions to follow.
Pests– Did the mice, birds, cats come eat or dig up your seeds in the night? It’s happened to me!
Compaction– If your soil is too hard or compacted seeds may be struggling to germinate, and even if they do germinate they may not be able to wiggle those tiny roots down into the soil. Seeds need fluffy soil to take root.
Pre-soak– Many seeds like to be pre-soaked, especially really ones with really hard seed coats like Nasturtiums and Peas. Could help go things moving, give it a try.
I have written many times about growing sprouts at home cause it is just so darn easy and rewarding. I have lots of friends out there who simply can’t start vegetables indoors but sprouts only require attention for 10 days or so and really only need heat and water and a little sunshine.
You can grow them with kids and they just love it and you could just keep that going and forgo a garden altogether and still get a constant supply of yummy fresh food for your table.
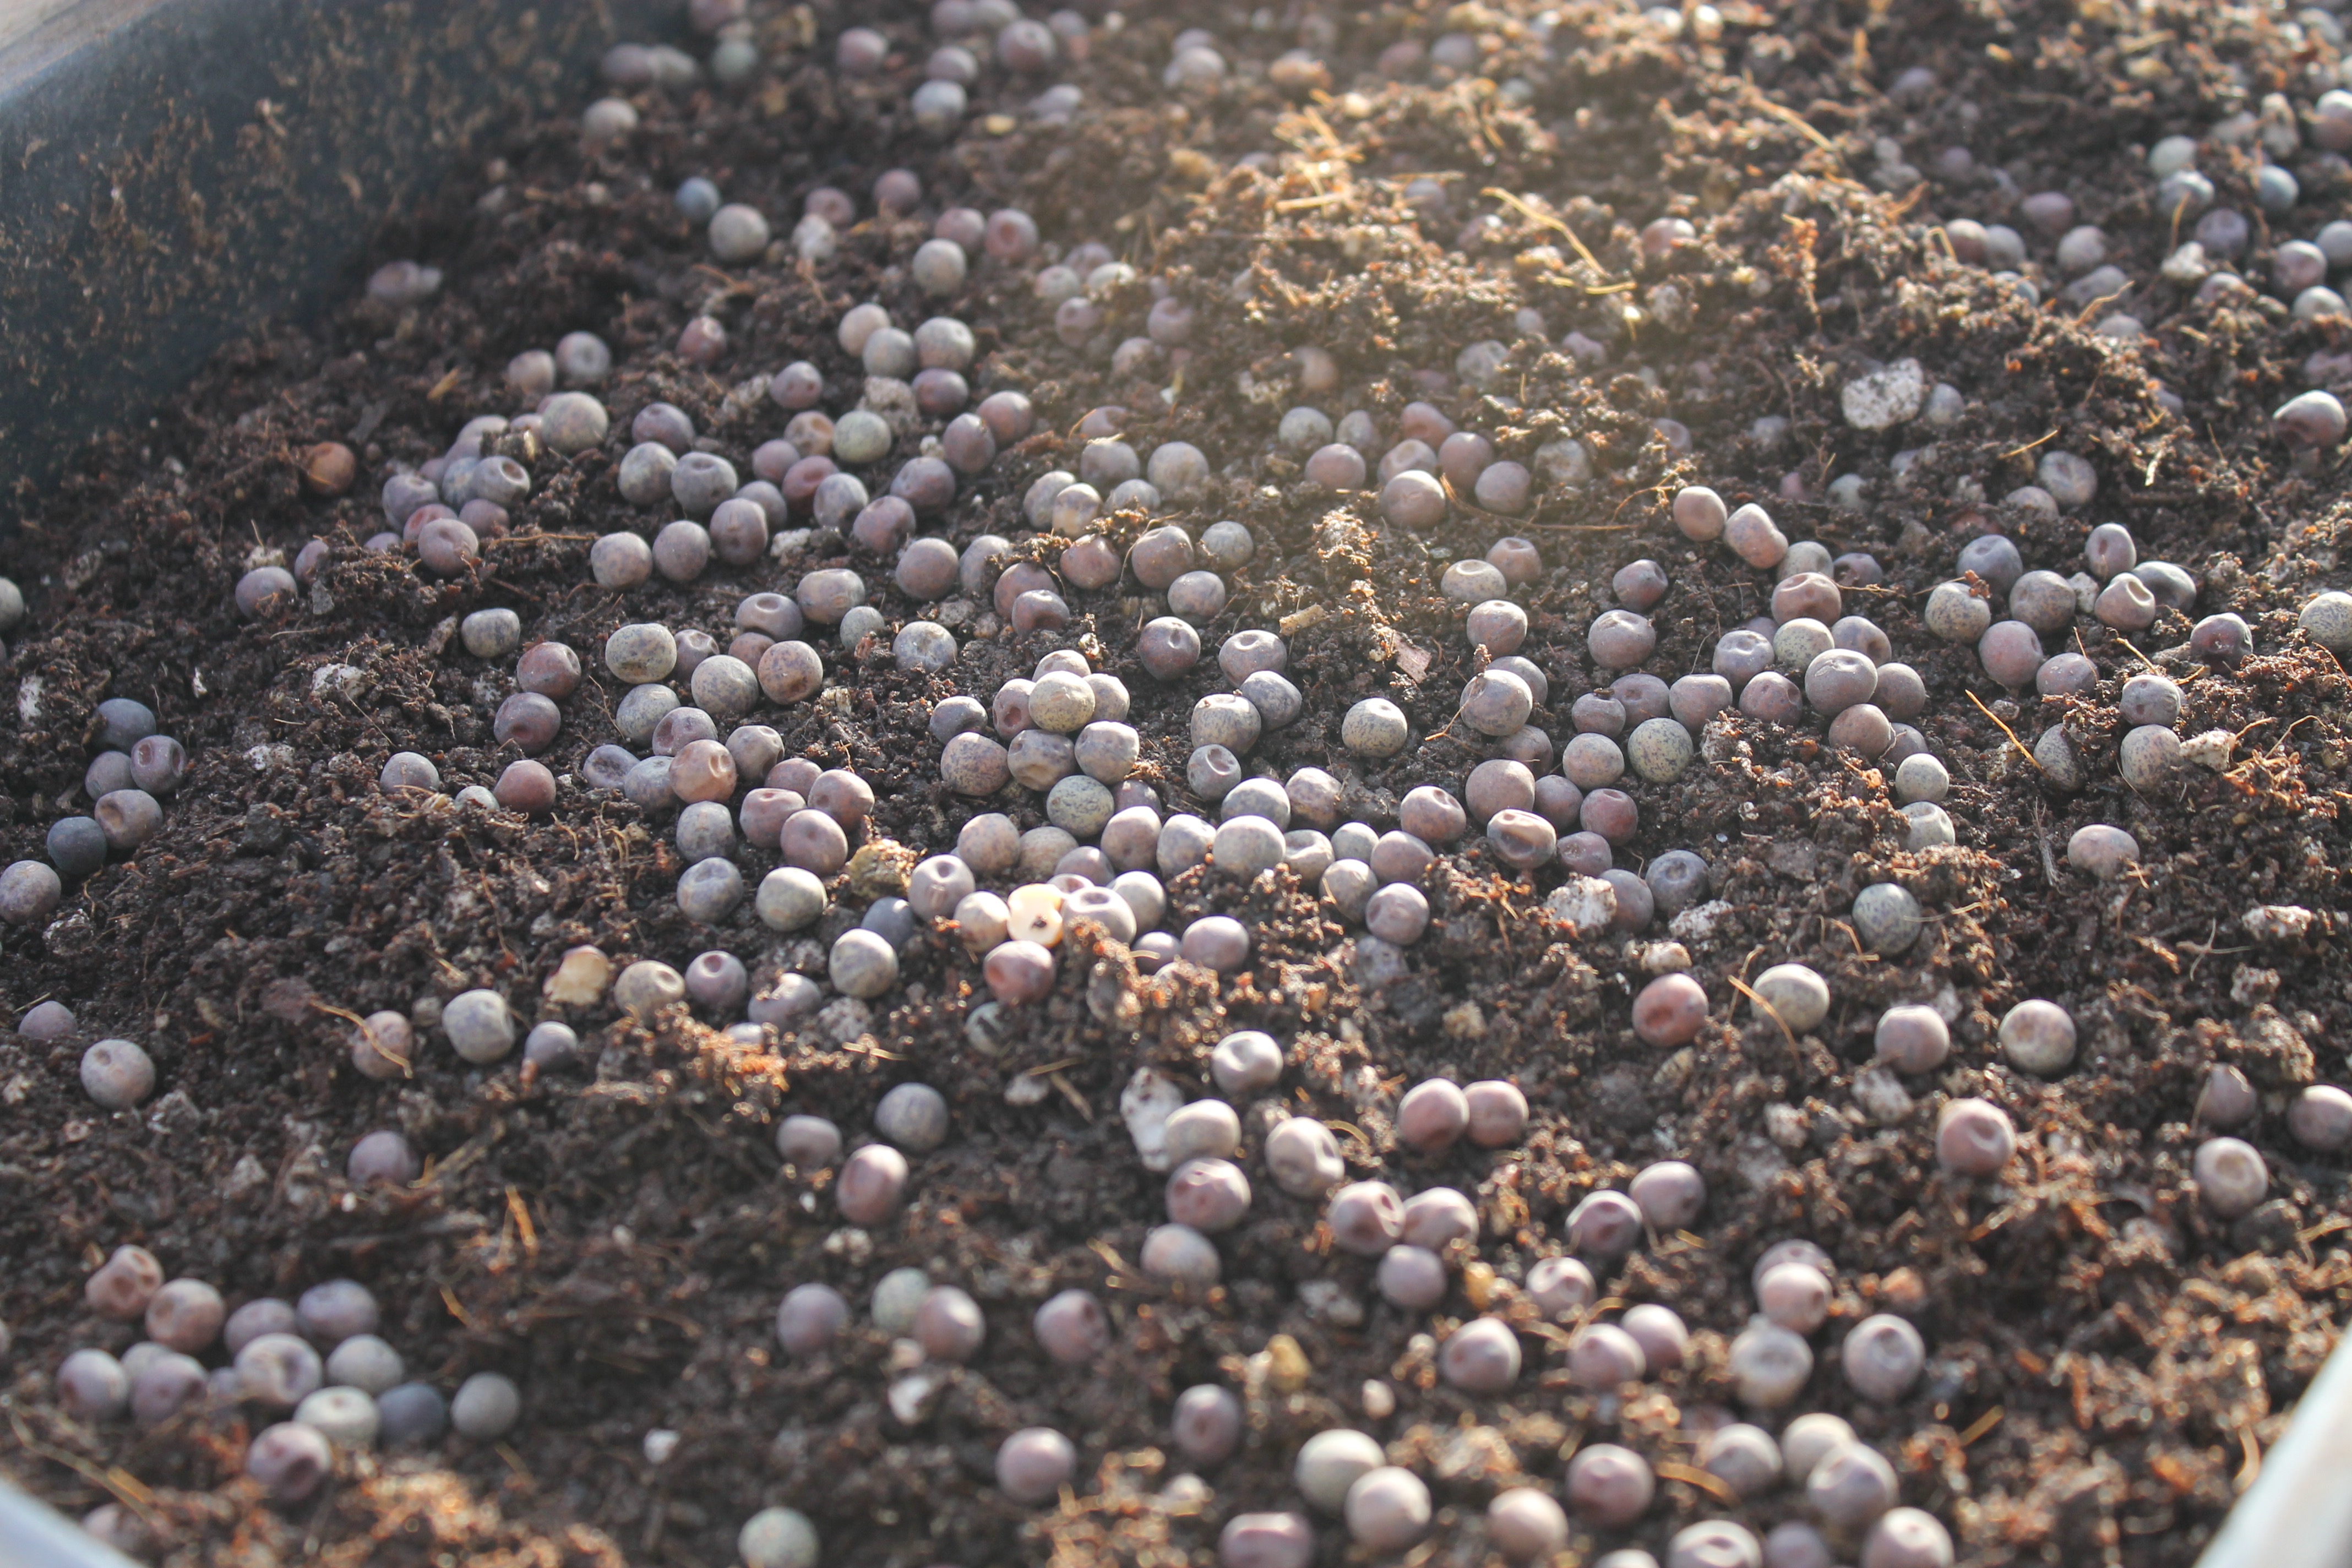
Field Peas Day 1
Here is last years link on growing sprouts and Micro greens. But seeing as today and tomorrow are leaf days I thought I would remind you to sow some sprouts indoors.
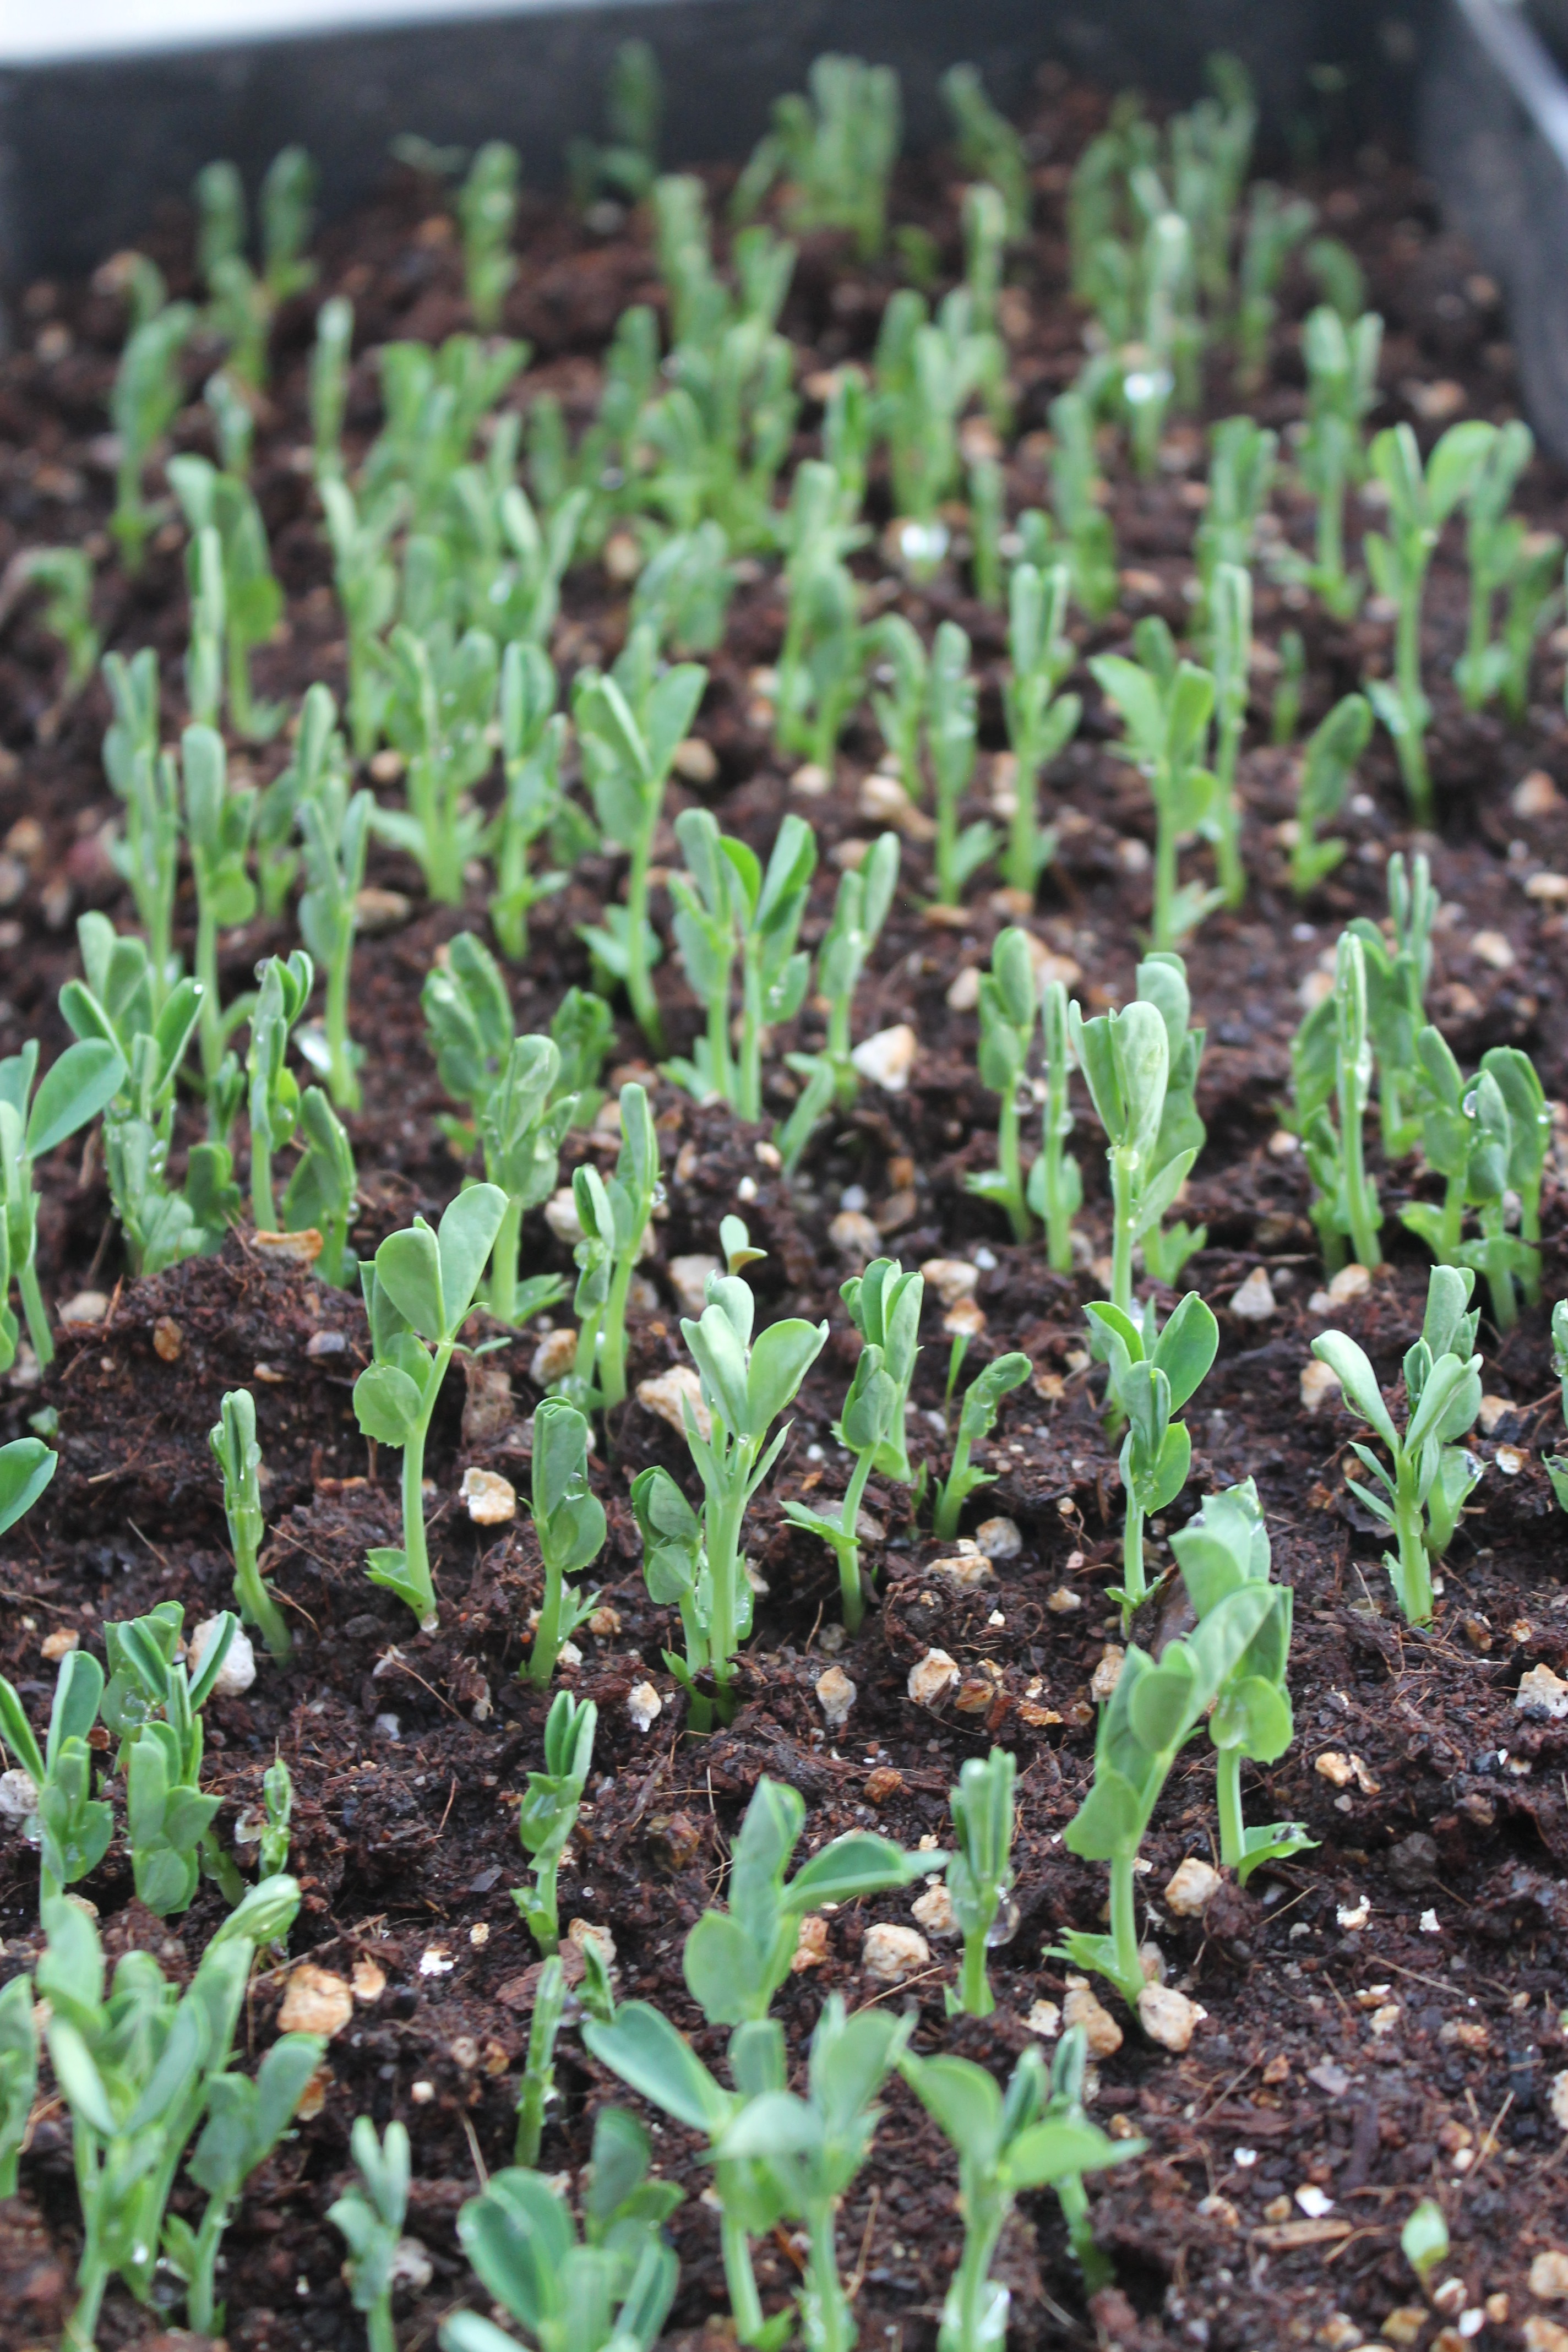
Field Peas day 7
If you do they may just be ready for Easter salads, and Easter baskets for that matter. Why not grow peas shoots or sunflower sprouts this year instead of grass and when the thrill of Easter morning has worn off, snip the sprouts into salad and get double your money…
Last Saturday I gave a public class on Seed Starting at Earth Care community garden. It went well and was well attended but made me realize a few things…..One was that a little re-cap may be useful, as people tend to have the same questions and quandaries about starting seeds indoors.
Seed Selection– Save your own, Trade, Share, Swap…If you are to buy seed go for heirlooms, locally appropriate and organic. If you would like to start your own seed saving collection, open pollinated varieties are what you need. Avoid hybrids (for seed saving) and GMOs at all cost! Sources I recommend:
Containers and Soil– There are of course so many choices, so I encourage you to use what you have and find what you like. My favorite are wooden flats so here is a link to making your own out of old pallets or new wood. I also prefer to make my own soil, so here is link to that, but of course find your method of ease a pleasure. Just remember for seedlings fluffy and light soil is best- high in peat moss or Coconut fiber. Once the seedlings the bigger they will need more nutrient rich mix or a rich garden bed and I will write more on that later.
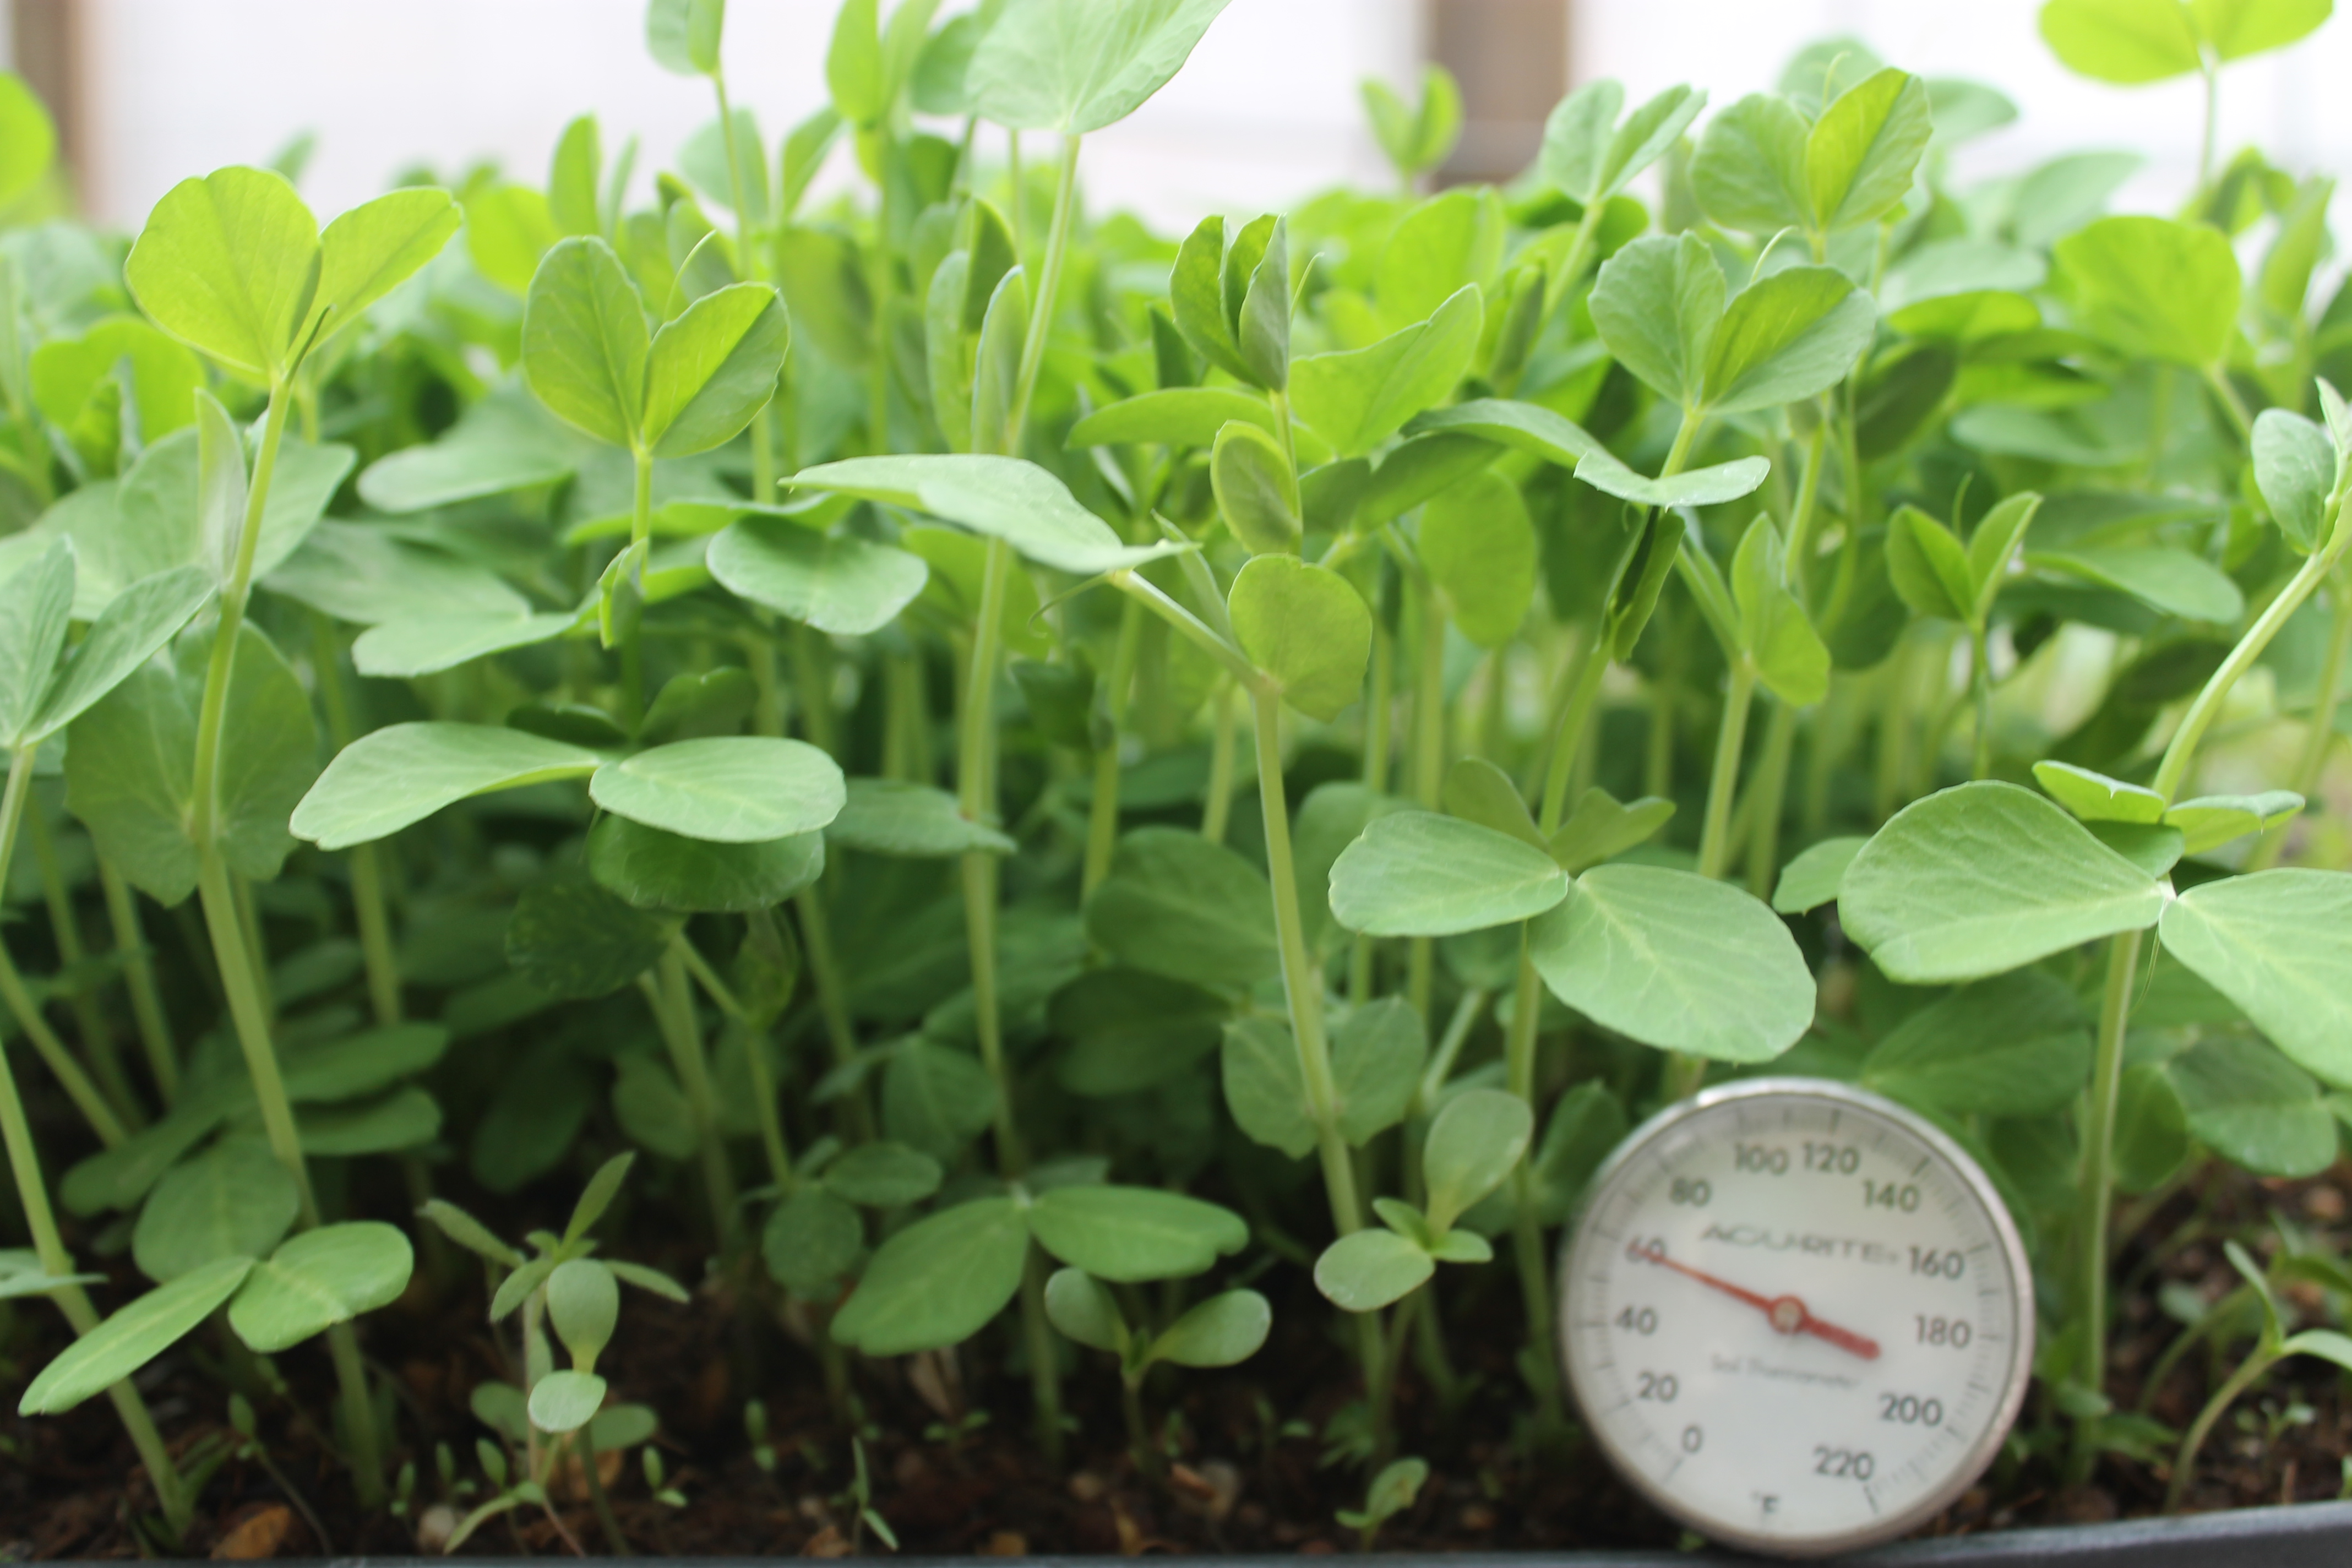
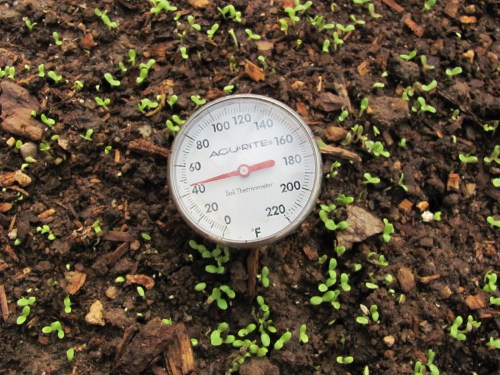
Temperature– Seedlings need different soil temperatures to germinate. For example some lettuces can germinate in soil that is 50 degrees and Tomatoes often need 70 degree soil. Here is a great Vegetable Planting Chart form High Mowing Seeds blog that has great info on soil temp, germination times, spacing and more. If you are starting your seedlings inside, the soil is probably stable at the temperatures of your house, but if not they are in an unheated greenhouse or cold frame, it is probably much colder. I simple Soil thermometer, purchase at any nursery, should help you see what your soil temps really are.
Check it morning and evening to see how it changes. Also check your seed packet to see if it tells you ideal soil temperatures for germination, so you know if you are waiting long enough before starting over. Remember if you seedlings haven’t come up yet, they are just waiting for the right chemistry, so don’t give up. Just keep working the elements of warmth, light and water till you see those sprouts. If you need to you can buy seedling heating mats here.
Light- This seems to be the most tricky for home growers. Many windows simply don’t get enough DIRECT sunlight. Choose a south-facing window that gets direct sun ALL day, that is at least 8-10 hours a day. The more the better. If your seeds sprouts but then get really long and leggy and look like the are desperately seeking the sun, you probably need to supplement with electric lights. So many people know so much more about that so google that.
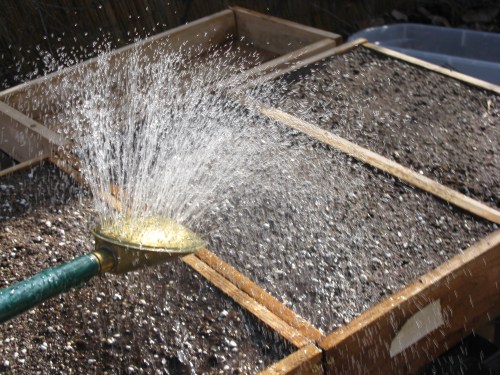
Water- Seeds really only need the right temperatures and moisture to germinate, that is sprouting before photosynthesis. Once you sow seeds (in a moist sowing mix) you MUST keep them moist at ALL times. Yep, Always!!!! that means watering many times a day if you need to, especially in a heated house in a south-facing window in the high desert!!!. A helpful tool may be a spray bottle. Set it on a fine mist and mist the soil. If you have children helping this is a great job for them and really can’t be over done. Once you see puddling on the surface of your soil, stop watering. A watering can with a fine sprinkle really is necessary, as big flows of water can wash the seed right out of the soil. Because the seed is only in the first inch of soil, this is what need to be moist. Once a plant grows the water needs to go deeper and the plants can be watered less frequently, but int he the beginning, moist always.
Water quality has an effect too. I use my precious rain water for seedlings and really have noticed a difference from the years I have used our hard well water. Tap water is ok, but it is best to fill your watering can or a big bucket hours, or days before you water so that the chlorine in the water can evaporate and the water can come up to room temperature. Cold water can shock plants and of course chlorine can harm them.
Seed Needs– Each seed of course has it’s own temperament. Some like to be planted deep, some with no soil at all. Some need fire, freeze or even scaring to crack their seed coats. They say a generally to plant seeds twice as deep as they are wide. Seed packets are great source of information, but if you don’t have packets, the High Mowing Vegetable Planting Guide works great to find out all the little special needs of each of your precious seeds.
So there you have it– If you seeds are warm, wet, sunned and in a good growing medium they should come up just fine. Plants are more like us than we might think. If you are cold, they probably are, too hot, the might be too.
Now planning your sowing timing and taking care of the babies well so that they thrive and are ready to go outside when the times comes, oh and of course there is seed starting outdoors as well…..but I think I will write more on that later, for now this should get you started if you haven’t jumped in already. Happy Seed Sowing!
As you may have gleaned from my blog, I like to garden. I like it so much that is mostly what I write about, and frankly do with most of my time. I also teach gardening and have in lots of different places from the Children’s Museum, to Elementary Schools, then high schools, and now I even teach it at a college!! This Saturday I will be teaching a class to the public hosted by Homegrown New Mexico and held at Earth Care Community Garden.
We will cover as much as we possibly can about seed selection, sowing mediums, containers, schedules, technique, and care in 2 hours. It would be great so see some of you there! RSVP here.
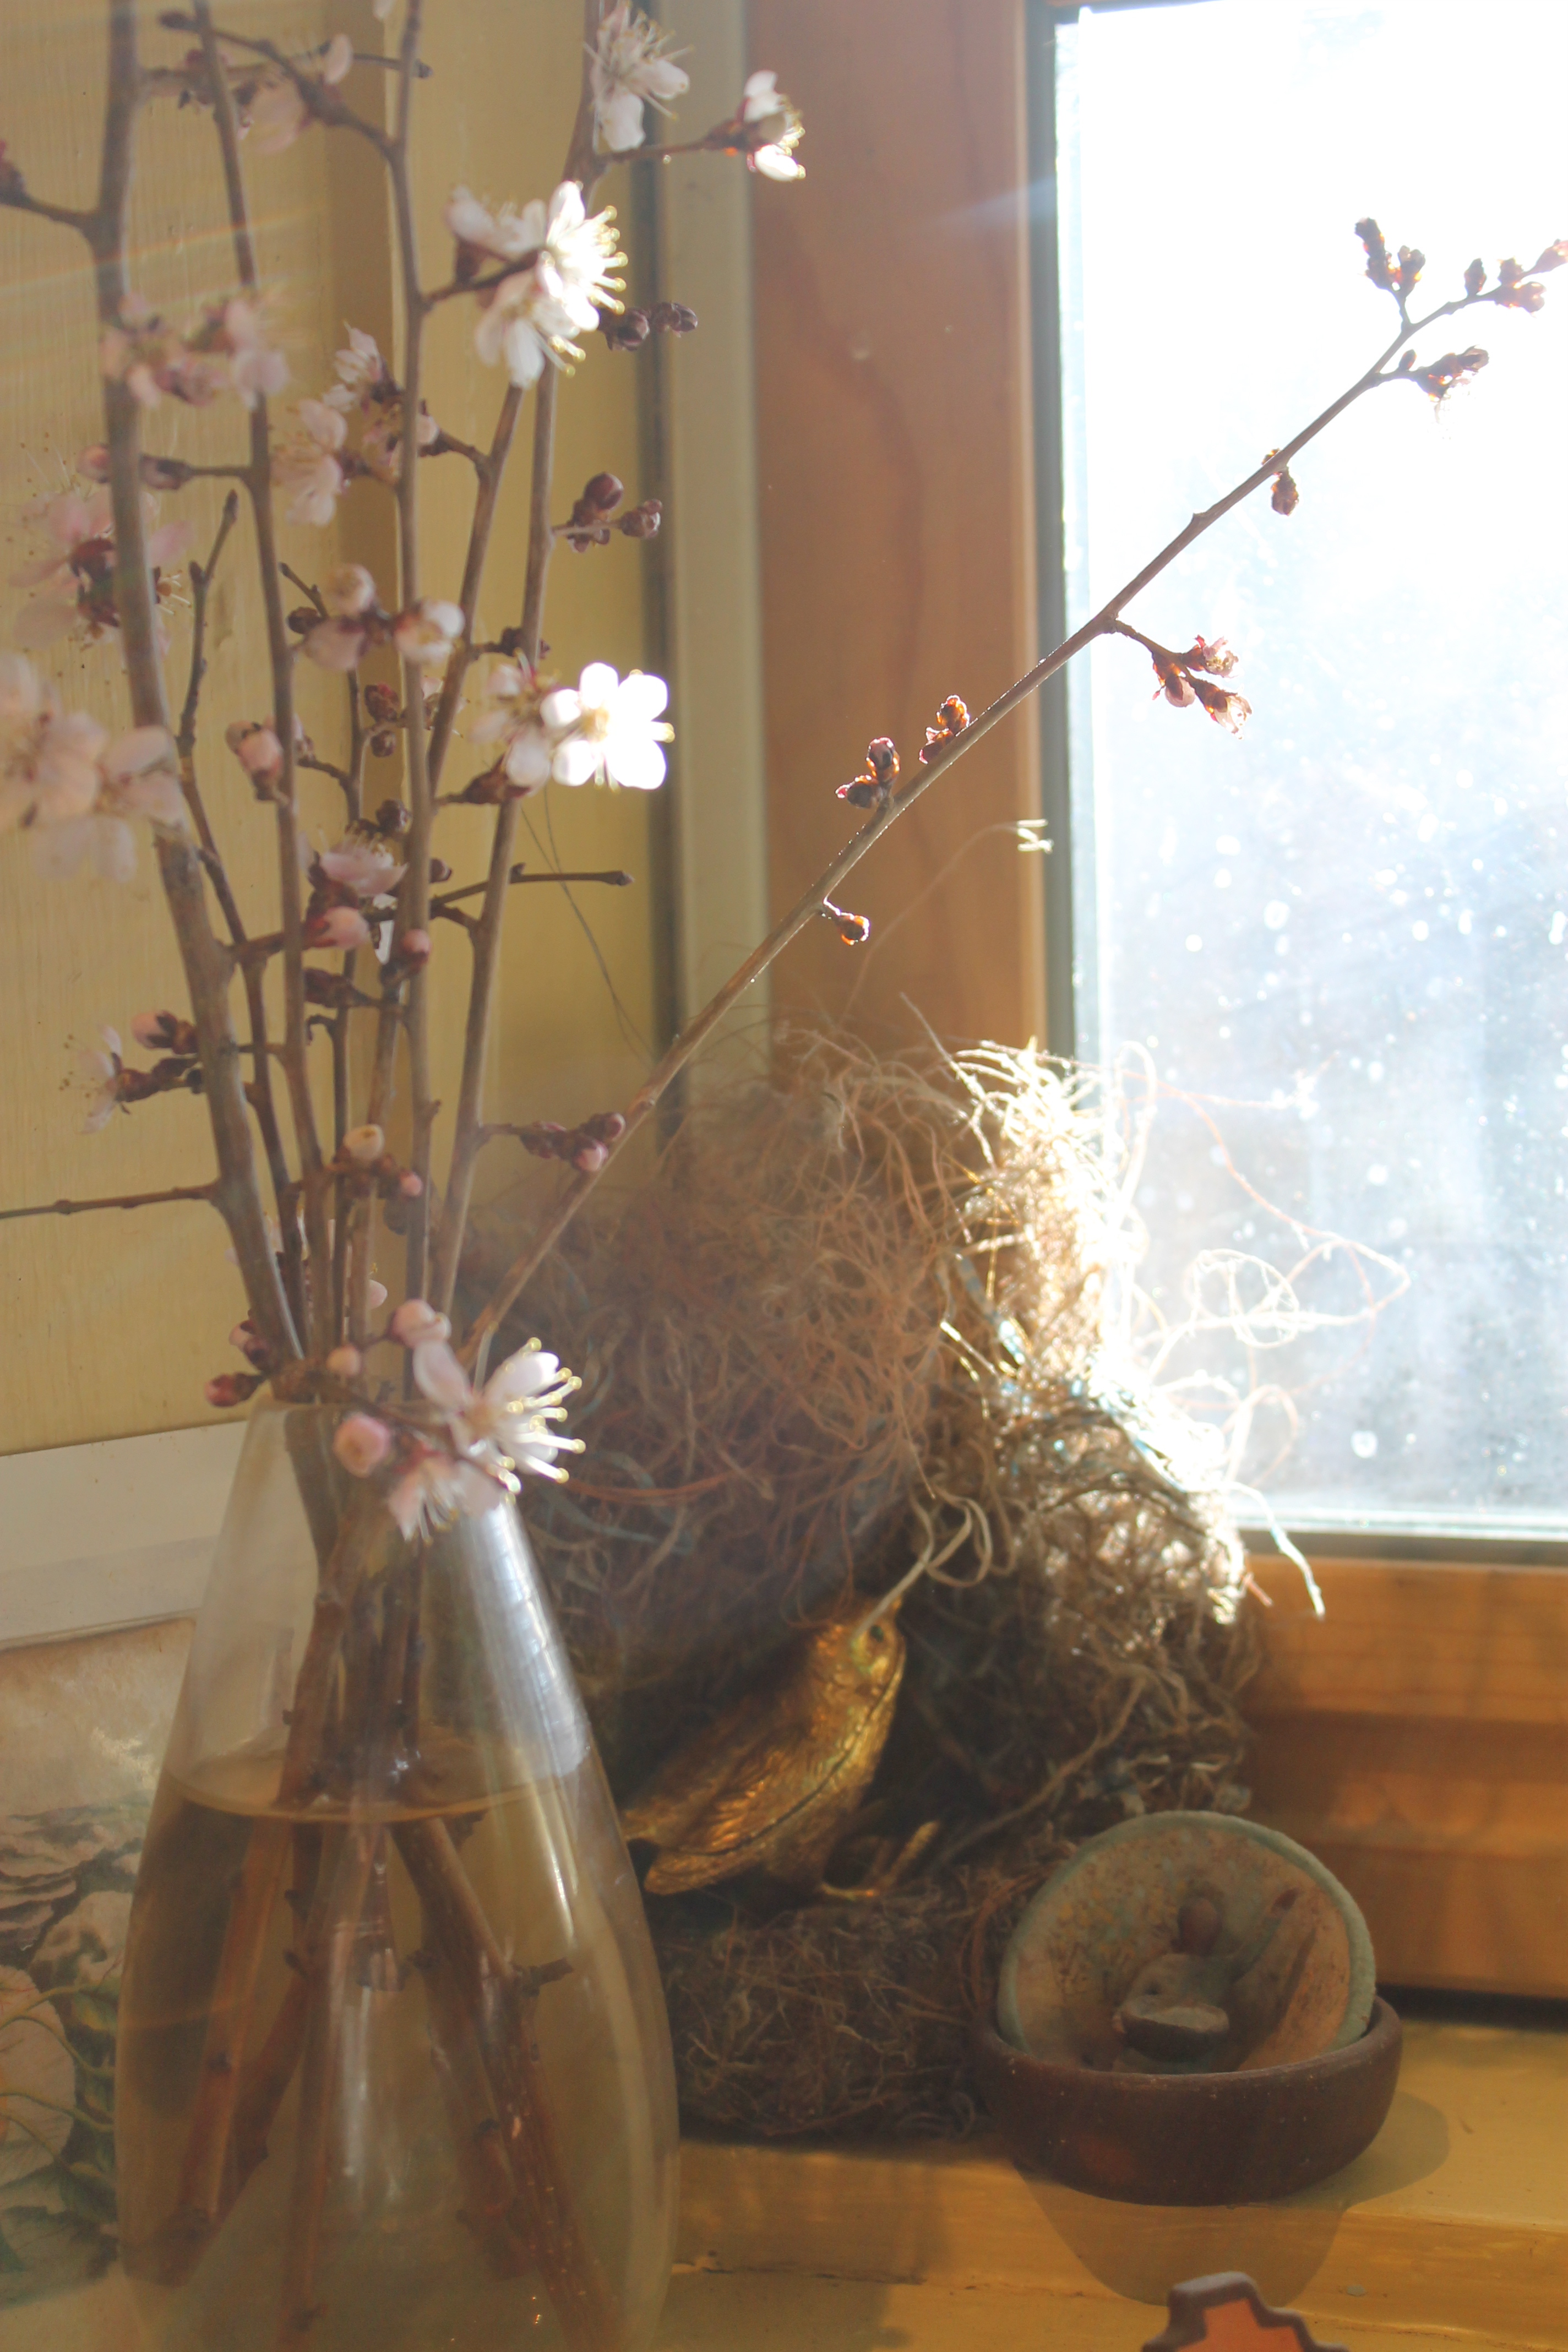
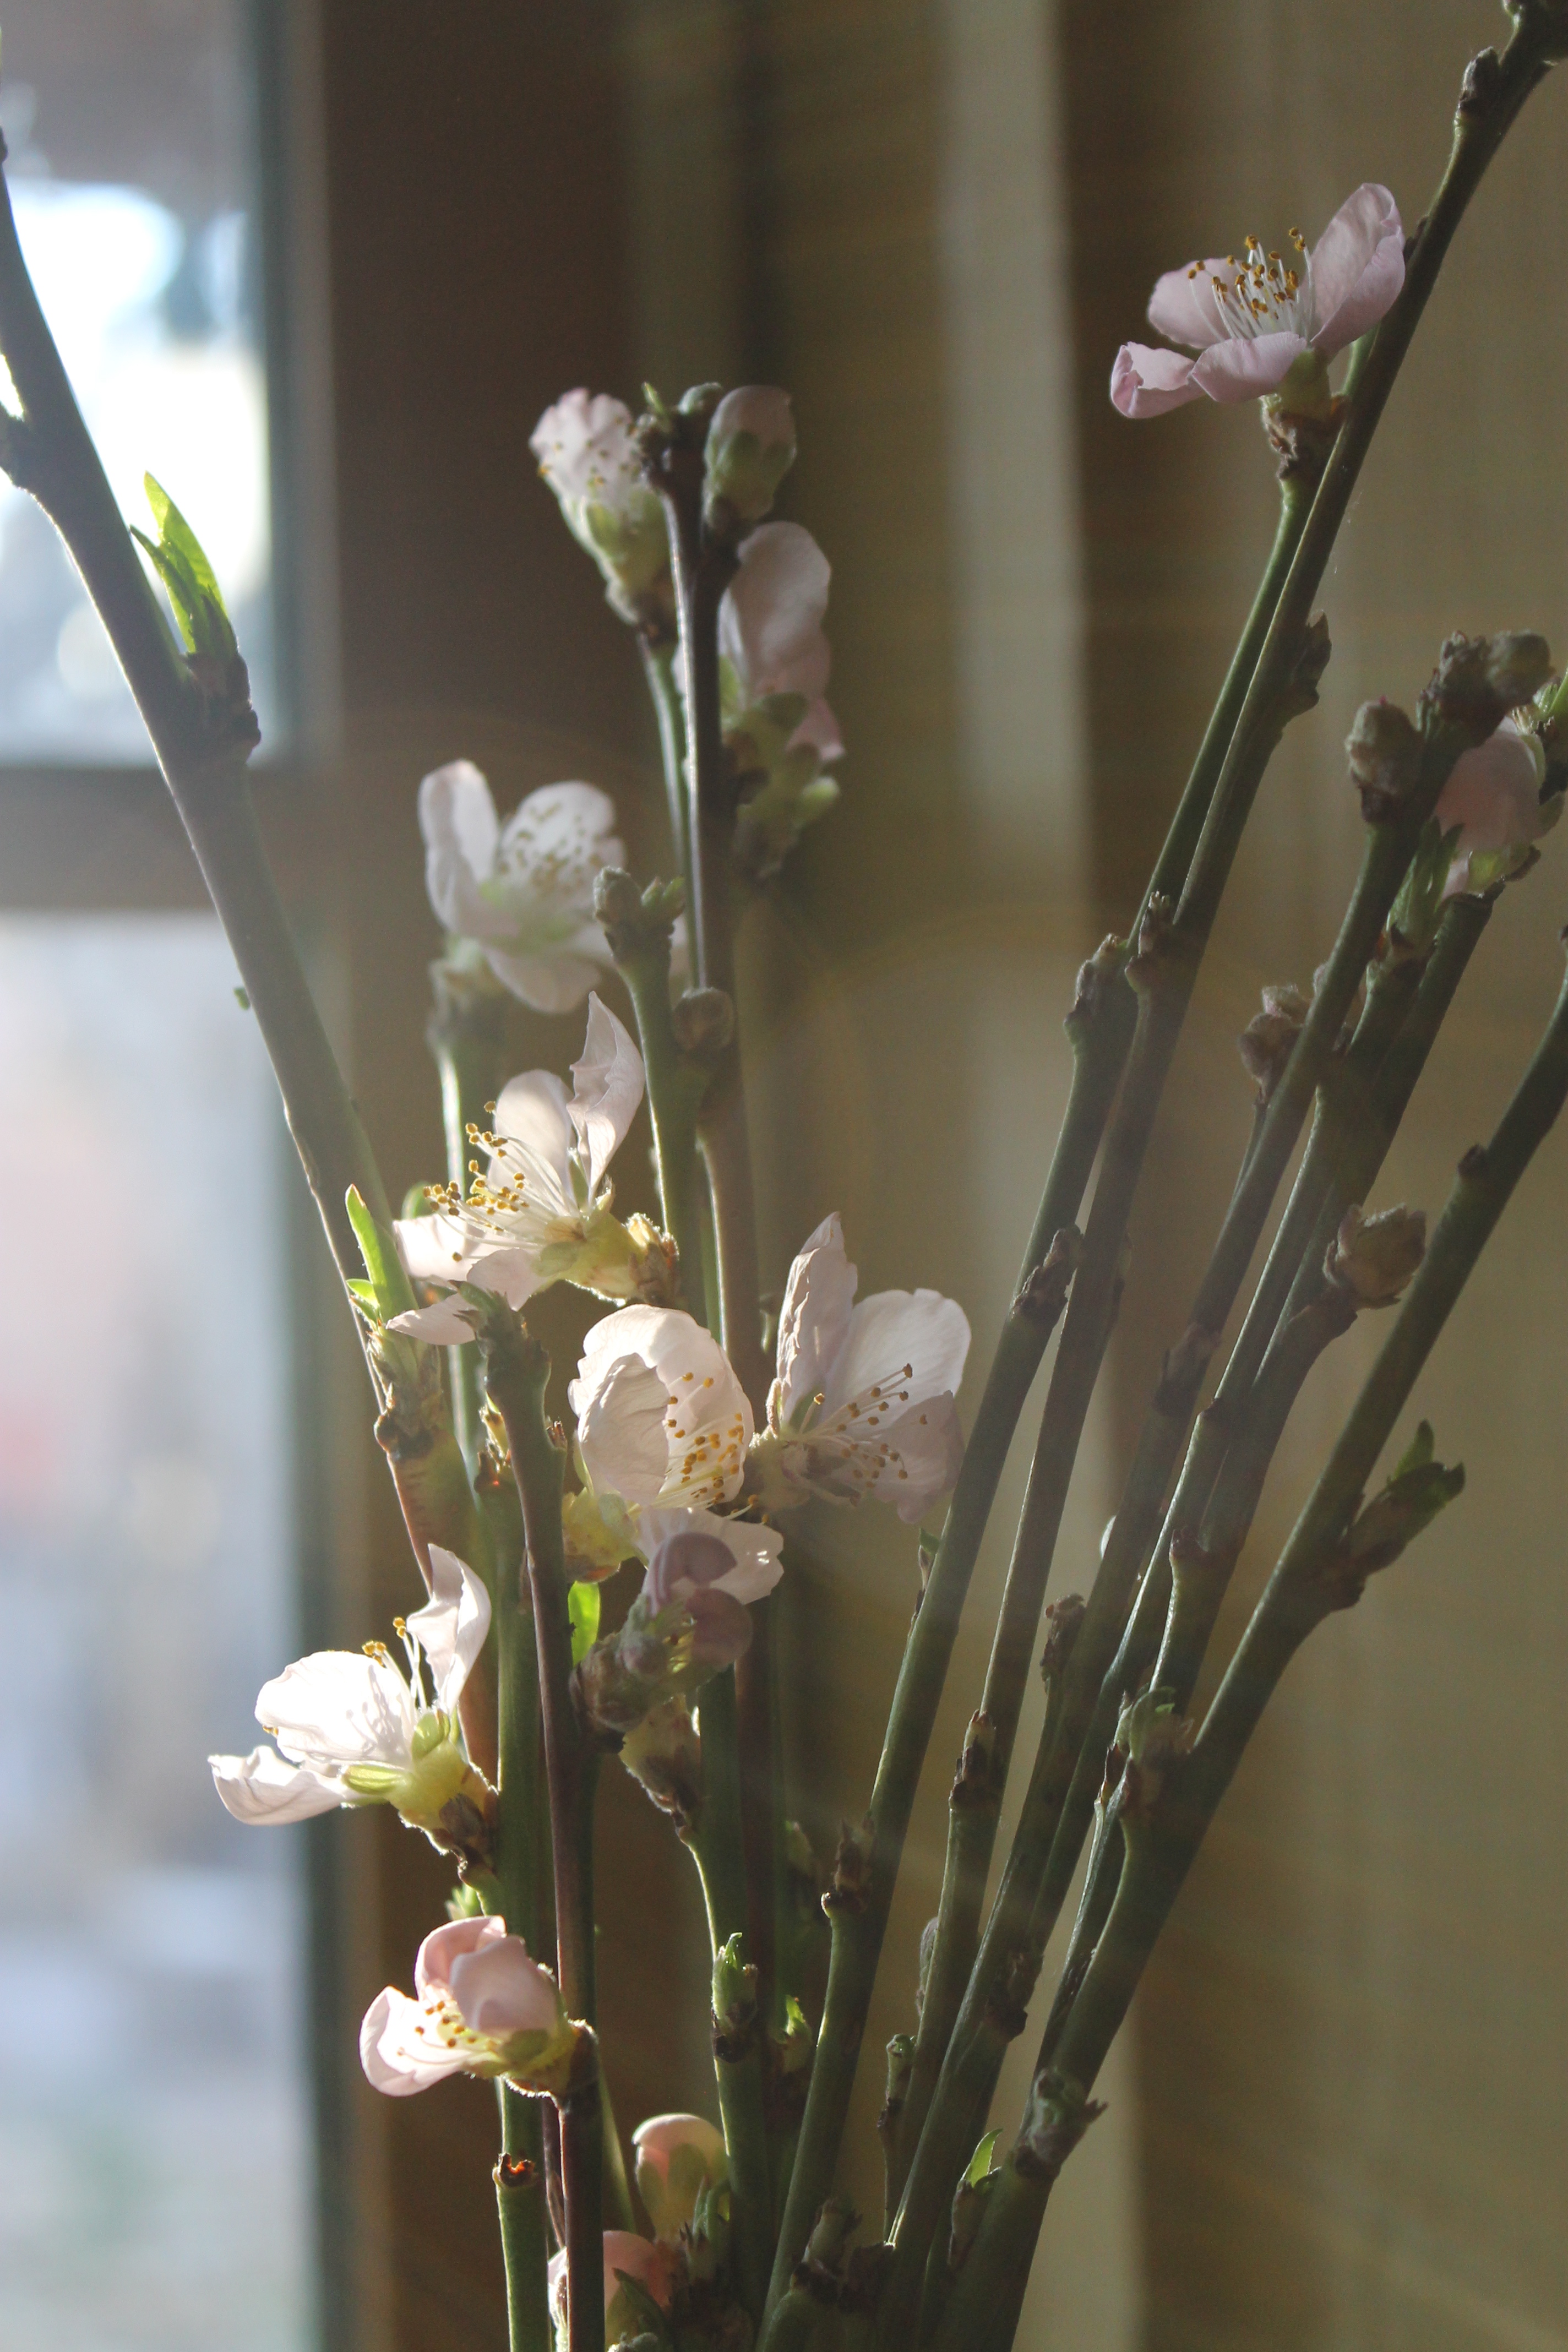
It is that time of year where the sun streams in from the East just as we rise, illuminating everything just so, that I must grab the camera before I put the kettle on and make breakfast.
The prunings from the Apricot and Peach are pushing blooms in our window sill
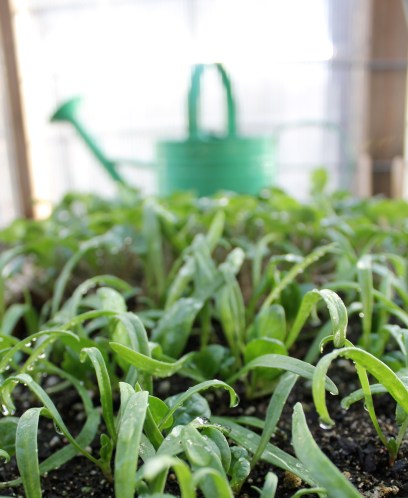
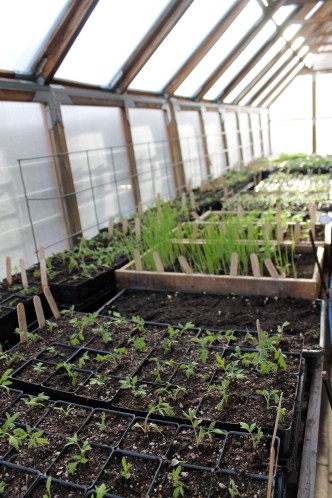
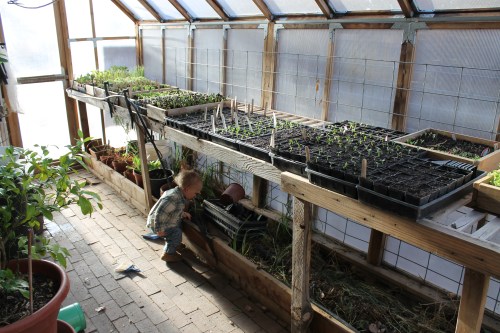
Everyone is sprouting up beautifully in the greenhouse.
Jaengy and I are spending a good portion of each morning now playing in the dirt and water & seeds. Feeling so lucky to have such a playroom for us both.
Struck so deeply by the light of morning, the calm, the beauty… I seek the words but only find pictures to share this glory….But then of course I turn to this and I simply must share.
Morning Poem
Every morning
the world
is created.
Under the orange
Sticks of the sun
the heaped
ashes of the night
turn into leaves again
and fasten themselves to the high branches-
and the ponds appear
like black cloth
on which are painted islands
of summer lilies.
If it is your nature
to be happy
you will swim away along the soft trails
for hours, your imagination
alighting
everywhere.
And if your spirit
carries within it
the thorn
that is heavier than lead-
if it’s all you can do
to keep on trudging-
there is still
somewhere deep within you
a beast shouting that the earth is exactly what it wanted-
I make potting mix every year for my greenhouse seedlings. I also make mixes for my mom’s raised garden beds, (at home I grow in the ground and do things a bit differently for that). I have written about making potting soil many times here & here, but every year I refine it, learn more, change things, or get my hands on something new.
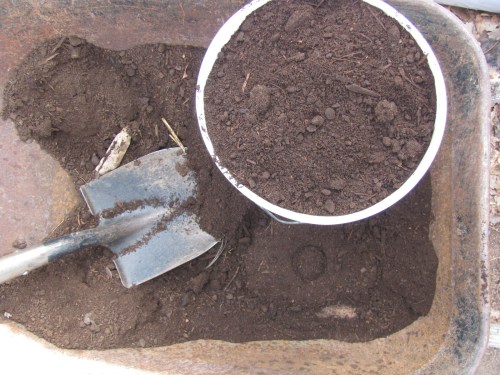
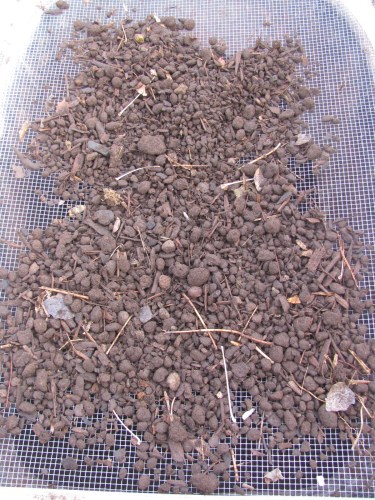
I gather my materials from my yard and pre- sift everything so I have it ready to make mixes when I want to. I sift it because little plants need readily available nutrients and fine tilth so their roots have an easy time growing. Any big chunks sifted out can go back into the landscape under big trees and around perennials.
Materials
Sifted Compost from your own pile (or another source if not is available)
Sifted Soil from your garden
Sifted Sand from your arroyo
Moistened Coco Peat ( this is the only thing I buy and I get it locally at Agua Fria Nursery)
I get all this stuff in advance and store it in bins so everything is ready to go when I need to mix.
Once I have everything gathered I get my
wheel burrow,
a 5 gallon bucket,
a shovel and
a hoe.
Here is my the recipe I use, adapted from my Alma Matar, CASFS.
It is a parts recipe, but if you use a 5 gallon bucket as your measuring cup and follow this recipe you will get a full wheel burrow, which will be enough soil for 10 flats of 2 inch pots or 6 homemade wooden 2x1ft seedling trays.
Mix into wheel burrow
1 Bucket-Shifted Compost
1Bucket- Shifted Garden soil
1 Bucket Coco Peat
This is the base recipe from here you can add all sorts of fancy things if you have them:
Oh there is so many thing you can add to soil mixes and that is really determined by how much money you have, what you are trying to grow. I keep things pretty simple around here, but have fun with what you decide to add to you soil, (or ask me for more advice!)
Mix everything well with a hoe and sprinkle occasionally with water.
The moisture level is key, not only does it cut down yucky dust, but you want a nice moist mix in your flat before you seed.
If it is too dry it will actually repel water and you tiny seeds will float away in the run off.
Give it a squeeze and release
If it stays in a loose ball and breaks apart when you bounce it in your palm you have got it. Now store it in a bin with a lid to keep that perfect moisture, or put it directly into you flats and sow away!
And that is that. Once you have your flats made & potting mix made, now all you have to do is decide what to grow. Go here if you are ready for the next step!
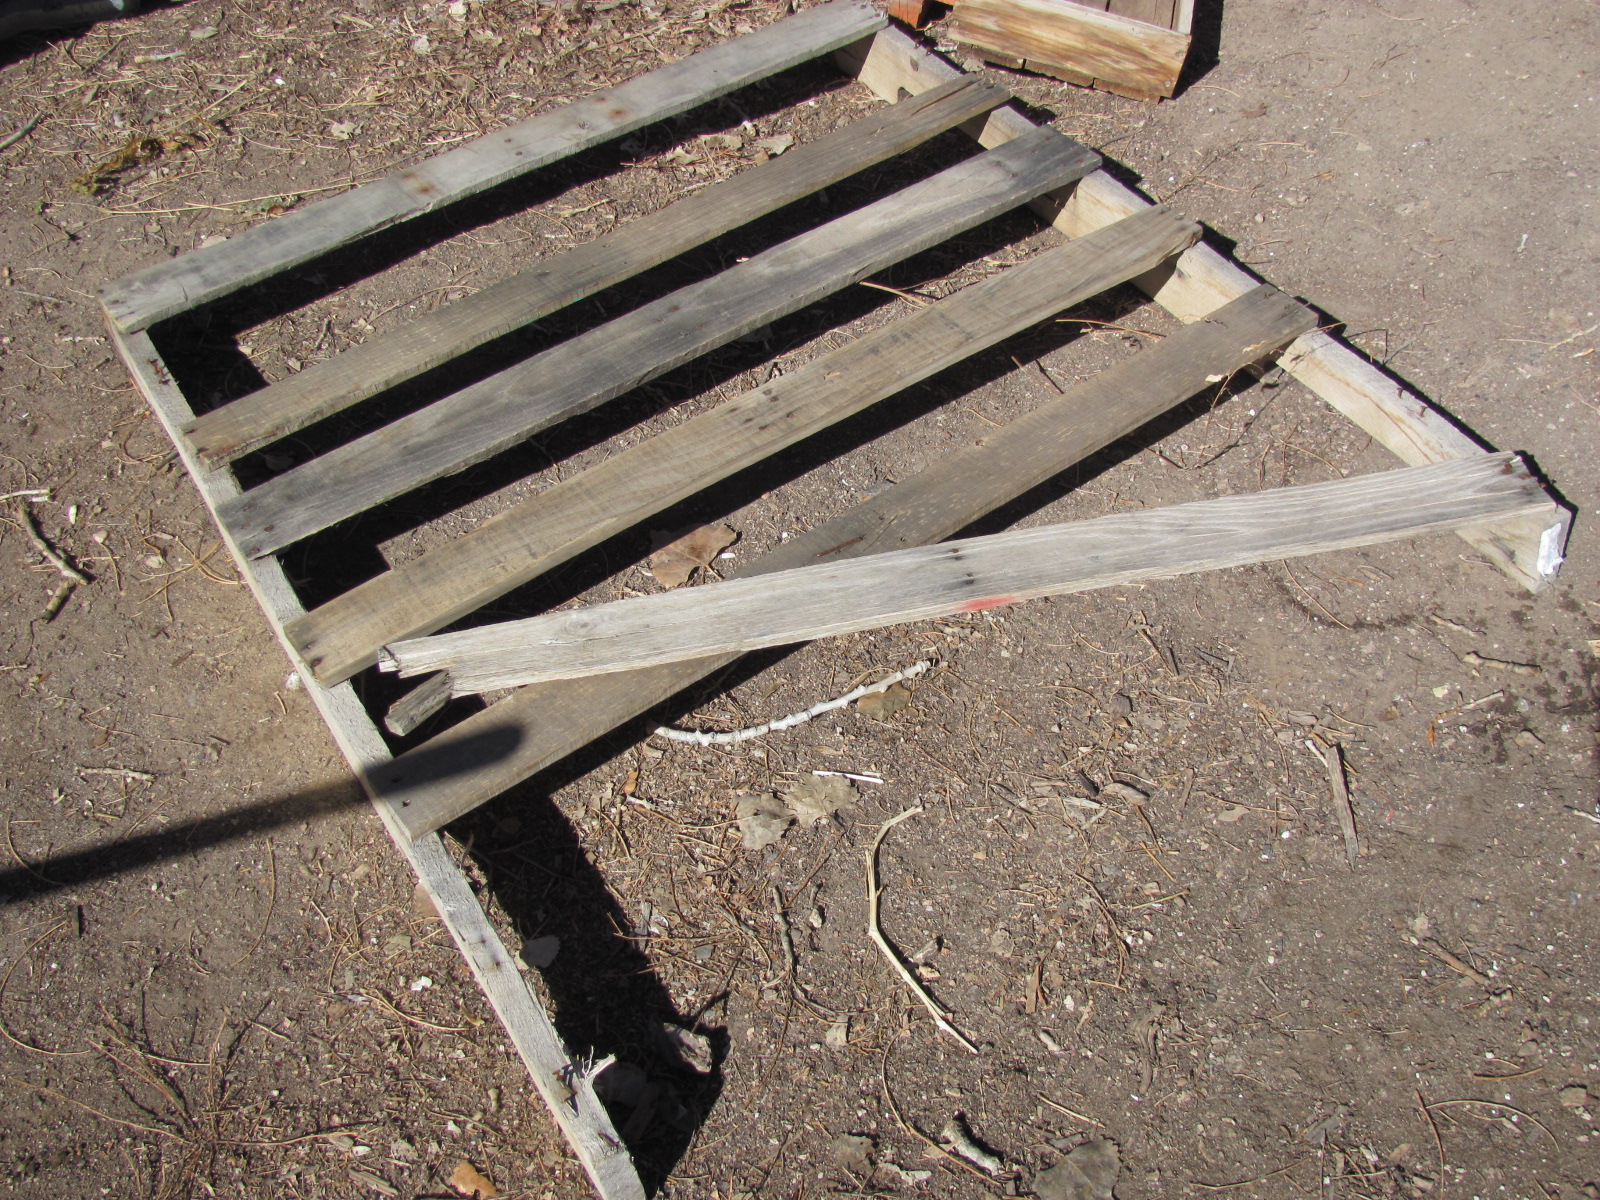
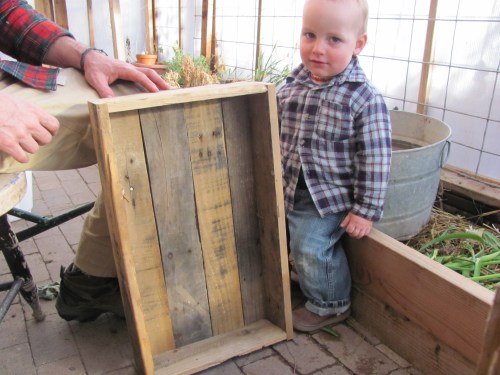
Is there anything you can’t make out of an old pallet? Yes, it does take more time and a bit more know-how to upcycle a pallet into a totally different and functional thing, but luckily I have an expert on my side. Yep, Joel does it again. This time he made me a new seed planting flat out of recycled pallet wood.
(Note: I do also do make these out new wood too, see here)
=
Cool Huh? Want to try? Here is how he did it.
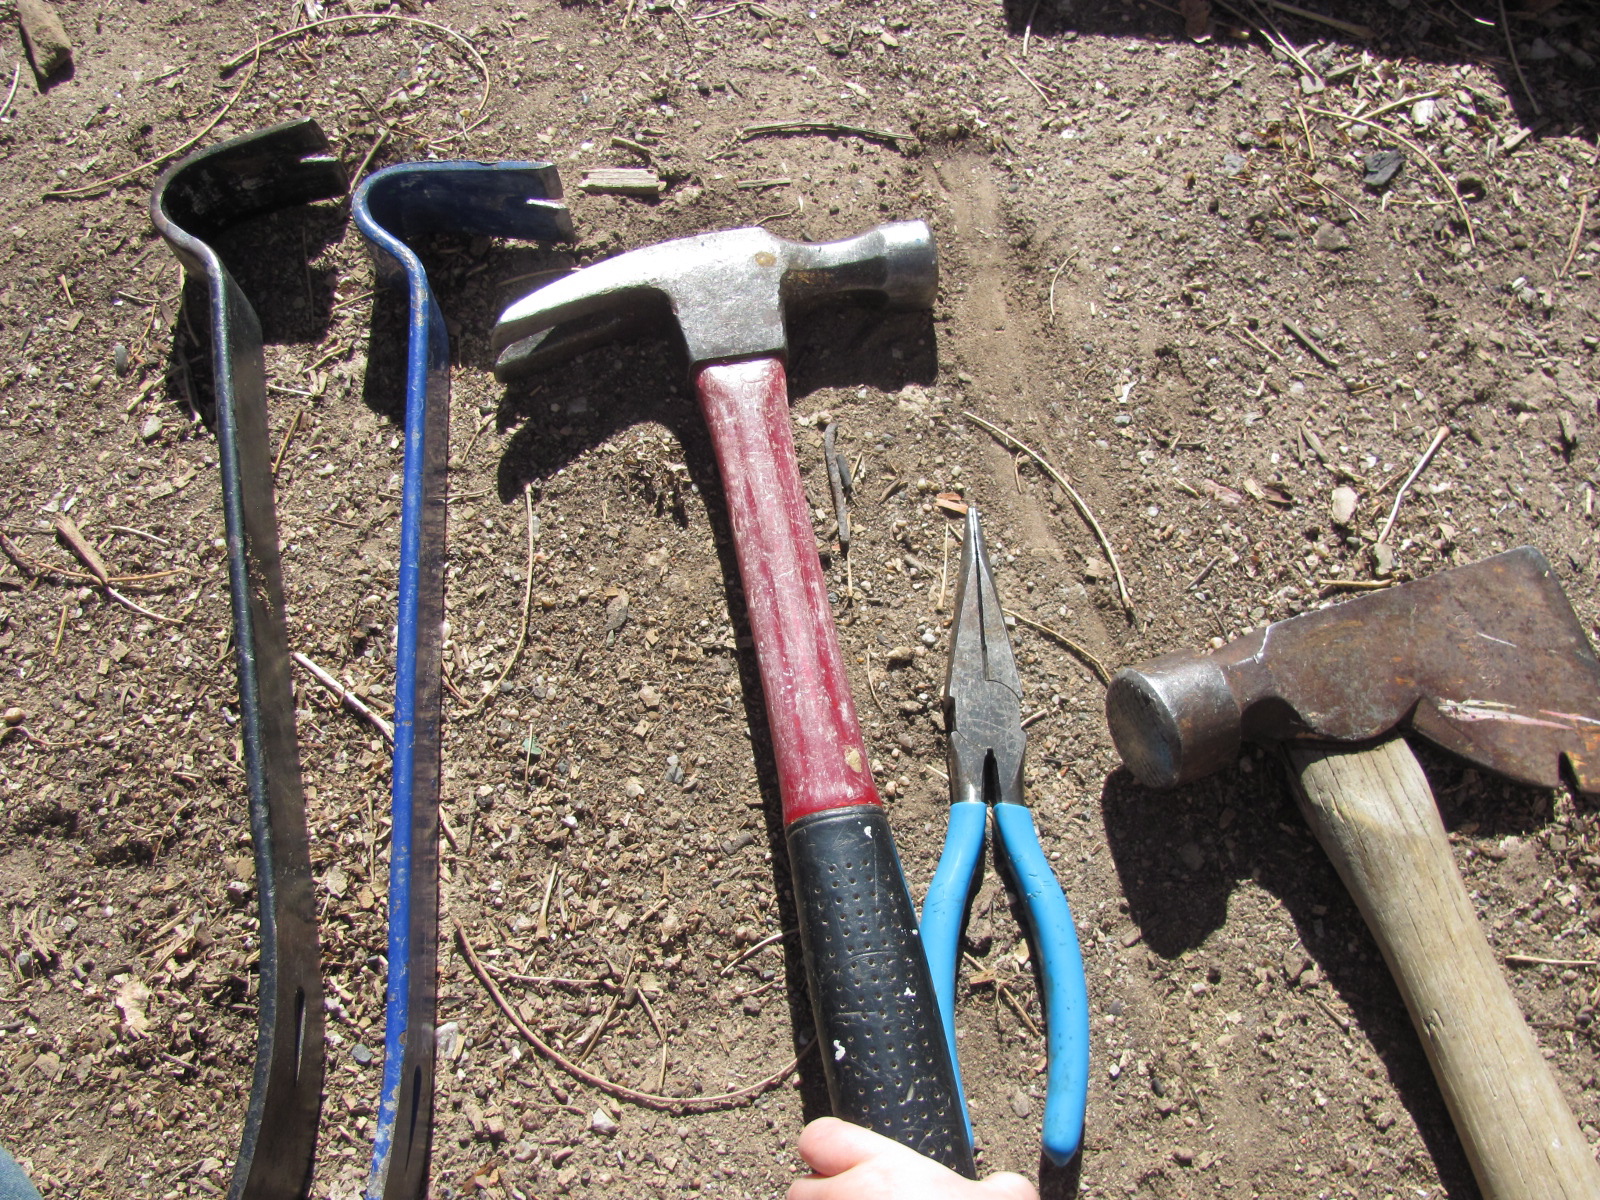
First, he tore the pallet apart with a flat bar to get the the lumber in order.
Then he used the cross pieces which were 3.5inches wide and 1/2 to 3/4 inches thick. There was mix of oak (harder, longer lasting, heavier) & pine (softer, easier to work with lighter)
Then he cut off the split tips with the nails in them- to have clean, split free ends and not to bother with pulling out the nails.
Then he cut 2 pieces at 1ft long and 6pieces at 2ft long
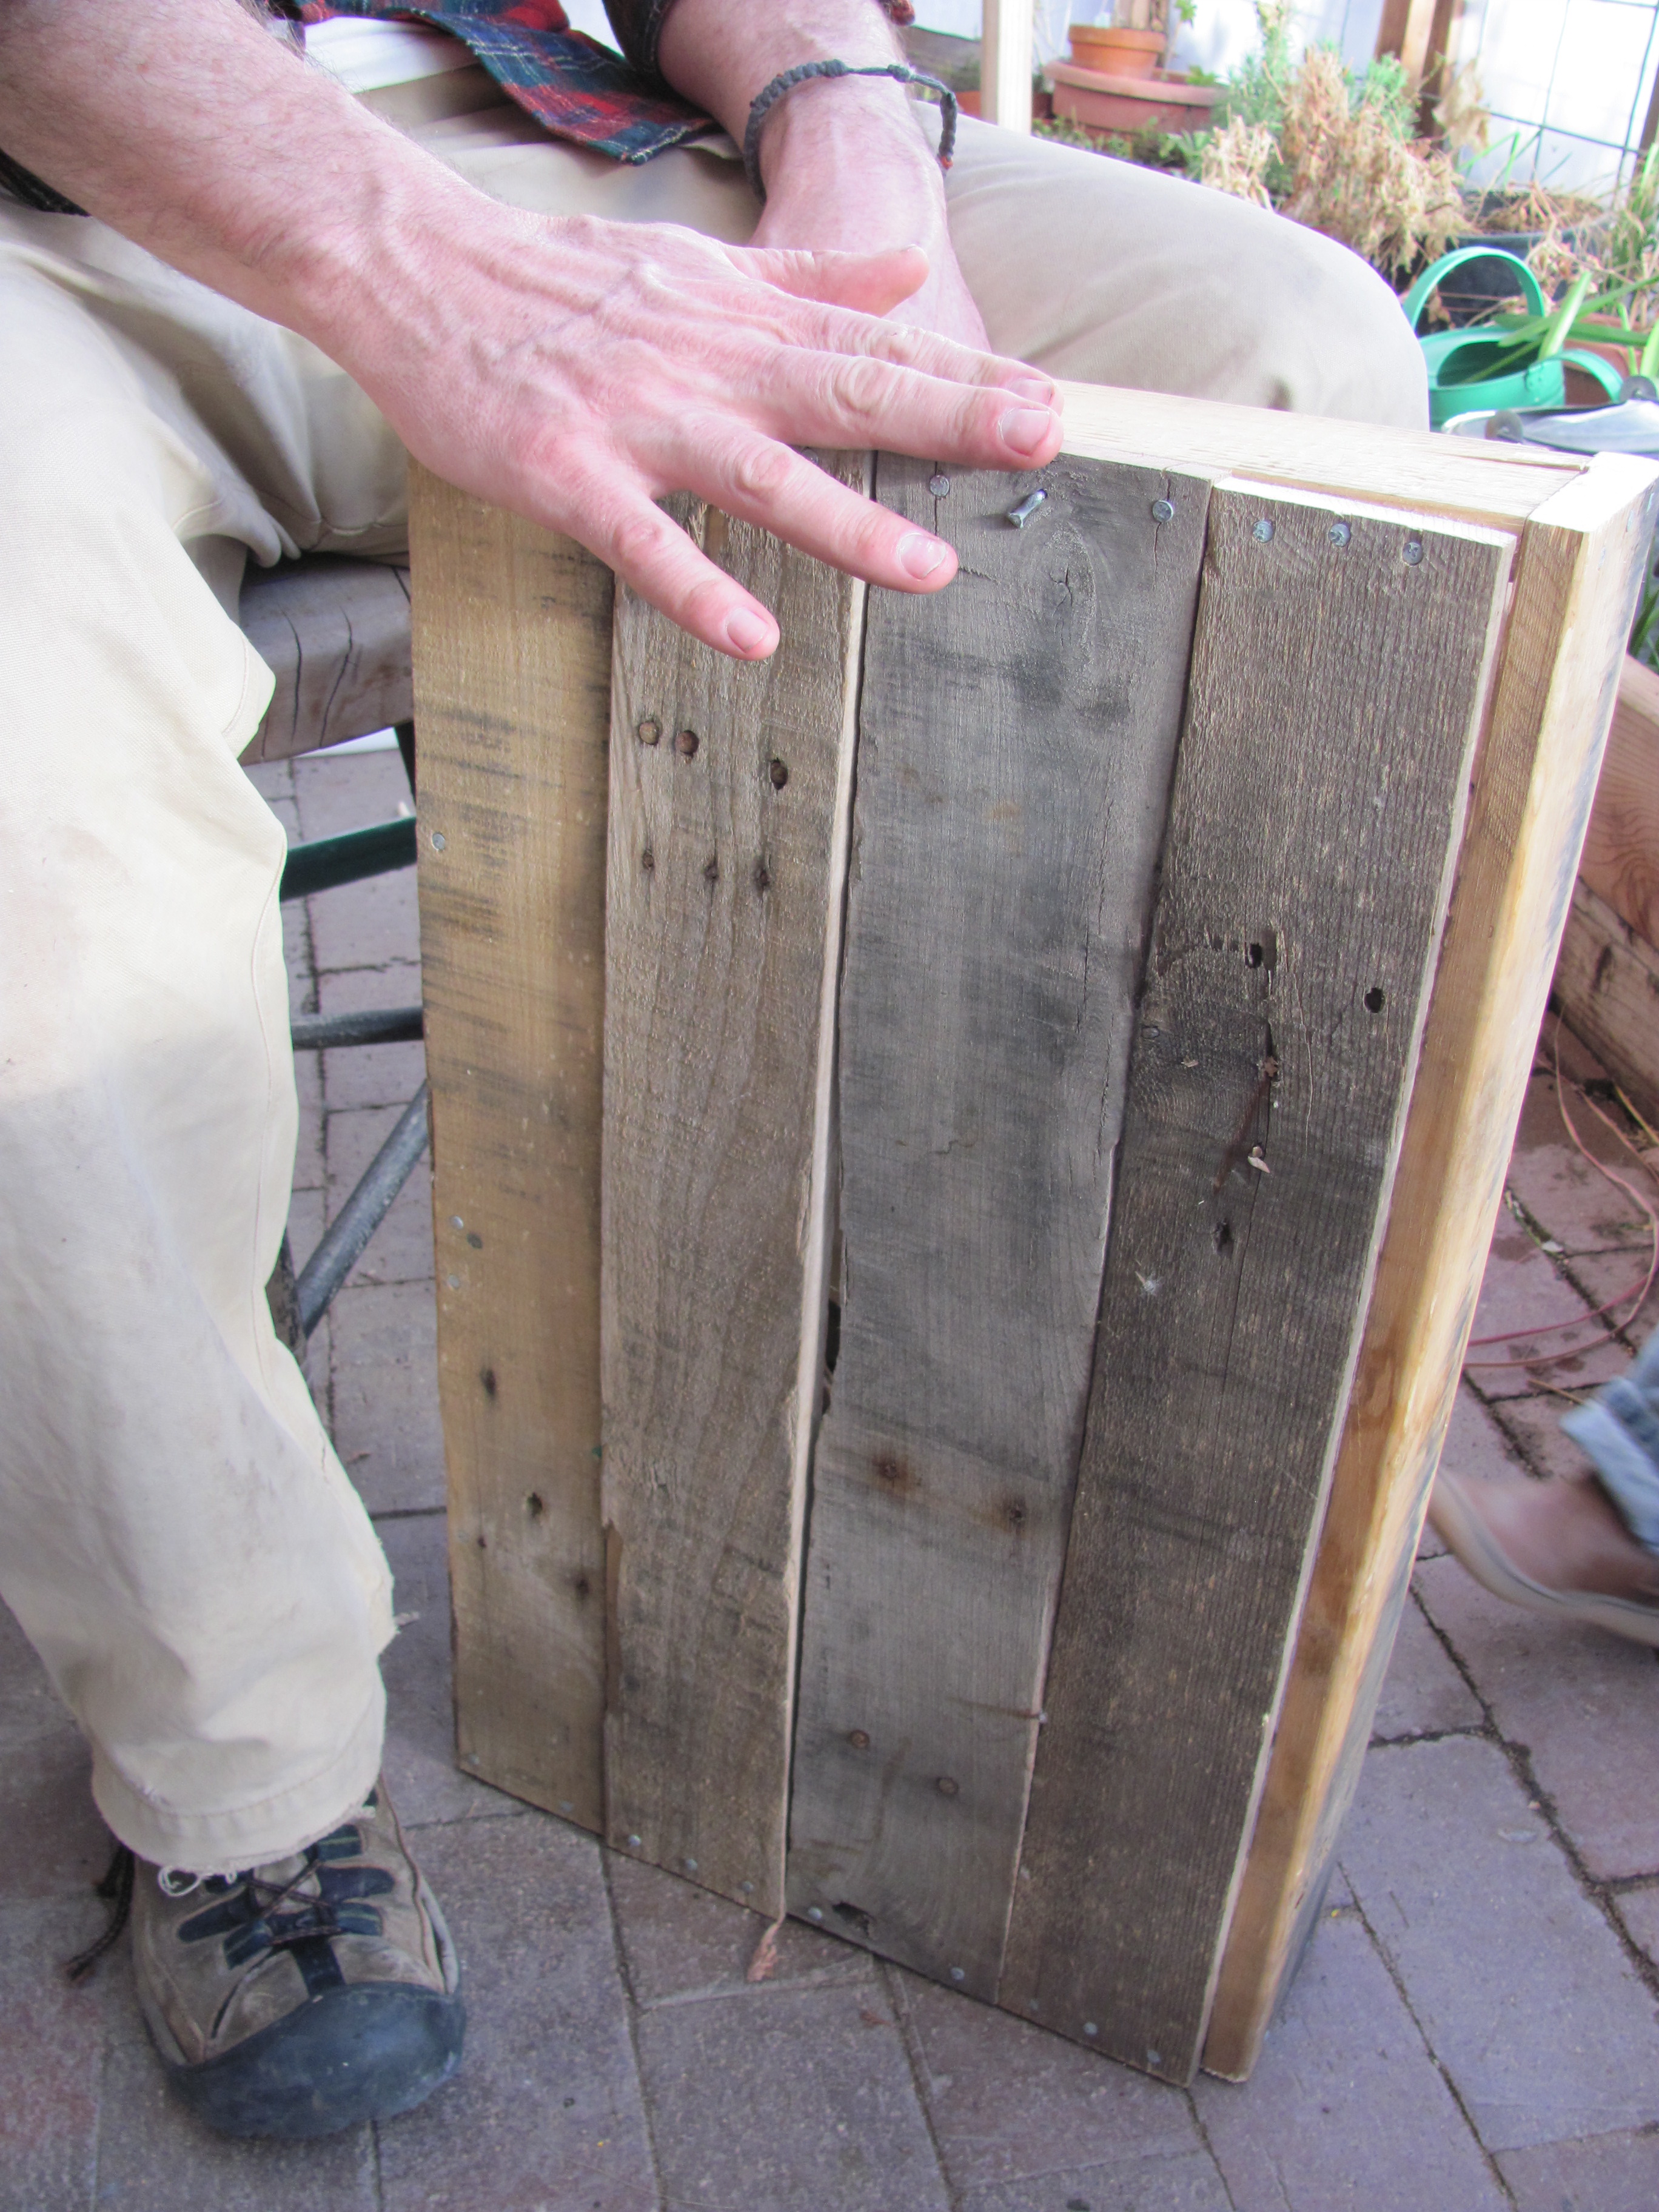
He nailed 2 of the 2footers & 2 of 1footers into a rectangular box. The 2 footer edges over lapped the edges of the 1 footers. Unfortunately he moved so fast I didn’t get to photograph every step… but I hope you follow.
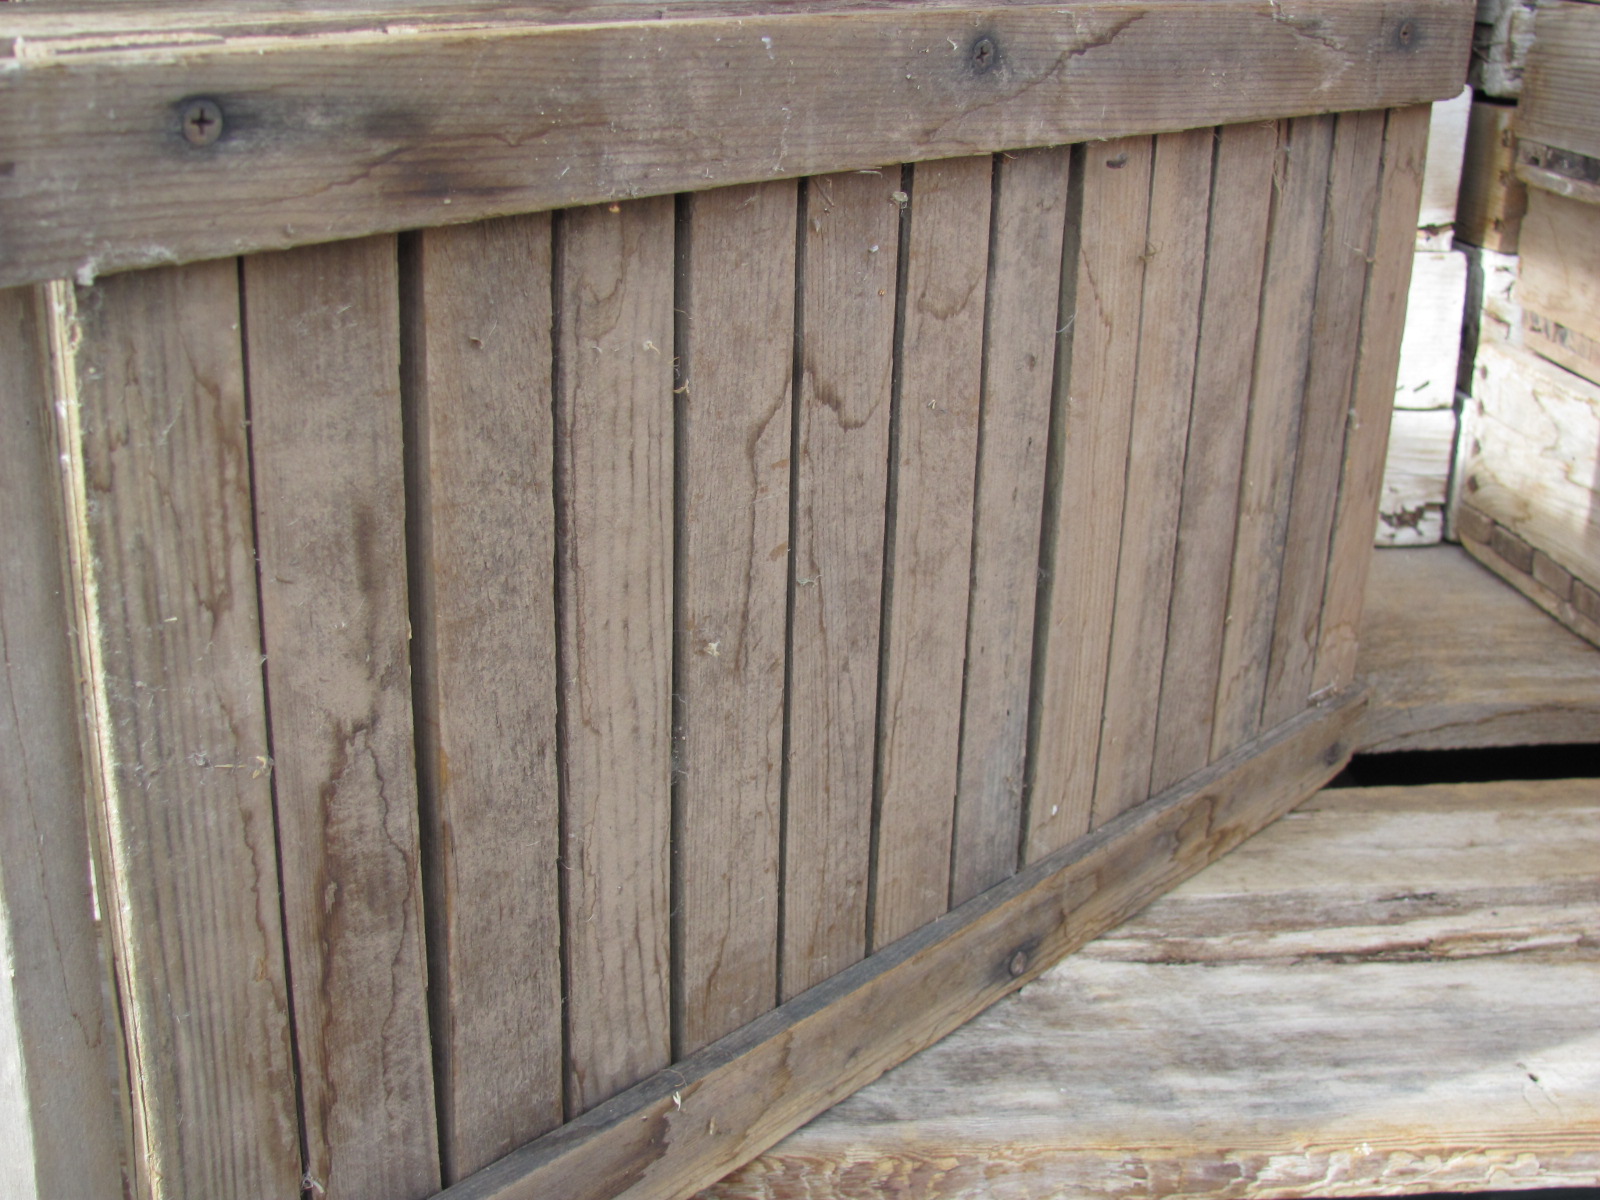
Then he nailed the remaining 4 2footers to the bottom of the box using 4d galvanized nails. These are rust resistant and small enough that they will keep the wood from splitting, but large enough to hold your box together when it is full of heavy, wet soil. Because the wood was irregular enough he just pushed the bottom slats together and nailed…but it is important to note during this step to leave a little space between the slats for water to drain out, but not soil. I usually stick a quarter between the slats which has always proven to be just right.
And there you have it. Here is one I made from Redwood and screws in 2010 (in front) and the new Pallet one (in back).
Similar—-but there are few subtle differences.
*The new one is a bit wider than the other. As far as size go, I pretty much try to maximize my table space. If you table is a 3×6 (which many tables are) you can fit 9 2×1 flats on it. That should be more than enough (much more in fact) for all your seedling needs. Remembering, when you start seeds in wooden planting flats you will need to divide them or thin them before they reach the garden, so leave space in you table(s) for transplants. This is basically bio-intensive gardening, but more on that later…here is the next step if you are eager.
*The other difference is that my new flat is mostly oak and the older one is Redwood. Both have their pros and cons
Oak- Hard, Heavy, Durable,Rot Resistant, Brittle-(Available in Pallets)
Pine- Soft, Not Rot resistant, Light weight, Cheap or free-(Available in Pallets)
Redwood- Light weight, doesn’t spilt easily, VERY Rot Resistant-(Must buy)
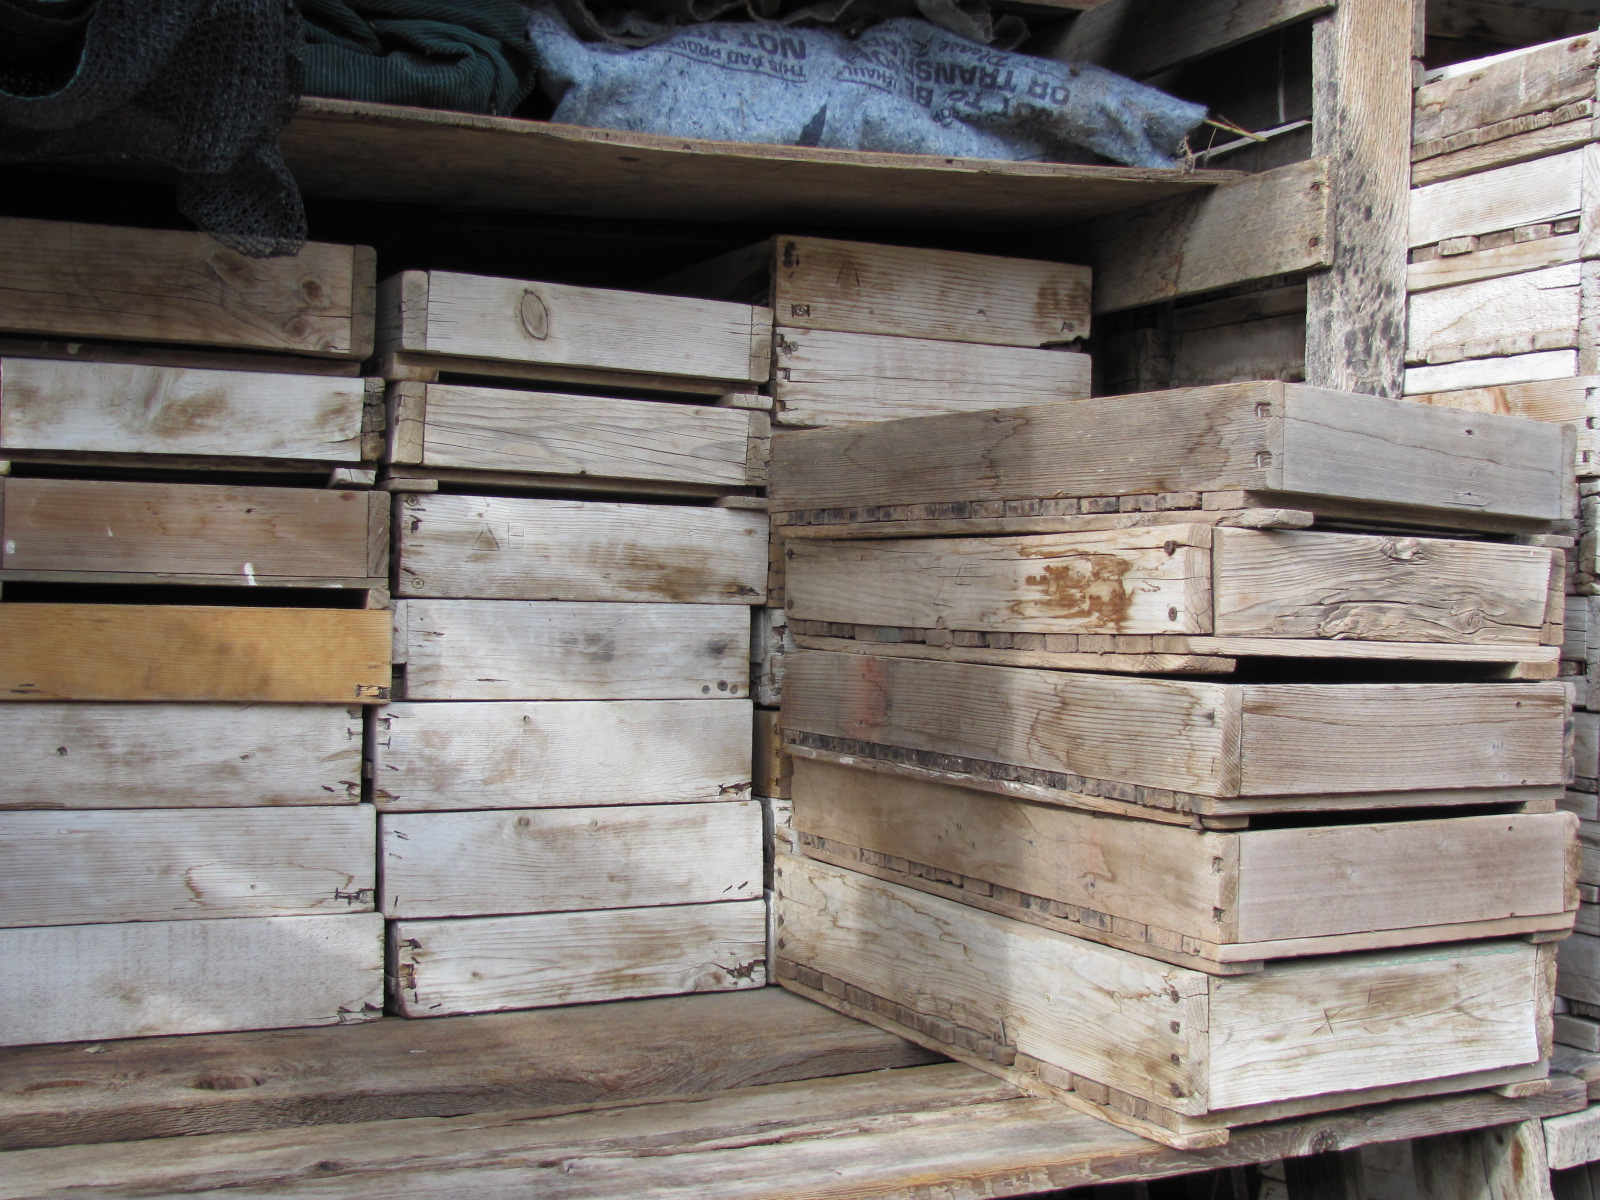
Wooden Flats are a great thing to add to your garden shed if you find yourself starting seeds every year. They are pretty simple to make, relatively cheap and last many years, not to mention they are NOT plastic. They work beautifully to hold moisture and give ample space for those babies to grow. Many farms use them, which is where I learned about them. Here are a few I stumble across while ambling through a sleepy farm in Colorado last spring.
Yes, I take pictures of other people’s planting flats, I told you I was a farm tourist.
Good Luck and I hope you help rescue one more lonely pallet from the back of your hardware store and put it to good use.
Juicing Carrots, Beets and Ginger for a little mid winter zing. Oh and did you notice the magazine I used as coaster? Yep, these very hands made the cover of the Spring SFCC (Santa Fe Community College) Continuing Ed course catalog. I have been helping them start a garden there that will produce food for their student run cafe!! So cool! Friday will be our first harvest ever, I am anticipating a couple of lbs of Spinach, some Parsley and maybe some Chard if we get lucky. I am not officially teaching in the garden this spring…but some of my cohorts are and their classes look great. Check out Botany for Gardeners by Scott Voorhies or Amanda Bramble’s intro to Permaculture.
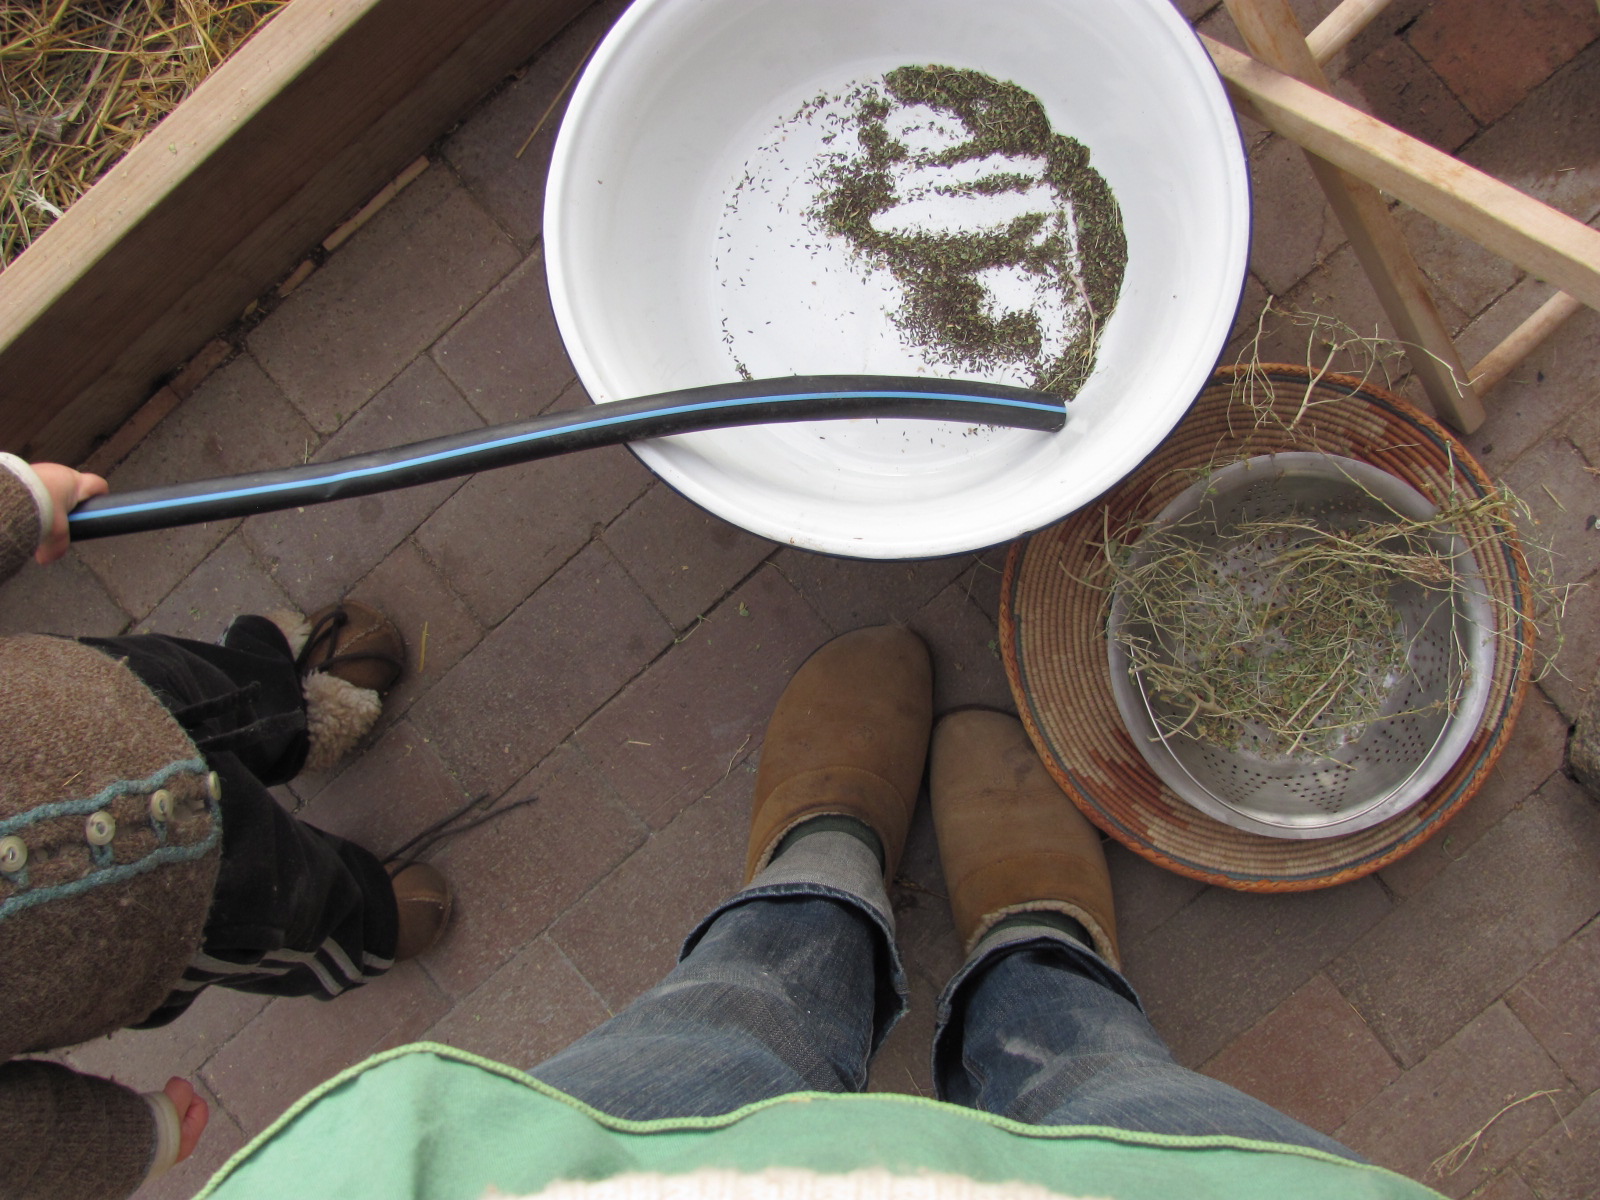
Jangy and I started on cleaning my bags and bags of seeds yesterday in the greenhouse..let’s just say seed cleaning with a 20 month old is…interesting. But we got a bunch lettuce seeds and they went right back into a flat sown on the first Leaf Day of the Year!! (the 7th) along with some spinach and sprouts– indoors of course.
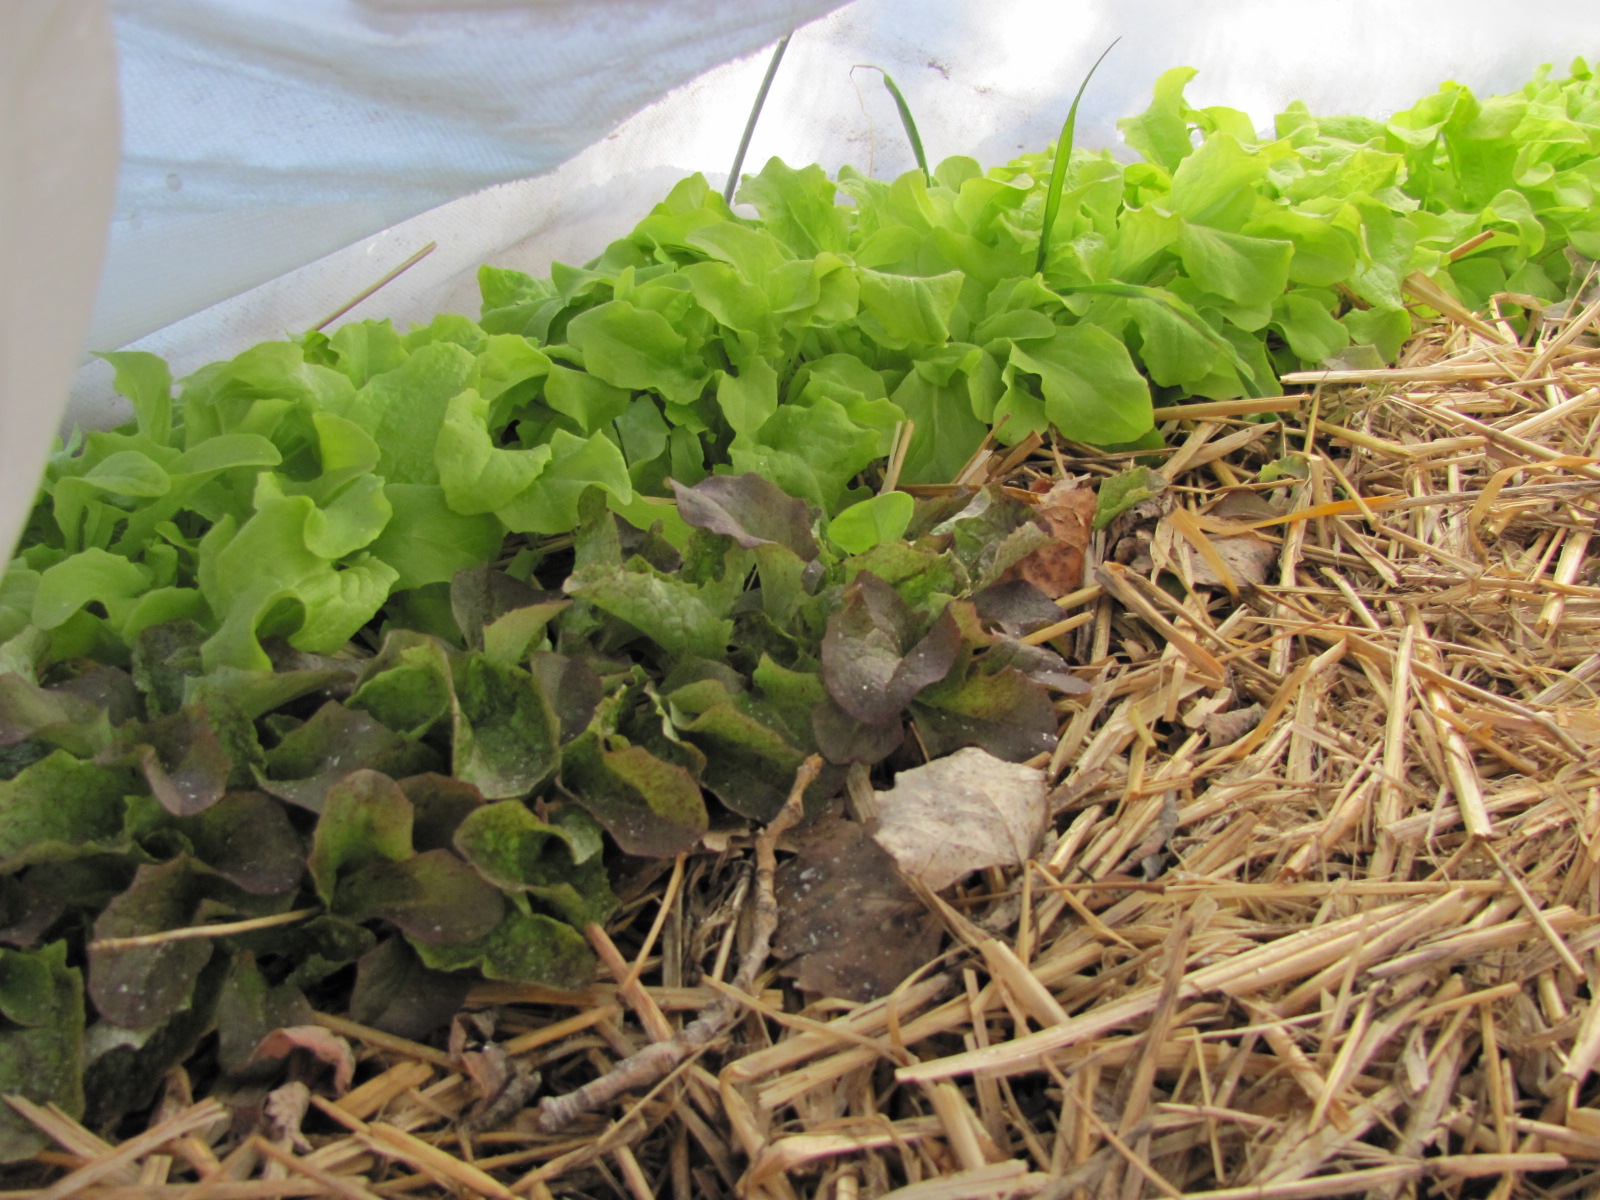
We also got to work on trying to de-ice my little hooped lettuce beds. I am sure they are alright under there, snow is a pretty good insulator…..
But I simply can’t reach them to harvest. I put a few layers of plastic, one black, one clear. I am hoping with a few of these warmer days and some greenhouse action they will open for me. This what they looked like on Christmas…
Hang on little guys, I will eat you up soon!!( or I could just wait and let them grow even more, but they look so good don’t they).
I am also trying to post a bunch of new jewelry on my Etsy page
Oh and attempting to ritualize an awesome yoga class into my life…..Here’s to a new start and good intentions! What are you sprouting up this year?
I started teaching classes again, talking to friends and doing my own garden planning and this question comes up every season- What to plant when— I tried to answer it as simply as I could by just sharing what I do at home, so here is my garden schedule in case you want to follow my lead– PS if you are in Santa Fe don’t stress about being behind me, it is just a bit warmer here in the Pojoaque banana belt so you have a bit of a grace period. I hope this helps makes gardening just a bit easier for everyone, but don’t take my word for it, grow it yourself, and do let me know how it goes!!

 Happy Earth Day- which is every day for me, but it always good to remember where you came from, your mother earth!
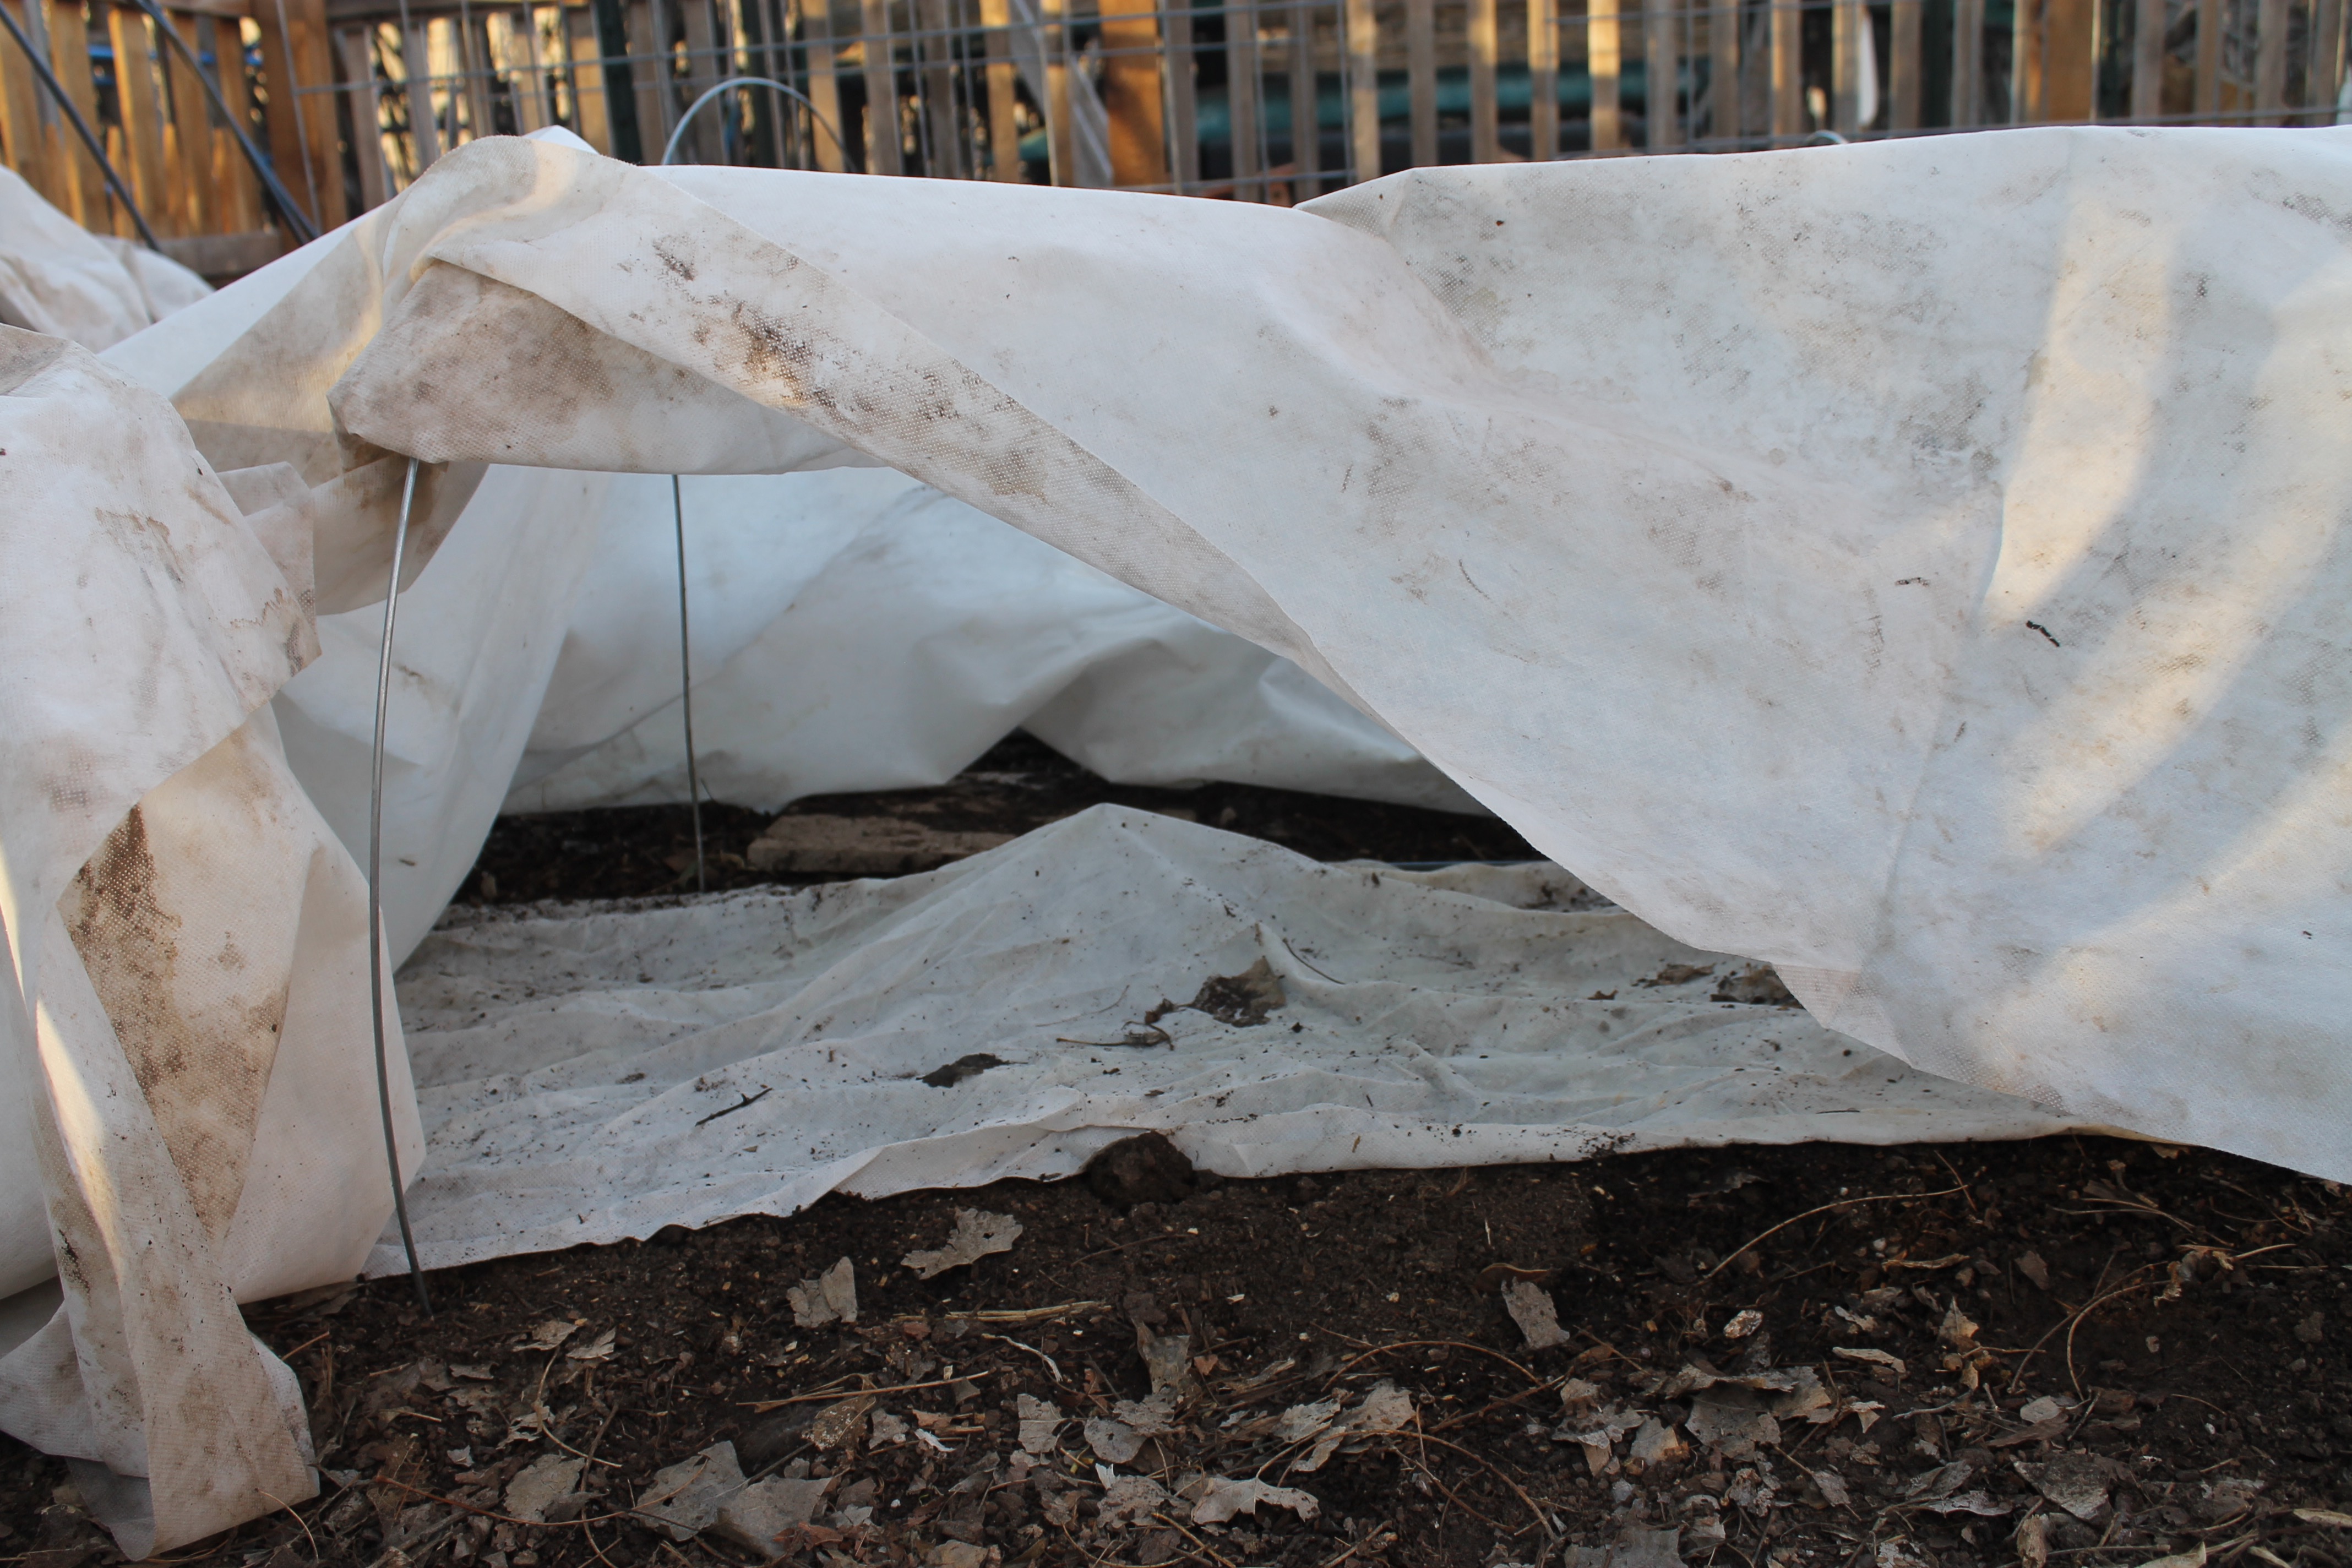 Moisture– Don’t water by habit, water by feel. You don’t need to water every day but you do need to visit your seedlings everyday. Touch the soil, get up close. If the soil is moist to the touch (moist as a rung out sponge) you don’t need to water. Seeds are only in the first inch of soil so this is the area that needs to be moist. If when you touch the soil your fingers aren’t moistened, water. I water daily, but on a cloudy day if the soil isn’t drying out, I leave it. Outside I use row cover over my seeds, like a blanket. I sow the seeds, water and them put row cover over them, then water the row cover. I peek every day or so to check the moisture and water if need be. When I see sprouts, I remove the row cover and place mini hoops over the bed, then I put the row cover over the hoops so the seedlings don’t get squashed, but still are protected against wind, birds, cats, children, etc… I do fold the row cover back to water with a sprinkler until I have my irrigation up and running.
  ***Note- I always water with a watering can or sprinkler with a very fine spray. Seeds are fragile and can be blasted out of place by a hose or heavy flow from a can.*** Just like this little gardener!
 Temperature–
 I plant peas in the snow and it works every time! Many people are planting carrot now, which is fine, but it is still chilly out there and they do take a while! You can do a few things heat up the soil faster like row cover, plastic covers, or mulch, and indoors heating mats work really well for peppers, eggplant and tomatoes, especially in January!… but the soil will warm up soon enough, wait for it!


 Mulch-Mulching is wonderful and necessary to retain moisture, create soil biology and protect your plants, but if a seed bed is over mulched before the seedlings are 3 inches tall it can suppress plants from coming up through it. I usually apply wet straw mulch around my seedlings, after they are 3 inches tall. If you do mulch with straw over a seed bed, make sure it is light and lose so the seedlings can push up through it. Like I mentioned above- Outside I like to use row cover to retain moisture till I get good germination.
 Other Factors–
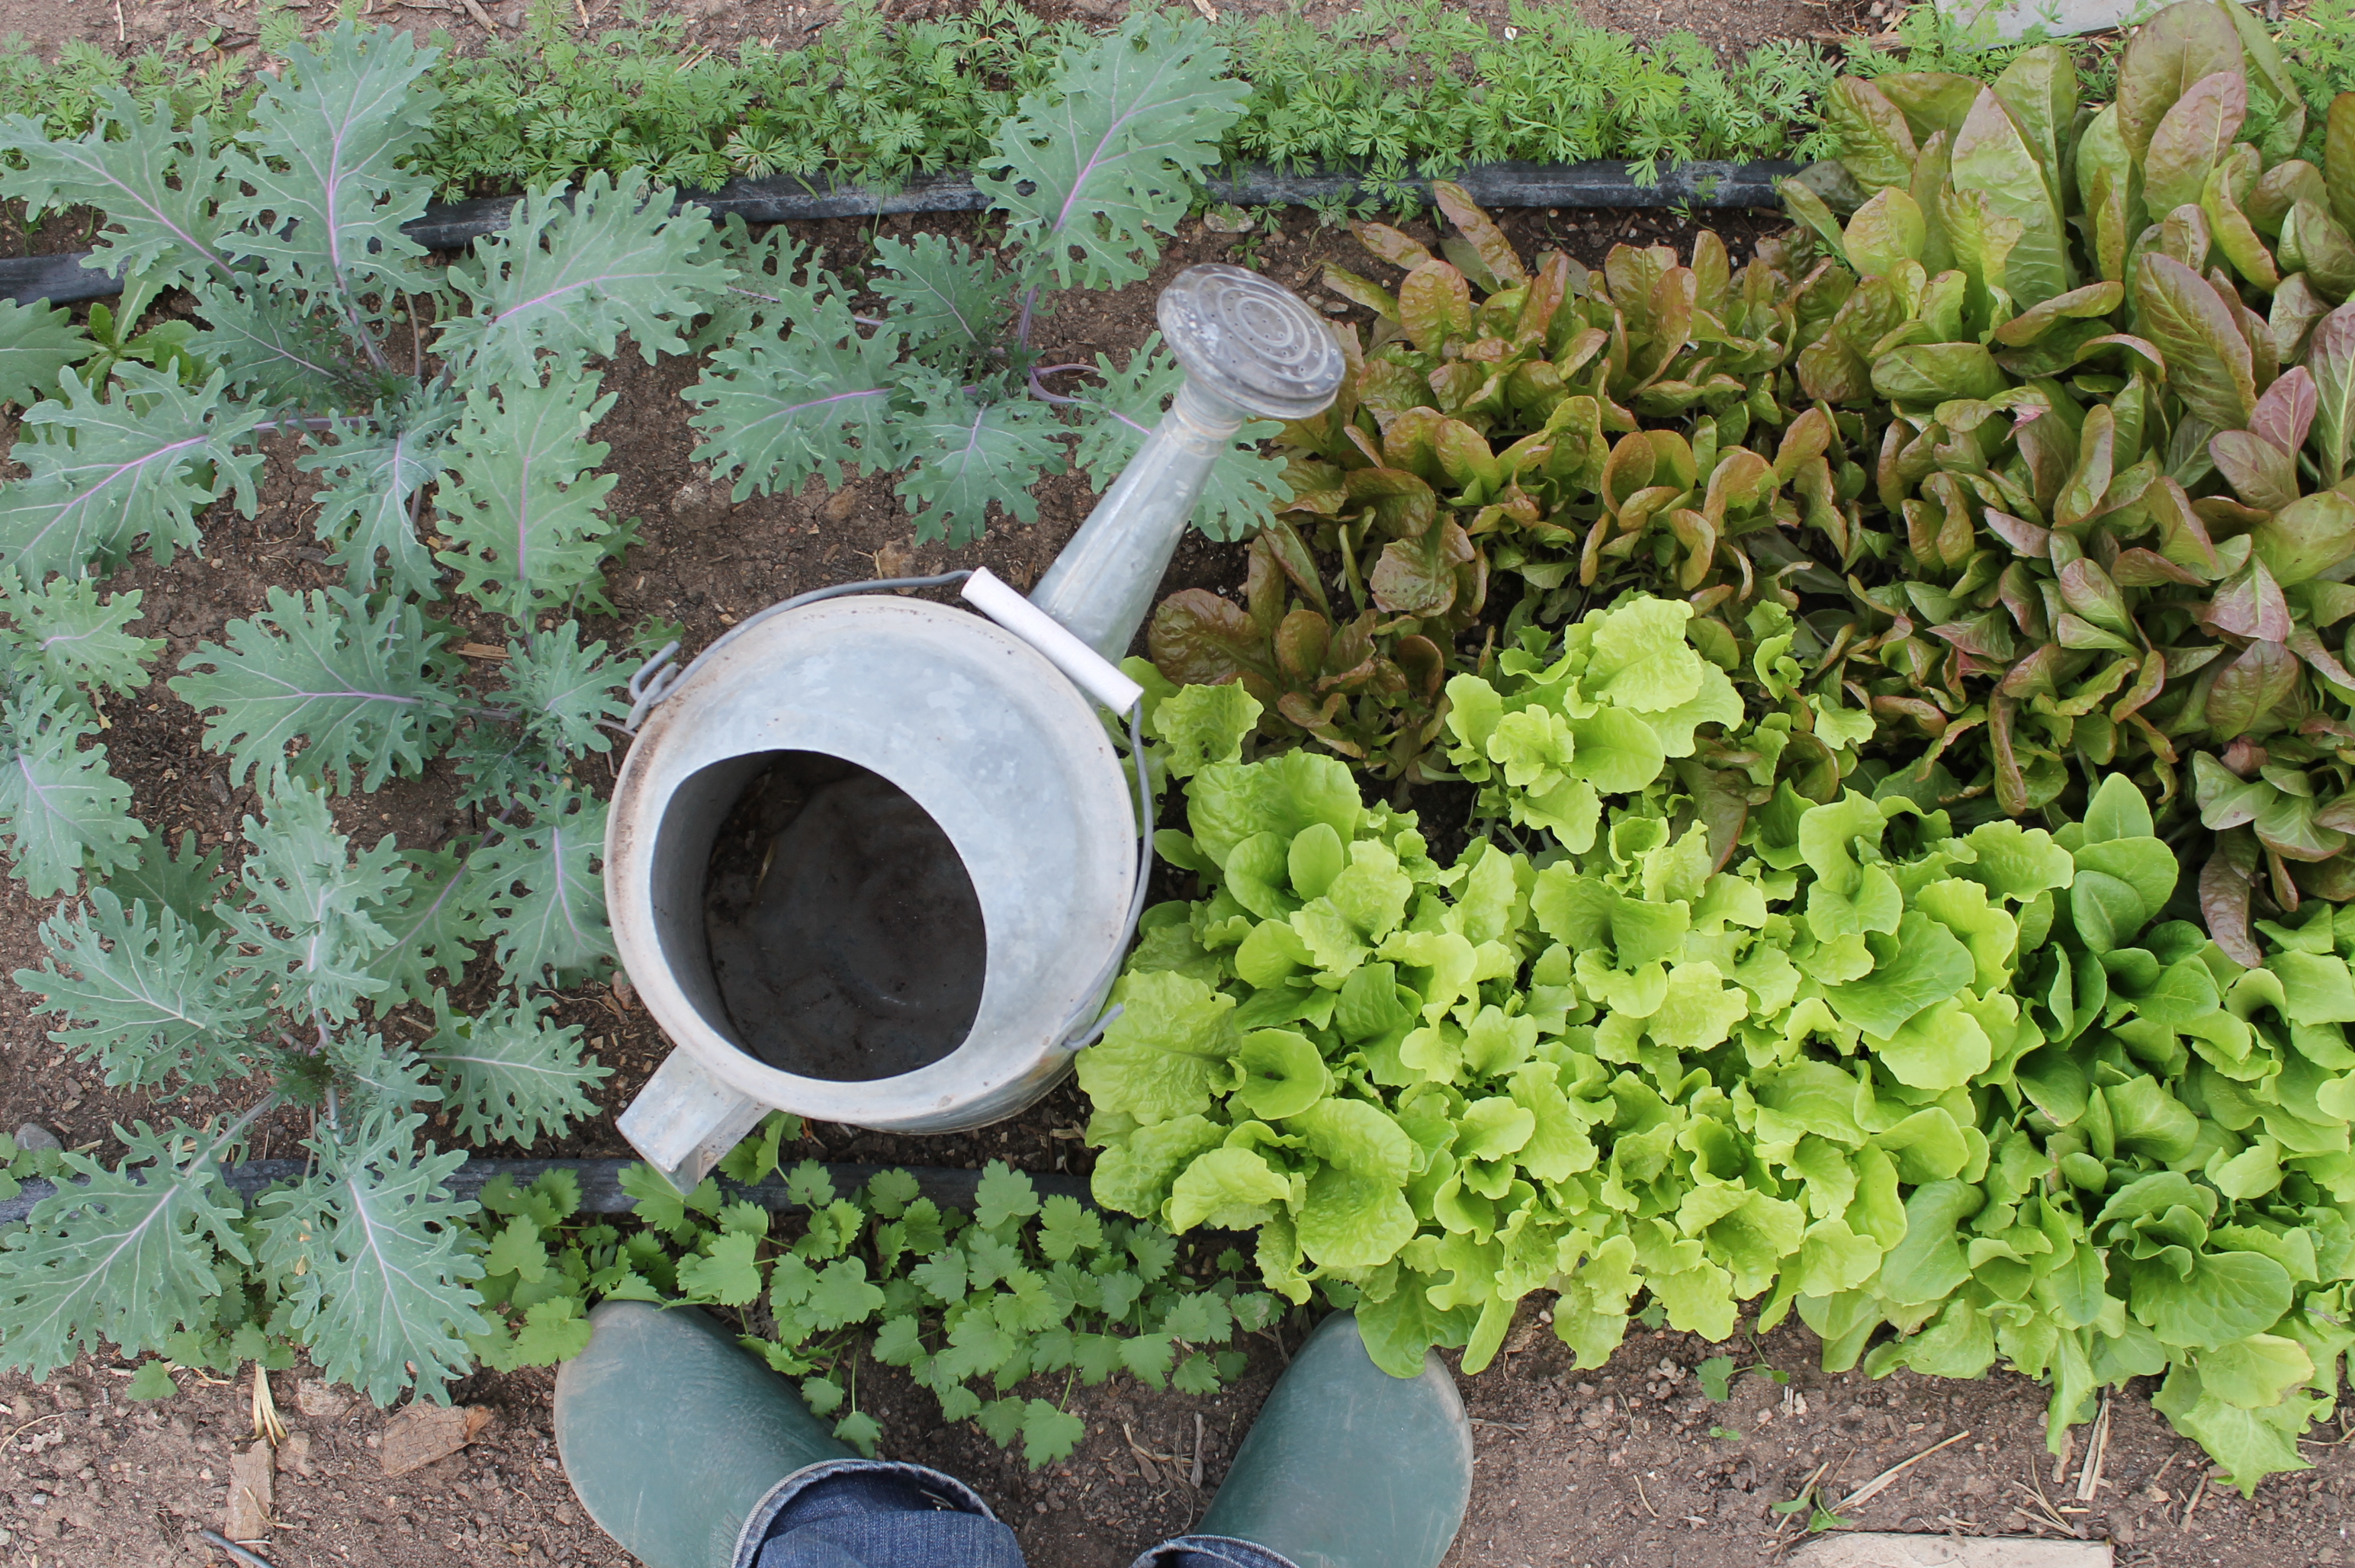
 I have written many times about growing sprouts at home cause it is just so darn easy and rewarding. I have lots of friends out there who simply can’t start vegetables indoors but sprouts only require attention for 10 days or so and really only need heat and water and a little sunshine.