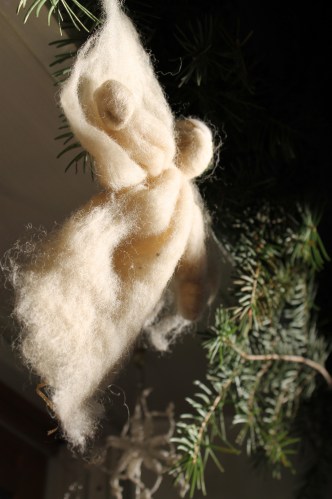
I have spent many a night since the turn of the year learning yet another hand work craft. Wrapping, poking, twisting & tying wool, otherwise know as needle felting. It is nothing I have really thought of sharing with you … Continue reading
I have spent many a night since the turn of the year learning yet another hand work craft. Wrapping, poking, twisting & tying wool, otherwise know as needle felting. It is nothing I have really thought of sharing with you … Continue reading
At mid day, the suns southern rays reach half way into the house, the furthest point the sun will touch all year.
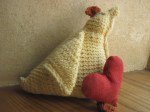
The little woolen angel basks in the afternoons glow
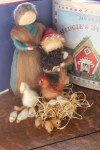
The divine mother cradles her babe in warmth & love

And a family of shepherds and their flock gather together on this cold winter day.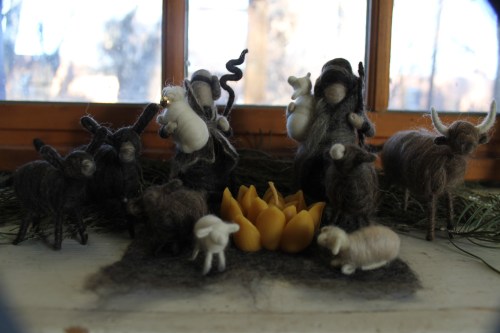
All is calm all is bright, happy return of the sacred light.
I am not bustling in malls, standing in lines, or really buying much of anything for Christmas this year, but I am sew busy!! ( I know my titles can be a little corny, sorry, I just can’t help myself!)

I have been sewing up a storm and my latest creations have been a flurry of more up-cycled Merino PJs.

If you have not tried this, really you must!! I love those German Woolies, but with a $5 Thrifted sweater you could turn this……

Into these…..

Or take this…..

cut like this…..

And make this….

and these…..

And be lift with just a tiny pile of waste

that will no doubt be used someday soon for something soft and sweet.
And that Cherry Red Grandma cardigan

Christmas Jammys!

Oh what fun we have on cold wintery days! I may not have any money for lots of stuff, but who needs stuff when you got skills, now that is Christmas magic!!
Happy Winter magic making to you!
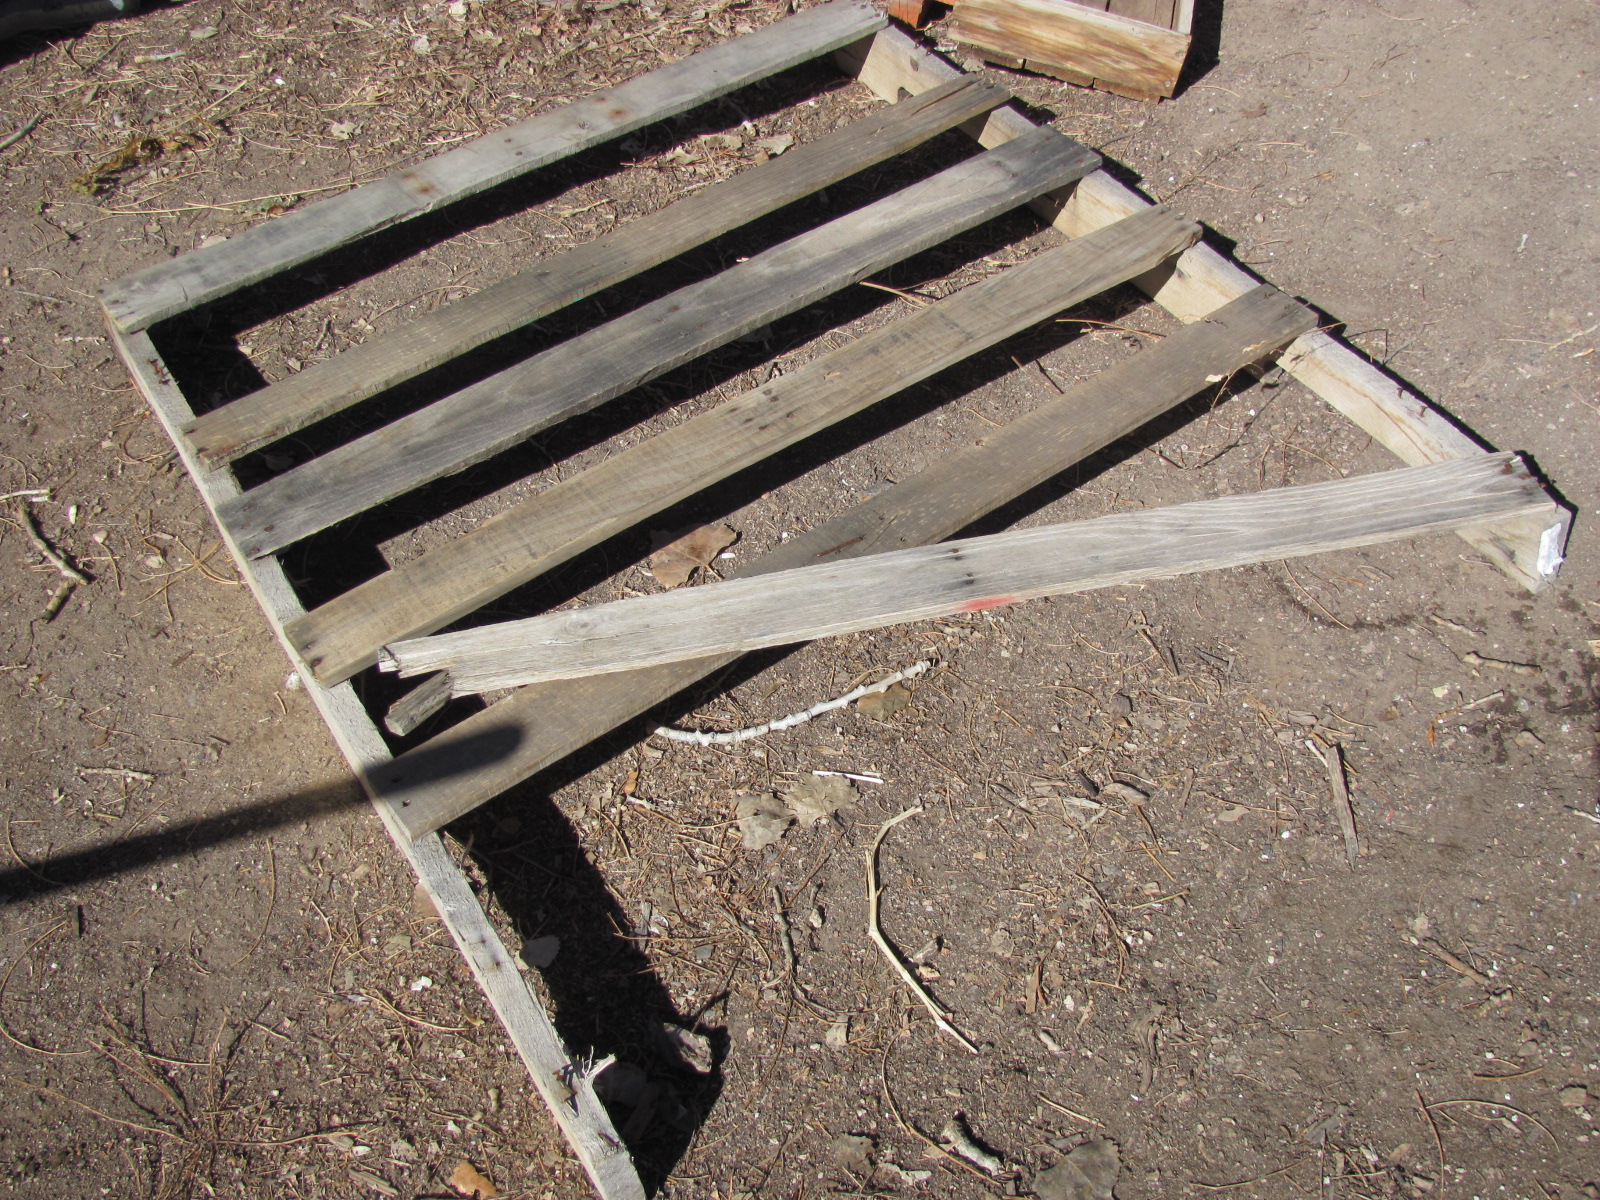
Is there anything you can’t make out of an old pallet? Yes, it does take more time and a bit more know-how to upcycle a pallet into a totally different and functional thing, but luckily I have an expert on my side. Yep, Joel does it again. This time he made me a new seed planting flat out of recycled pallet wood.
(Note: I do also do make these out new wood too, see here)
=

Cool Huh? Want to try? Here is how he did it.
First, he tore the pallet apart with a flat bar to get the the lumber in order. 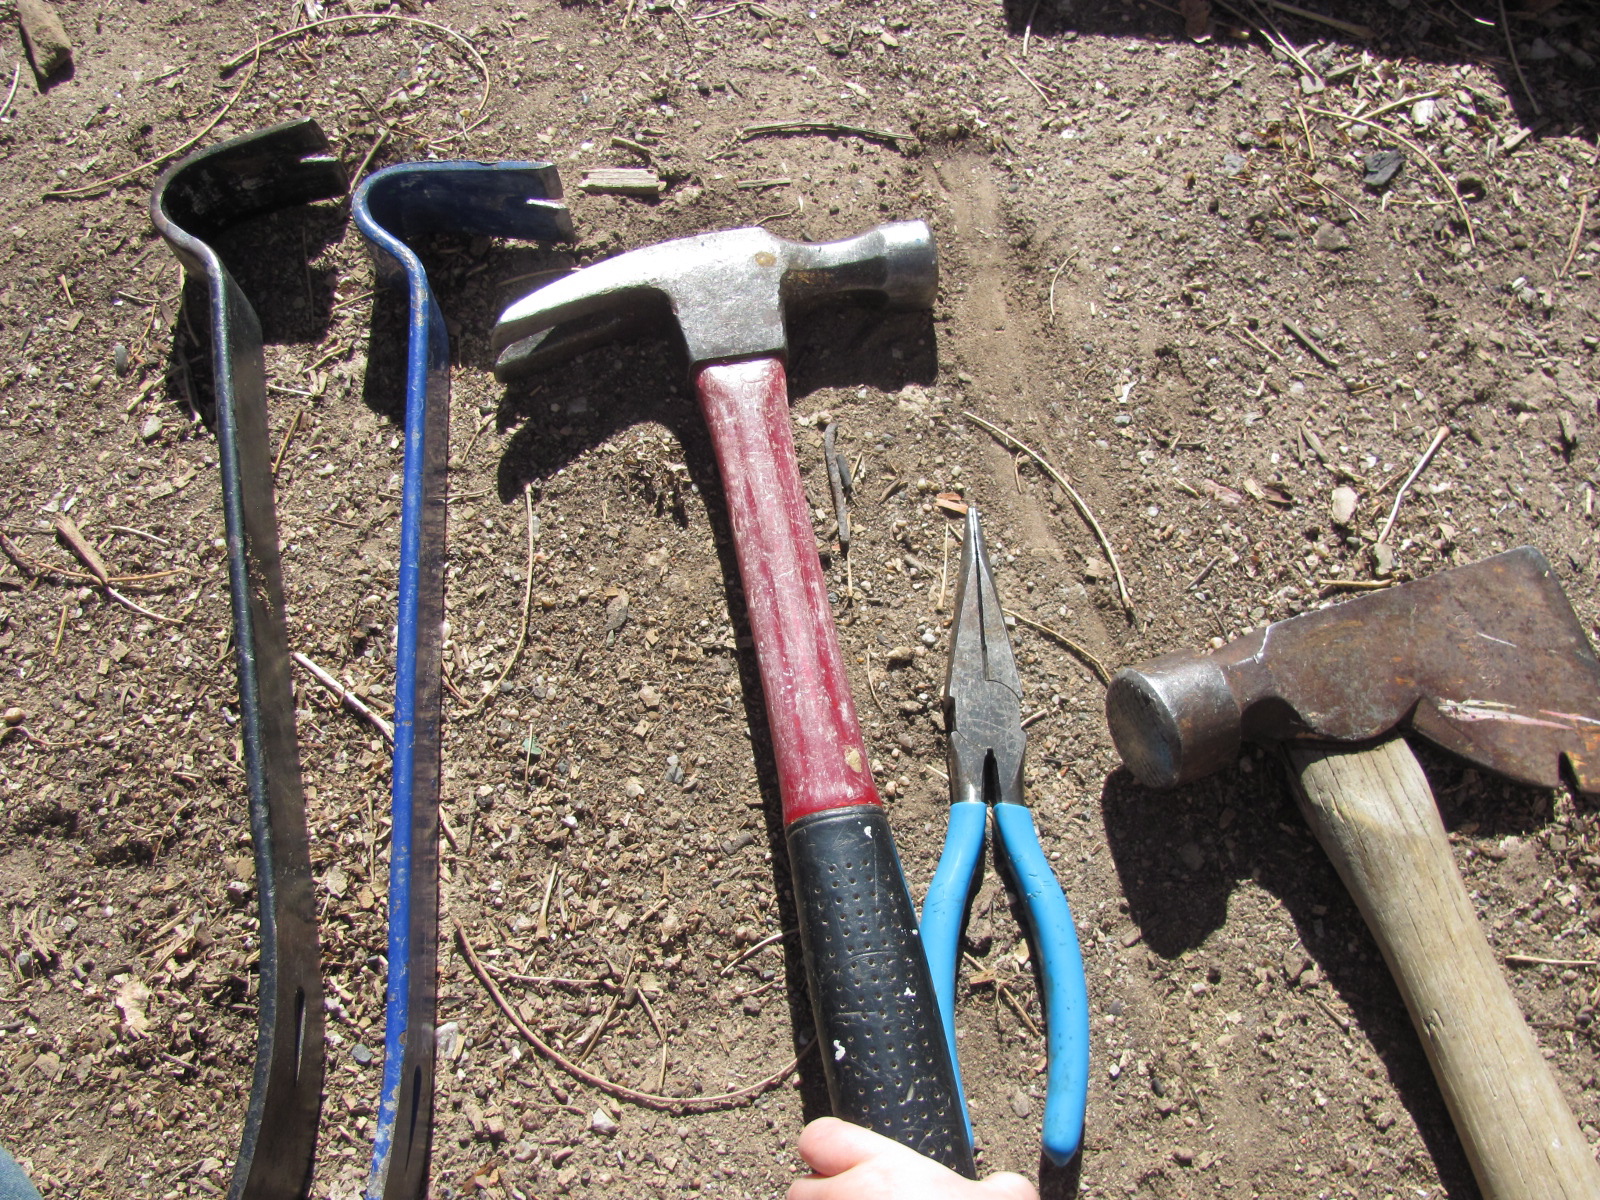
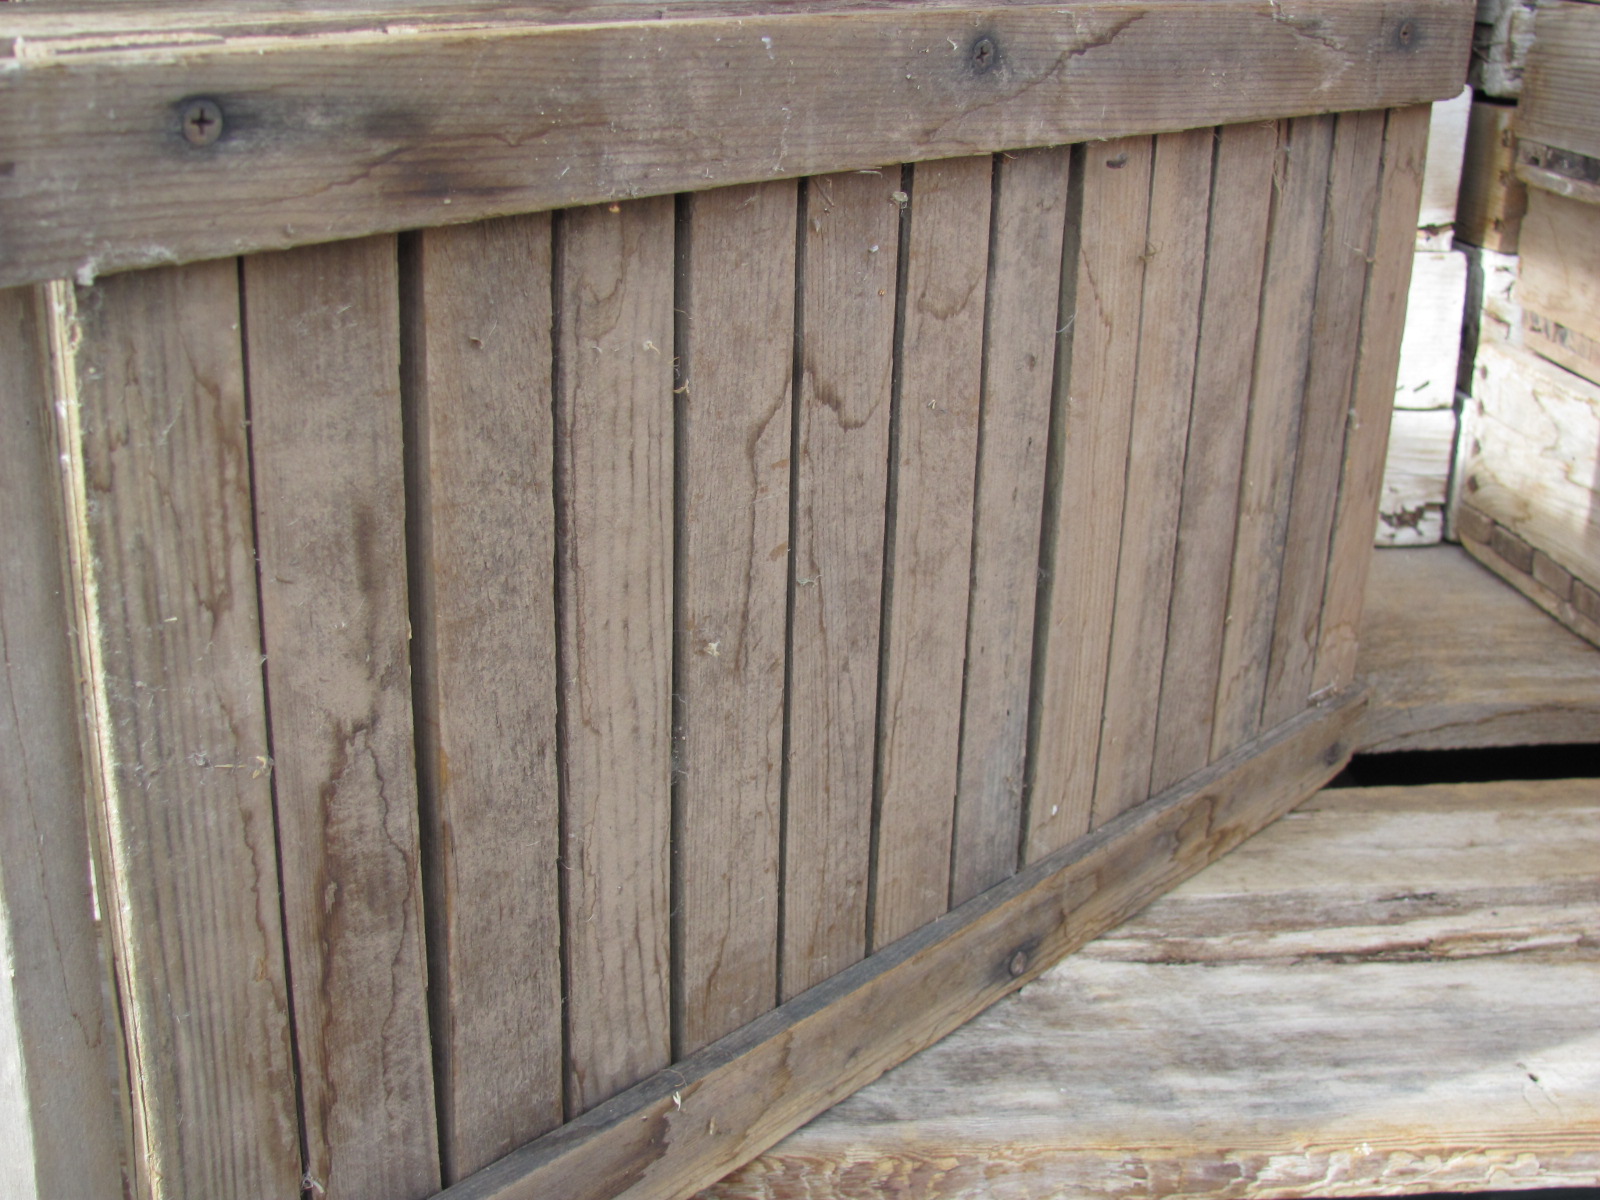
Then he used the cross pieces which were 3.5inches wide and 1/2 to 3/4 inches thick. There was mix of oak (harder, longer lasting, heavier) & pine (softer, easier to work with lighter)
Then he cut off the split tips with the nails in them- to have clean, split free ends and not to bother with pulling out the nails.
Then he cut 2 pieces at 1ft long and 6pieces at 2ft long
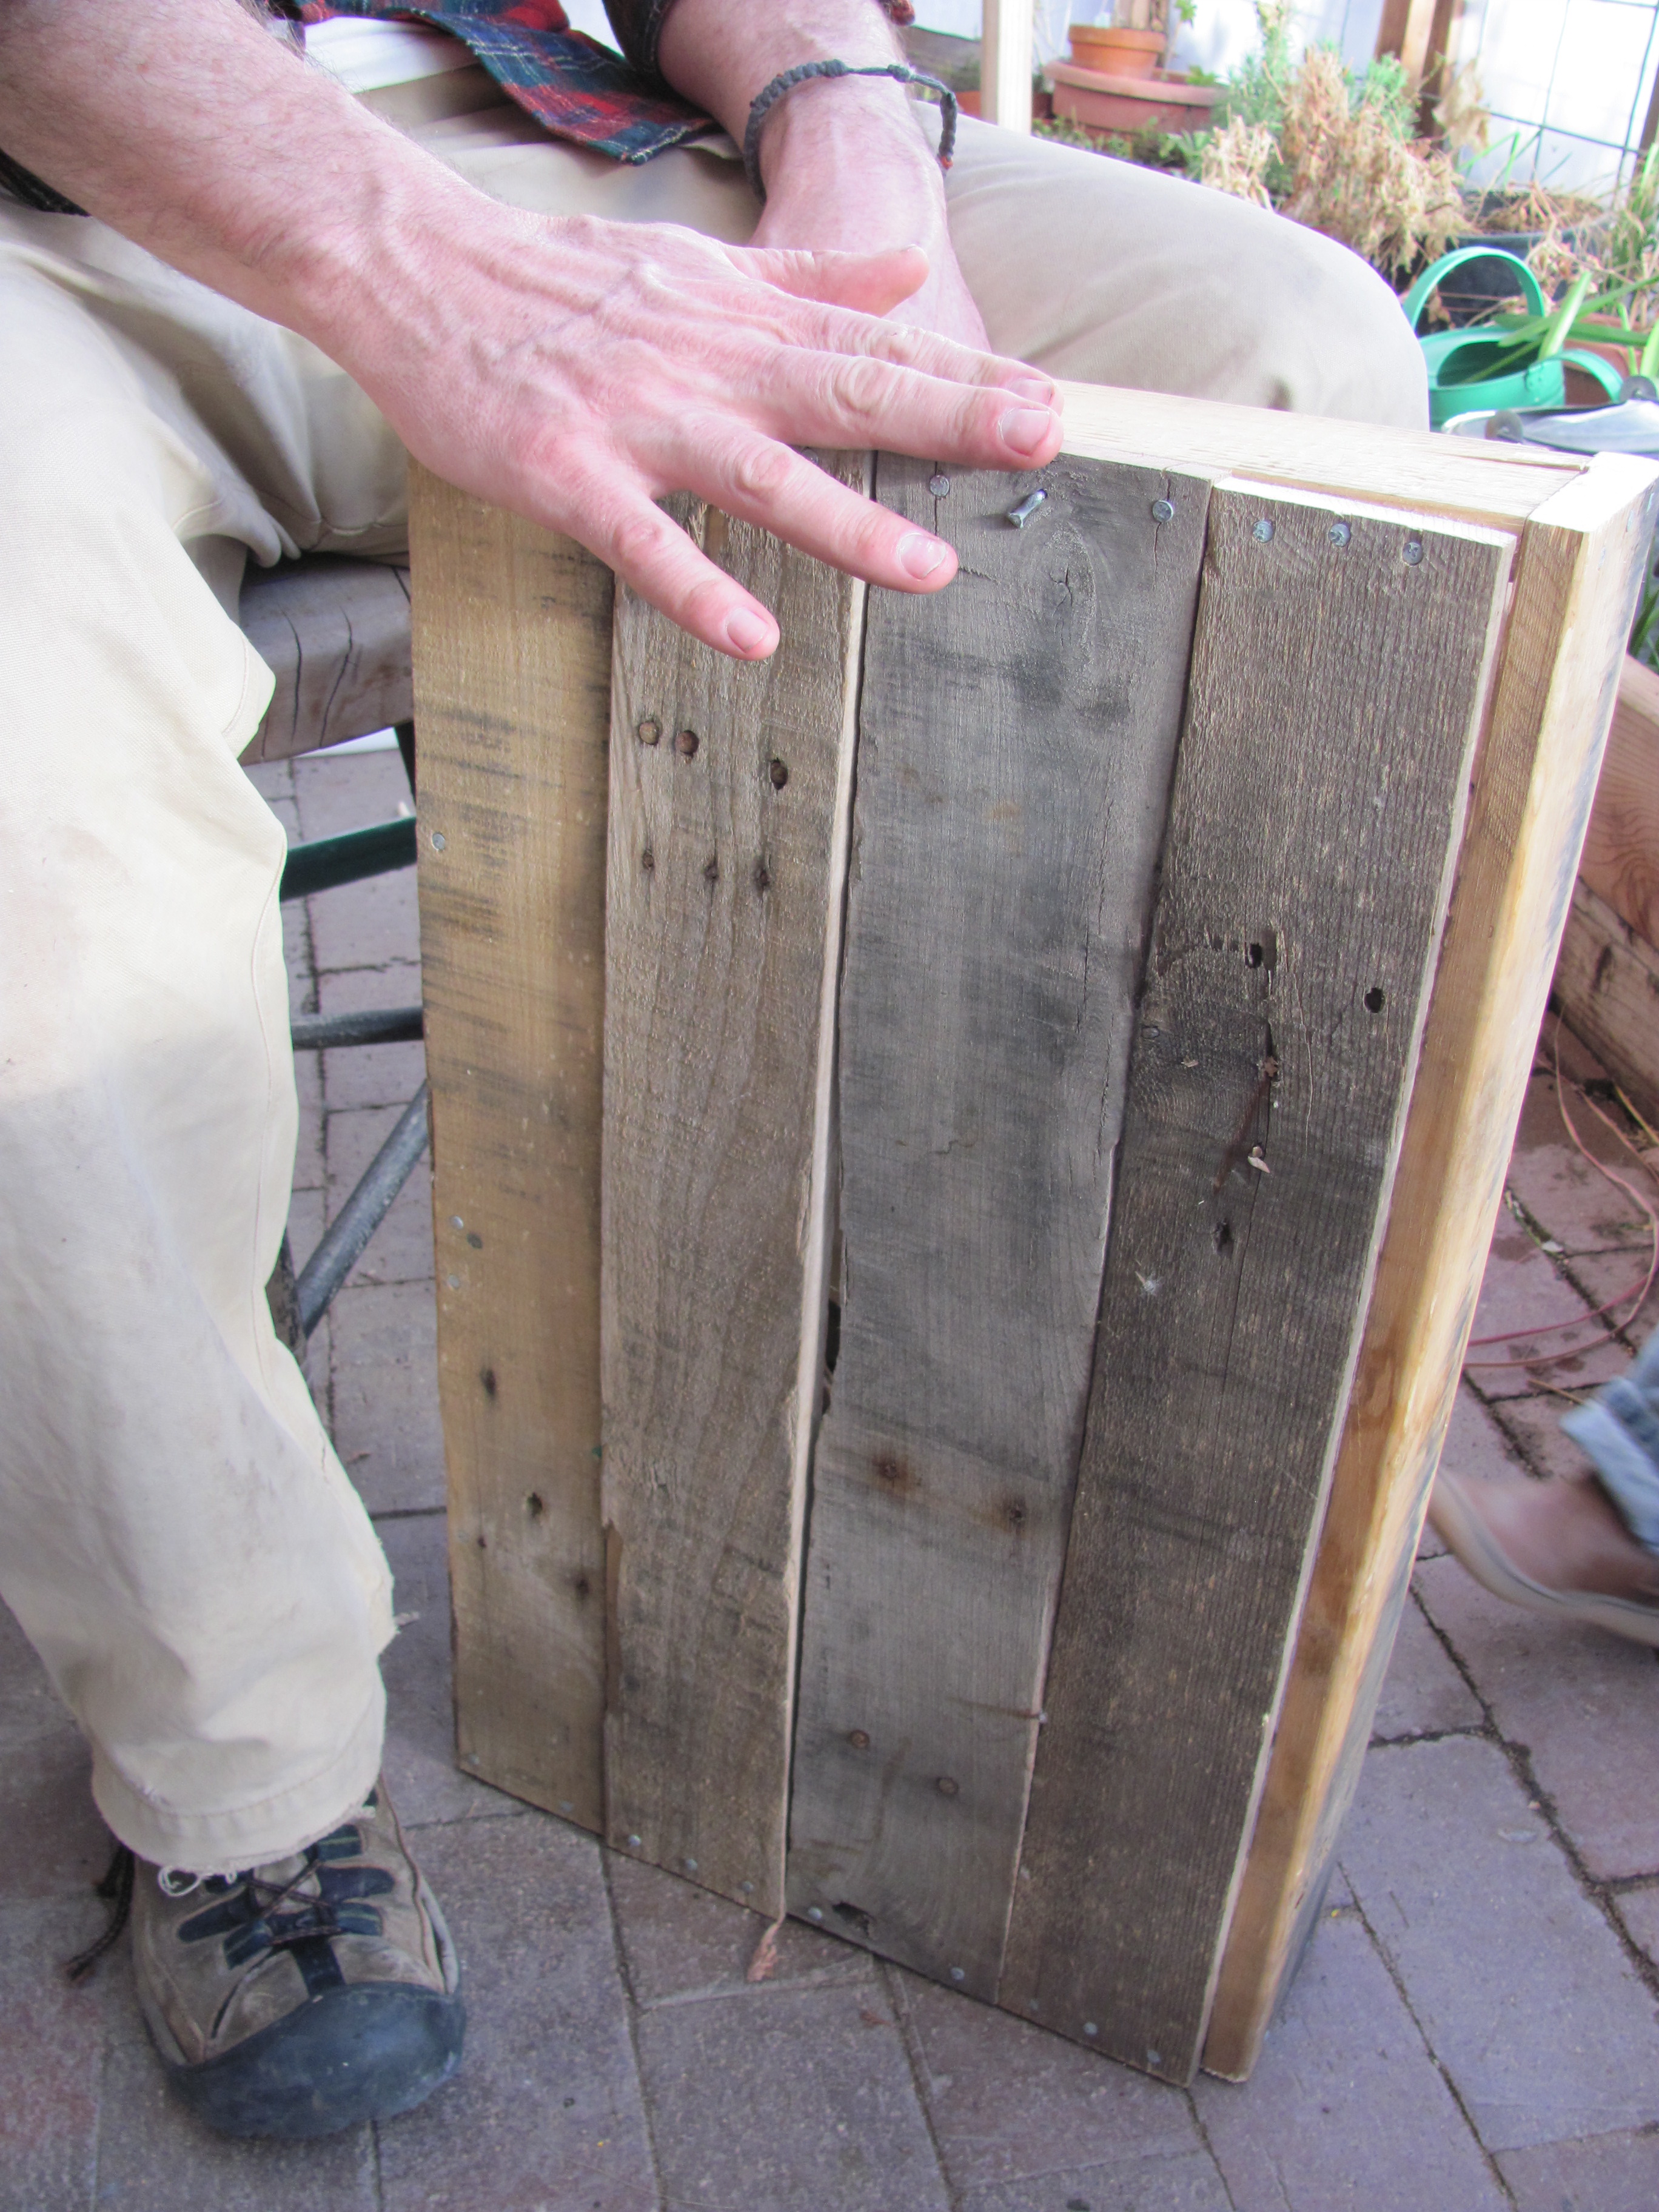
He nailed 2 of the 2footers & 2 of 1footers into a rectangular box. The 2 footer edges over lapped the edges of the 1 footers. Unfortunately he moved so fast I didn’t get to photograph every step… but I hope you follow.

Then he nailed the remaining 4 2footers to the bottom of the box using 4d galvanized nails. These are rust resistant and small enough that they will keep the wood from splitting, but large enough to hold your box together when it is full of heavy, wet soil. Because the wood was irregular enough he just pushed the bottom slats together and nailed…but it is important to note during this step to leave a little space between the slats for water to drain out, but not soil. I usually stick a quarter between the slats which has always proven to be just right.
And there you have it. Here is one I made from Redwood and screws in 2010 (in front) and the new Pallet one (in back). 
Similar—-but there are few subtle differences.
*The new one is a bit wider than the other. As far as size go, I pretty much try to maximize my table space. If you table is a 3×6 (which many tables are) you can fit 9 2×1 flats on it. That should be more than enough (much more in fact) for all your seedling needs. Remembering, when you start seeds in wooden planting flats you will need to divide them or thin them before they reach the garden, so leave space in you table(s) for transplants. This is basically bio-intensive gardening, but more on that later…here is the next step if you are eager.
*The other difference is that my new flat is mostly oak and the older one is Redwood. Both have their pros and cons
Oak- Hard, Heavy, Durable,Rot Resistant, Brittle-(Available in Pallets)
Pine- Soft, Not Rot resistant, Light weight, Cheap or free-(Available in Pallets)
Redwood- Light weight, doesn’t spilt easily, VERY Rot Resistant-(Must buy)
Wooden Flats are a great thing to add to your garden shed if you find yourself starting seeds every year. They are pretty simple to make, relatively cheap and last many years, not to mention they are NOT plastic. They work beautifully to hold moisture and give ample space for those babies to grow. Many farms use them, which is where I learned about them. Here are a few I stumble across while ambling through a sleepy farm in Colorado last spring.
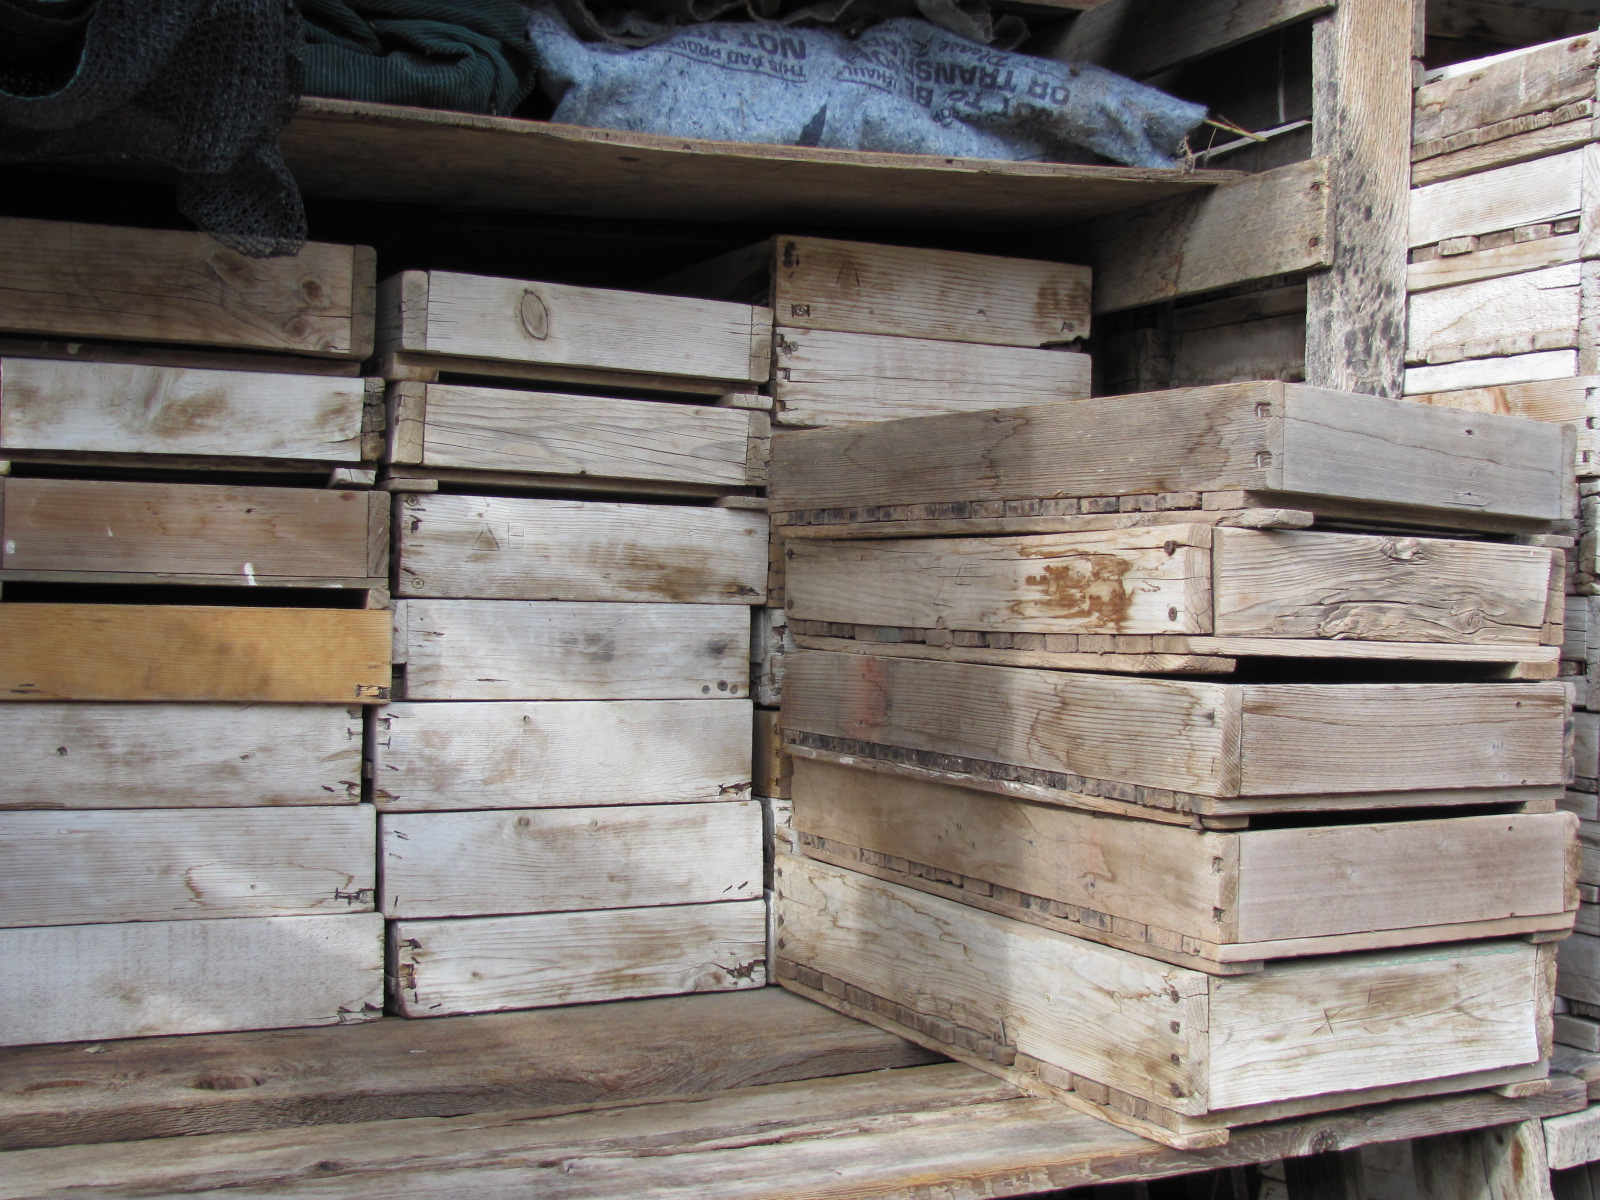

Yes, I take pictures of other people’s planting flats, I told you I was a farm tourist.
Good Luck and I hope you help rescue one more lonely pallet from the back of your hardware store and put it to good use.
When you are ready here is a link to how to make potting soil for the flats and one on how to plant into them properly. Let the sowing begin!!
This is really a dream come true! Humble as it is, a 8×8 Pallet and Mud shack….it changed my whole life and for this I must thank my wonderful husband and his crafty hands– Thanks Joel!!

Garden cottage in evening light
You see it all started last March 2011…Baby was on his way and we needed to turn the studio/storage room into kids room….So while I sat, very pregnant watching…Joel built us this little number from some old pallets picked up behind the hardware store, some mud and straw (instead of a baby shower we had a cob party!! Thanks Everyone) insulted the roof with packing peanuts, (that thrifty guy), and finished it off with a marvelous over hanging roof that added outside storage and of course shade, nothing says loving like a porch!!

This photo was taken of the same spot a few years earlier. Where the Cottage now stands was an outdoor shower over the well house
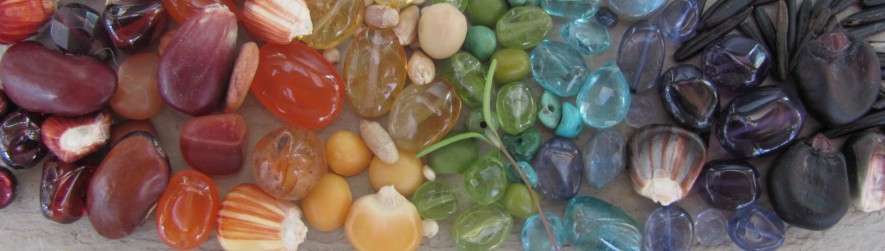
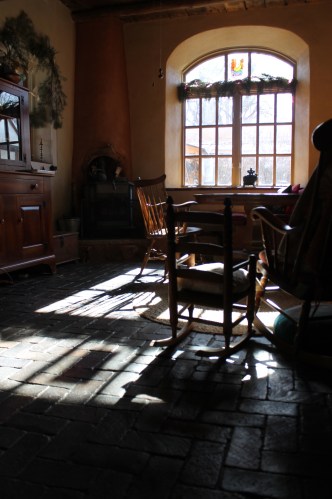
Now, almost two years later, on this cold winter day, I sit snug in this perfect little space creating like I was born to do. Gems hang in the winter light among pattern books, sewing machine, yarn, and all kinds of materials to weave together into something beautiful, someday. My challenge is pacing my creative self, knowing in time it will all get made, and tearing myself away when life…or my toddler need tending. I just feel so grateful for this space, quite, calm, focused, a sanctuary for my spirit to rest and my hands to run wild.

New Jewelry for Next weekends Holiday Craft Show
Because my husband is a crafty genius himself, I thought I would share the making of this little craft shack, and a few of Joel’s words about the process.
When my wife and I were expecting a baby, and my shop was too full of stuff to work in, we decided to build a shed on top of the concrete slab roof of the well house. We’d been using it as root cellar for a couple of years and also needed a pantry and a place for the used sunfrost freezer we’d bought. Our goal was to build an attractive (it is right outside our living room window) temperature-stable, weather tight structure using as much waste material as possible. It also turned out as a good way to use up scrap wood cluttering the yard.

You can see the concrete slab over the well house is the floor, and the pallets being placed together as the frame
I decided to do a modern twist on the traditional jacal technique of Northern New Mexico. Upright posts are set in the ground and the whole thing is plastered over with mud. Instead we used wooden pallets and filled and plastered them with strawy mud. Using four portland cement pallets (very strong), a 4’x 8’ “ pallet for plywood, five pallets from a cabinet shop, and miscellaneous pallets from behind the hardware store, I pieced together the walls. First redwood 2 x 4 plates were screwed to the concrete slab using tapcon screws. The pallets were attached with scrap pieces of 2×4 screwed flat to the plate that keyed into the voids in the pallets. Short pieces of scrap 2x 4 also tied the pallets to one another.

Door came from Habitat for Humanity restore and because we already had it, Joel build the doorway to fit it…it is a lot harder going the other way around.
The south wall went up first because it was against the neighbor’s fence. It was sheathed with T 111 before being stood-up. The front wall included some straight lumber for framing out the door and window openings. A 2” x 8” ridge joist resting on upright members in the wall pallets carried the four cabinet shop pallets. The OSB on these pallets serves as the ceiling, the 2×4’s the roof joists, and the one-by skids are the nailers for the metal roof. The inside was sheathed with 1/8thinch pine plywood and the south wall and ceiling insulated with packing peanuts.

Roof framed for extra over hang
The pallets were filled with a straw-rich cob mixture using dirt dug in the yard. This was all plastered over with the same strawy mud mix. The straw bridges the wood members and the wood members act like wood lathe to hold the cob in place.

Strawy Mud stuck in the walls
The whole thing then got plastered over with earth plaster. The final coat was an aliz of Carle Crews’ recipe (see her book Clay Culture).

Final coat of clay plaster
Using a pallet base, a floor of douglas fir seconds was installed along with a ladder and trap door to make the root cellar more accessible. The building including electrical cost about $500 mostly for metal roofing. Many have said that would be a great extra bedroom. The big front and side overhangs make the building.- Joel Glanzberg

All Done, Pretty as a picture!!
Oh what a difference just a little shack of one’s own can make It has already taken on so many forms, a storage shed, a herb drying/potting shed, a studio space for me to make jewelry, sew and knit, a writing studio for Joel’s New book….and hopefully some day we will..Have an outdoor kitchen under it’s eves, grow mushrooms in the root cellar, use it as a bedroom for our son when he turns into a teenager… and who knows what else the future will hold for this 8×8 shack of love.

West side storage for bikes & garden tools, love that over hang
Storage

And of course the freezer with the trap door to well house/root cellar
Stocking up space

Grilling out front
Outdoor living

Creative space

Garden cottage, looks like it has always been there, tucked away in the garden
My flower garden is in full glory right now, humble compared to most, but so inspiring to me. I am not the first human to be inspired by flowers, I believe almost all of us our. How could one resist such splendor, color, scent, symmetry… Some paint flowers, others weave words about them….I spent most of Monday trying to mirror the soft peaches and light greens of the roses in my jewelry making, attempting in my own way to mimic them, to be guided by them, to honor them in their perfect beauty…..

The sweetest smelling soft country roses outside my front door
This is what I came up with

These danglys
And this to match

Pink and green!! Love this combo
And this

Rose buds on a chain
On our walk I feel in love with the wild sweet peas, fushia, light green and white…….I guess that is the essence of my creative process, not something I write about often, or even know how to put into words. It is much more an experience of beauty that guides my hands and imagination….Hmmmmm what will I make today?

Light through the sweet peas
So you saw the swing and seemed to love it as much as we do. THANKS, I was astounded at how many of you cheered us on!! Jangy also loved it , so much in fact he didn’t want to get down for meal times, which we are enjoying outside on the porch just about every meal now…So daddy came up with this cool tray that comes on and off for meals.

Swinging through lunchtime
Now we sit across from him and all share our meals right here. And the best part is, no more sweeping the floor!! Anything that falls the birds, ants and who knows else will get later.

Removable Feeding tray
Joel took some cherry he had from left over flooring in Jangy’s room and made the sides. Drilled holes and cut out notches for the dowels to fit in.

Pine tray with little indentation so food won’t get away
The tray top is pine which he used a scorp on, (a tool that cuts in a U shape) to make the indentation so the food would roll off.)

Pictures of Scorps from
“A Musuem of Early American Tools” by Eric Sloane
Drilled the pieces together, made a little wooden lock so it would stay put.

Wooden lock
Sanded it then rubbed the whole thing with Walnut oil and Tada…so cool.

And there you have it, a flying high chair. Then we gave him Kimchi I made from Carrots, Turnips, and Cabbage we grew and he gobbled it up…..Oh a parents pride!!

Jangy is munching on a Kimchied Turnip slice!! That’s our boy!!

My husband and I do lots of things together well, but making things together is a kind of newly found joy. I guess it started with our home, our garden and our baby of course, but actually designing & crafting something together is not something we have really done yet. Saturday morning we spent nap time together drinking coffee and searching for images of baby swings. There were lots, mostly plastic, some beautiful wood, some cloth and all kind of shockingly expensive.

We could have probably got one used, but it spurred a fun conversation about design and technique, craftsmanship & quality and of course our shared love of homemade. I truly admire my husband’s fearless DIY attitude. He can look at things and understand how they are made, alter them in his mind and tada!! he has made it with his own two hands and more likely than not with things he had stashed away in his shed, salvaged, saved for a rainy day. For this project we put both our design minds together, rummaged around in our stashes and here is how we spent our Saturday DITing (Doing it Together).
It started with an old pair of Mountain Kakai’s, really nice sturdy work pants, worn, loved and finally ripped above the knee. I stashed them in the sewing box to fix or transform someday and that day was today.

I basically looked at the swing I most admired and realized it was a basic cross of fabric.

This awesome swing I found on Pinterest from an Australian company called Swingz
I turned the pants into shorts and proceeded to line up, pin and cut the legs of the pants. I got kind of engrossed so it didn’t photograph this part of the process but I tried to cut as little as possible and use those strong triple seams whenever I could so this swing wouldn’t make me nervous as my little baby swung around 4 feet above our brick porch. It was a basic bucket seat with sleeves for dowels to slip into so the swing would have a skeleton to hang from. That is where my husband came. He drilled the oak dowels, cut and sanded them so they stuck out a bit from the sleeves. Then he got an old climbing rope slipped it through the sleeves as well, made a few knots, and hung it from a carabiner and big eye bolt in the viga on the porch. And just like that–there it was……smiles for all!!

We all love the swing and have spent hours playing with it already. But more than the actual thing, we love being together; envisioning, creating, recycling, using our hands & stashes of saved goods, staying home and enjoying the sunshine……and as we like to say around here ‘Why DIY when you can DIT’?
Tis, the season for fresh eggs and color. This post is a great little guide on natural dyes for Easter eggs.

Two Men and a Little Farm: DYEING EASTER EGGS THE NATURAL WAY.
I have had a wonderful wintry season this year…. baby in arms, steady fires to keep us all warm; growing into family life, motherhood and my new self. Amidst these humble blessings and all this growth, there has been a … Continue reading
