Garden Transitions- The Fall Flip

I plan my garden very strategically so that there isn’t much work to do in June and July… For many reasons… Maybe first because I was a garden teacher for so many years that I planned spring and fall gardens with very little summer maintenance.  Even though I am not running a school garden this year, I now have a tiny baby and can’t really garden much at all…so it is convenient that I don’t have much to do but harvest in the high heat.  It is also convenient for leaving town during the hottest, driest time of year which we all want to do.

IMG_2405

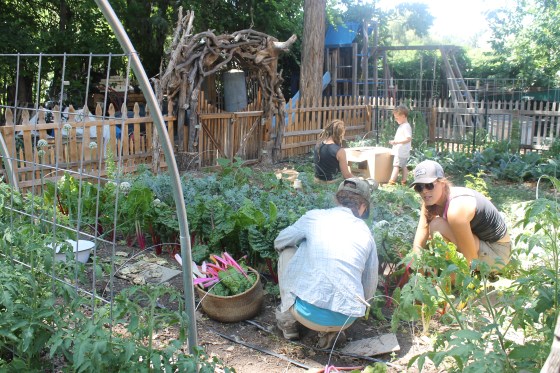
Yeah for harvest help from our good friends from Ampersand, love you guys!!

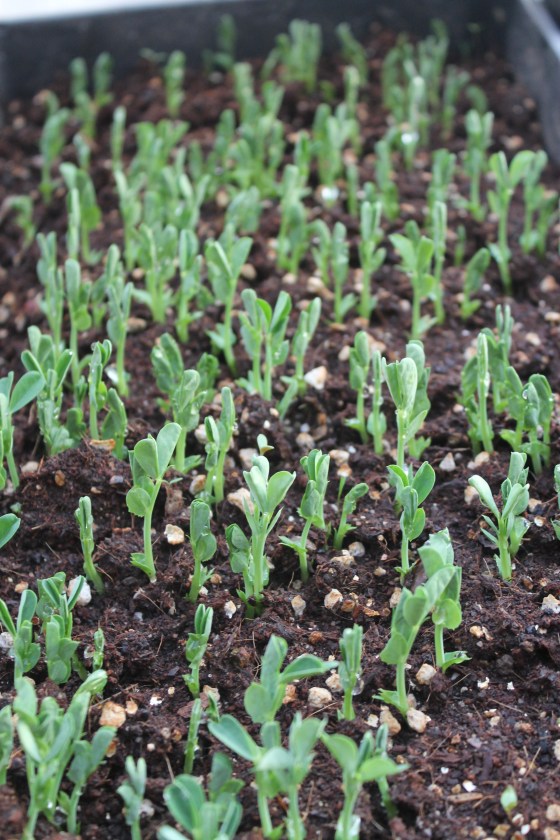
And probably the biggest reason I plan so much for spring and fall gardening is that is when gardening in the high desert is at it’s best!  There is cool air, cooler soils and real water falling from the sky!  I start things outside as early as February (my pea crop was started then and yielded my best crop yet!)  and am eating out of the garden till Christmas eve.  Summer is for being lazy anyways right!?

IMG_8101

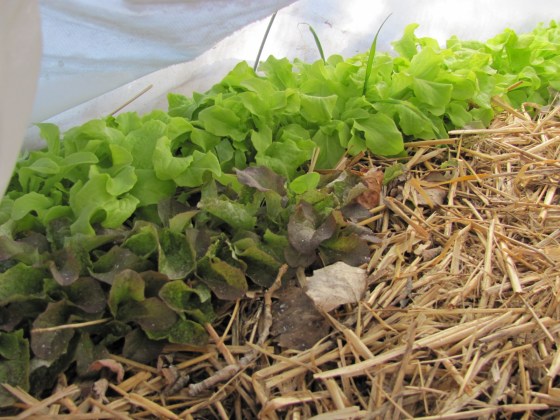
So though I am still being very lazy, I am starting to think about the transitions about to happen out there, the good old ‘fall flip’.  This is when I pull out all the lettuce and peas that have stopped yielding and bolted into pure bitterness that may still remain and I plant a whole new slew of cool season crops.  IMG_0273

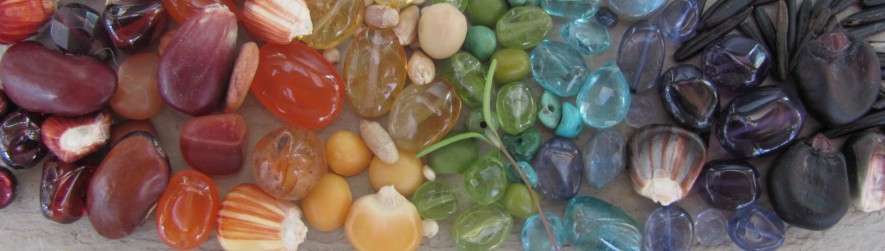
Because it is only the 9th  of  July I can still plant a nice beet & carrot crop.  Later in the month I will plant more lettuce, spinach, cilantro, and whatever other cool season greens I wish.  I also have started planting big beautiful marigolds this time of year to have for autumn garlands.  IMG_9387

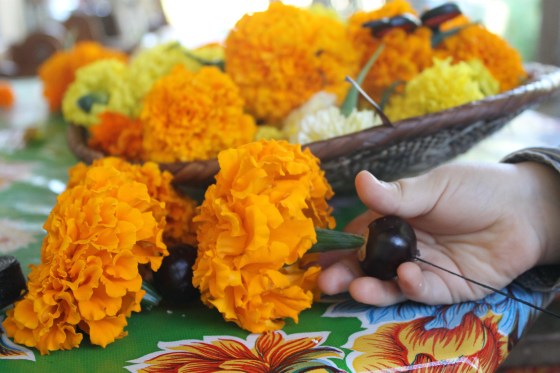
High summer I hear a lot of people say, ‘oh I am too late to have a garden this year’…but you are not!  Autumn harvest is within reach.  Plant now and you will abundance you will reap!!

Seeds Starting Recap

Last Saturday I gave a public class on Seed Starting at Earth Care community garden.  It went well and was well attended but made me realize a few things…..One was that a little re-cap may be useful,  as people tend to have the same questions and quandaries about starting seeds indoors.

IMG_9550

Seed Selection– Save your own, Trade, Share, Swap…If you are to buy seed go for heirlooms, locally appropriate and organic.  If you would like to start your own seed saving collection, open pollinated varieties are what you need.  Avoid hybrids (for seed saving) and GMOs at all cost! Sources I recommend:

Seed Savers Exchange

Native Seed Search

Fedco

High Mowing

Peaceful Valley

to name a few

Containers and Soil– There are of course so many choices, so I encourage you to use what you have and find what you like.  My favorite are wooden flats so here is a link to making your own out of old pallets or new wood.  I also prefer to make my own soil, so here is  link to that, but of course find your method of ease a pleasure.  Just remember for seedlings fluffy and light soil is best- high in peat moss or Coconut fiber.  Once the seedlings the bigger they will need more nutrient rich mix or a rich garden bed and I will write more on that later.

Temperature–  Seedlings need different soil temperatures to germinate.  For example some lettuces can germinate in soil that is 50 degrees and Tomatoes often need 70 degree soil.  Here is a great Vegetable Planting Chart form High Mowing Seeds blog that has great info on soil temp, germination times, spacing and more.   If you are starting your seedlings inside, the soil is probably stable at the temperatures of your house, but if not they are in an unheated greenhouse or cold frame, it is probably much colder.   I simple Soil thermometer, purchase at any nursery, should help you see what your soil temps really are.

IMG_0132

Check it morning and evening to see how it changes.  Also check your seed packet to see if it tells you ideal soil temperatures for germination, so you know if you are waiting long enough before starting over.  Remember if you seedlings haven’t come up yet, they are just waiting for the right chemistry, so don’t give up.  Just keep working the elements of warmth, light and water till you see those sprouts.  If you need to you can buy seedling heating mats here.

Light- This seems to be the most tricky for home growers.  Many windows simply don’t get enough DIRECT sunlight.  Choose a south-facing window that gets direct sun ALL day, that is at least 8-10 hours a day.  The more the better.  If your seeds sprouts but then get really long and leggy and look like the are desperately seeking the sun, you probably need to supplement with electric lights.  So many people know so much more about that so google that.

Water- Seeds really only need the right temperatures and moisture to germinate, that is sprouting before photosynthesis.  Once you sow seeds (in a moist sowing mix) you MUST keep them moist at ALL times.  Yep, Always!!!! that means watering many times a day if you need to, especially in a heated house in a south-facing window in the high desert!!!.  A helpful tool may be a spray bottle.  Set it on a fine mist and mist the soil.  If you have children helping this is a great job for them and really can’t be over done.  Once you see puddling on the surface of your soil, stop watering.  A watering can with a fine sprinkle really is necessary,  as big flows of water can wash the seed right out of the soil.  Because the seed is only in the first inch of soil, this is what need to be moist.  Once a plant grows the water needs to go deeper and the plants can be watered less frequently, but int he the beginning, moist always.

IMG_0102

Water quality has an effect too.  I use my precious rain water for seedlings and really have noticed a difference from the years I have used our hard well water.  Tap water is ok, but it is best to fill your watering can or a big bucket hours, or days before you water so that the chlorine in the water can evaporate and the water can come up to room temperature.  Cold water can shock plants and of course chlorine can harm them.

Seed Needs– Each seed of course has it’s own temperament.  Some like to be planted deep, some with no soil at all.  Some need fire, freeze or even scaring to crack their seed coats.  They say a generally to plant seeds twice as deep as they are wide.  Seed packets are great source of information, but if you don’t have packets, the High Mowing Vegetable Planting Guide works great to find out all the little special needs of each of your precious seeds.

So there you have it– If you seeds are warm, wet, sunned and in a good growing medium they should come up just fine.  Plants are more like us than we might think.  If you are cold, they probably are, too hot, the might be too.

IMG_0330

Now planning your sowing timing and taking care of the babies well so that they thrive and are ready to go outside when the times comes, oh and of course there is seed starting outdoors as well…..but I think I will write more on that later, for now this should get you started if you haven’t jumped in already.  Happy Seed Sowing!

Seed Starting Class

As you may have gleaned from my blog, I like to garden.  I like it so much that is mostly what I write about, and frankly do with most of my time.  I also teach gardening and have in lots of different places from the Children’s Museum, to Elementary Schools, then high schools, and now I even teach it at a college!!  This Saturday I will be teaching a class to the public hosted by Homegrown New Mexico and held at Earth Care Community Garden.IMG_0290

We will cover as much as we possibly can about seed selection, sowing mediums, containers, schedules, technique, and care in 2 hours.  It would be great so see some of you there!  RSVP here.

Homemade Potting Soil

IMG_8863

I make potting mix every year for my greenhouse seedlings.  I also make mixes for my mom’s raised garden beds, (at home I grow in the ground and do things a bit differently for that).  I have written about making potting soil many times here & here, but every year I refine it, learn more, change things, or get my hands on something new.

IMG_8859

I gather my materials from my yard and pre- sift everything so I have it ready to make mixes when I want to.  I sift it because little plants need readily available nutrients and fine tilth so their roots have an easy time growing.  Any big chunks sifted out can go back into the landscape under big trees and around perennials.

IMG_8864

Materials

Sifted Compost from your own pile (or another source if not is available)

Sifted Soil from your garden

Sifted Sand from your arroyo

Moistened Coco Peat ( this is the only thing I buy and I get it locally at Agua Fria Nursery)

I get all this stuff in advance and store it in bins so everything is ready to go when I need to mix.

IMG_8862

Once I have everything gathered I get my

wheel burrow,

a 5 gallon bucket,

a shovel and

a hoe.

IMG_8870

Here is my the recipe I use, adapted from my Alma Matar, CASFS.

It is a parts recipe, but if you use a 5 gallon bucket as your measuring cup and follow this recipe you will get a full wheel burrow, which will be enough soil for 10 flats of 2 inch pots or 6 homemade wooden 2x1ft seedling trays.

Mix into wheel burrow

1 Bucket-Shifted Compost

1Bucket- Shifted Garden soil

1 Bucket Coco Peat

This is the base recipe from here you can add all sorts of fancy things if you have them:

Ground up egg shells

Perilite

Moonshine

Grape seeds

Oh there is so many thing you can add to soil mixes and that is really determined by how much money you have, what you are trying to grow.  I keep things pretty simple around here, but have fun with what you decide to add to you soil, (or ask me for more advice!)

Mix everything well with a hoe and sprinkle occasionally with water.

IMG_8801

The moisture level is key, not only does it cut down yucky dust, but you want a nice moist mix in your flat before you seed.

If it is too dry it will actually repel water and you tiny seeds will float away in the run off.

IMG_0083

Give it a squeeze and release

IMG_0084

If it stays in a loose ball and breaks apart when you bounce it in your palm you have got it.  Now store it in a bin with a lid to keep that perfect moisture, or put it directly into you flats and sow away!

And that is that.  Once you have your flats made & potting mix made, now all you have to do is decide what to grow.  Go here if you are ready for the next step!

IMG_1075 (1)

Planting into pallets

Is there anything you can’t make out of an old pallet?  Yes, it does take more time and a bit more know-how to upcycle a pallet into a totally different and functional thing, but luckily I have an expert on my side.  Yep, Joel does it again.  This time he made me a new seed planting flat out of recycled pallet wood.

(Note: I do also do make these out new wood too, see here)

Image

=

IMG_8851

Cool Huh?  Want to try? Here is how he did it.

First, he tore the pallet apart with a flat bar to get the the lumber in order. Image

Then he used the cross pieces which were 3.5inches wide and 1/2 to 3/4 inches thick.  There was mix of oak (harder, longer lasting, heavier) & pine (softer, easier to work with lighter)


Then he cut off the split tips with the nails in them- to have clean, split free ends and not to bother with pulling out the nails.Image

Then he cut 2 pieces at 1ft long and 6pieces at 2ft long

He nailed 2 of the 2footers & 2 of 1footers into a rectangular box.  The 2 footer edges over lapped the edges of the 1 footers.  Unfortunately he moved so fast I didn’t get to photograph every step… but I hope you follow.

Image

Then he nailed the remaining 4 2footers to the bottom of the box using 4d galvanized nails. These are rust resistant and small enough that they will keep the wood from splitting, but large enough to hold your box together when it is full of heavy, wet soil.  Because the wood was irregular enough he just pushed the bottom slats together and nailed…but it is important to note during this step to leave a little space between the slats for water to drain out, but not soil.  I usually stick a quarter between the slats which has always proven to be just right.

Image

And there you have it.  Here is one I made from Redwood and screws in 2010 (in front) and the new Pallet one (in back).  Image

Similar—-but there are few subtle differences.

*The new one is a bit wider than the other.  As far as size go, I pretty much try to maximize my table space.  If you table is a 3×6 (which many tables are) you can fit 9 2×1 flats on it.  That should be more than enough (much more in fact) for all your seedling needs.  Remembering, when you start seeds in wooden planting flats you will need to divide them or thin them before they reach the garden, so leave space in you table(s) for transplants.  This is basically bio-intensive gardening, but more on that later…here is the next step if you are eager.

*The other difference is that my new flat is mostly oak and the older one is Redwood.  Both have their pros and cons

Oak- Hard, Heavy, Durable,Rot Resistant, Brittle-(Available in Pallets)

Pine- Soft, Not Rot resistant, Light weight, Cheap or free-(Available in Pallets)

Redwood- Light weight, doesn’t spilt easily, VERY Rot Resistant-(Must buy)

Wooden Flats are a great thing to add to your garden shed if you find yourself starting seeds every year.  They are pretty simple to make, relatively cheap and last many years, not to mention they are NOT plastic.  They work beautifully to hold moisture and give ample space for those babies to grow.  Many farms use them, which is where I learned about them.  Here are a few I stumble across while ambling through a sleepy farm in Colorado last spring.

ImageImageImage

Yes, I take pictures of other people’s planting flats, I told you I was a farm tourist.

Good Luck and I hope you help rescue one more lonely pallet from the back of your hardware store and put it to good use.

When you are ready here is a link to how to make potting soil for the flats and one on how to plant into them properly.  Let the sowing begin!!